Databricks Integration
Integration of Databricks with Entropy Data.
When setting up an integration between Entropy Data and Databricks, we provide two options:
1. Ingestion-based Integration (Built-In)
The integration is managed within Entropy Data. Configure the connection and sync schedule to start syncing with Databricks.
No additional deployments are needed.
2. Connector-based Integration
Our connectors are based on the Entropy Data SDK and provide support for more use cases. You get the asset syncing capabilities of the ingestion-based integration, plus direct integration with Databricks permissions. Changes through the Access Approval Workflow can be dynamically applied to Databricks user permissions.
If you have a complex network topology or direct integration with Entropy Data is not possible due to governance restrictions, the Databricks connector can be deployed in a DMZ of your network to provide additional security.
| Feature | Ingestion-based Integration | Connector-based Integration |
|---|---|---|
| Direct integration into Entropy Data | ✅ | |
| Syncing of assets | ✅ | ✅ |
| Syncing of permissions | ✅ | |
| Complete control of deployment | ✅ | |
| Support for different network topologies | ✅ |
1. Ingestion-based Integration
You can directly integrate Databricks with Entropy Data.
Prerequisites
To start, navigate to Settings > Integrations > Add Integration.
This opens a wizard that guides you through configuring the integration.
Select the Integration Type
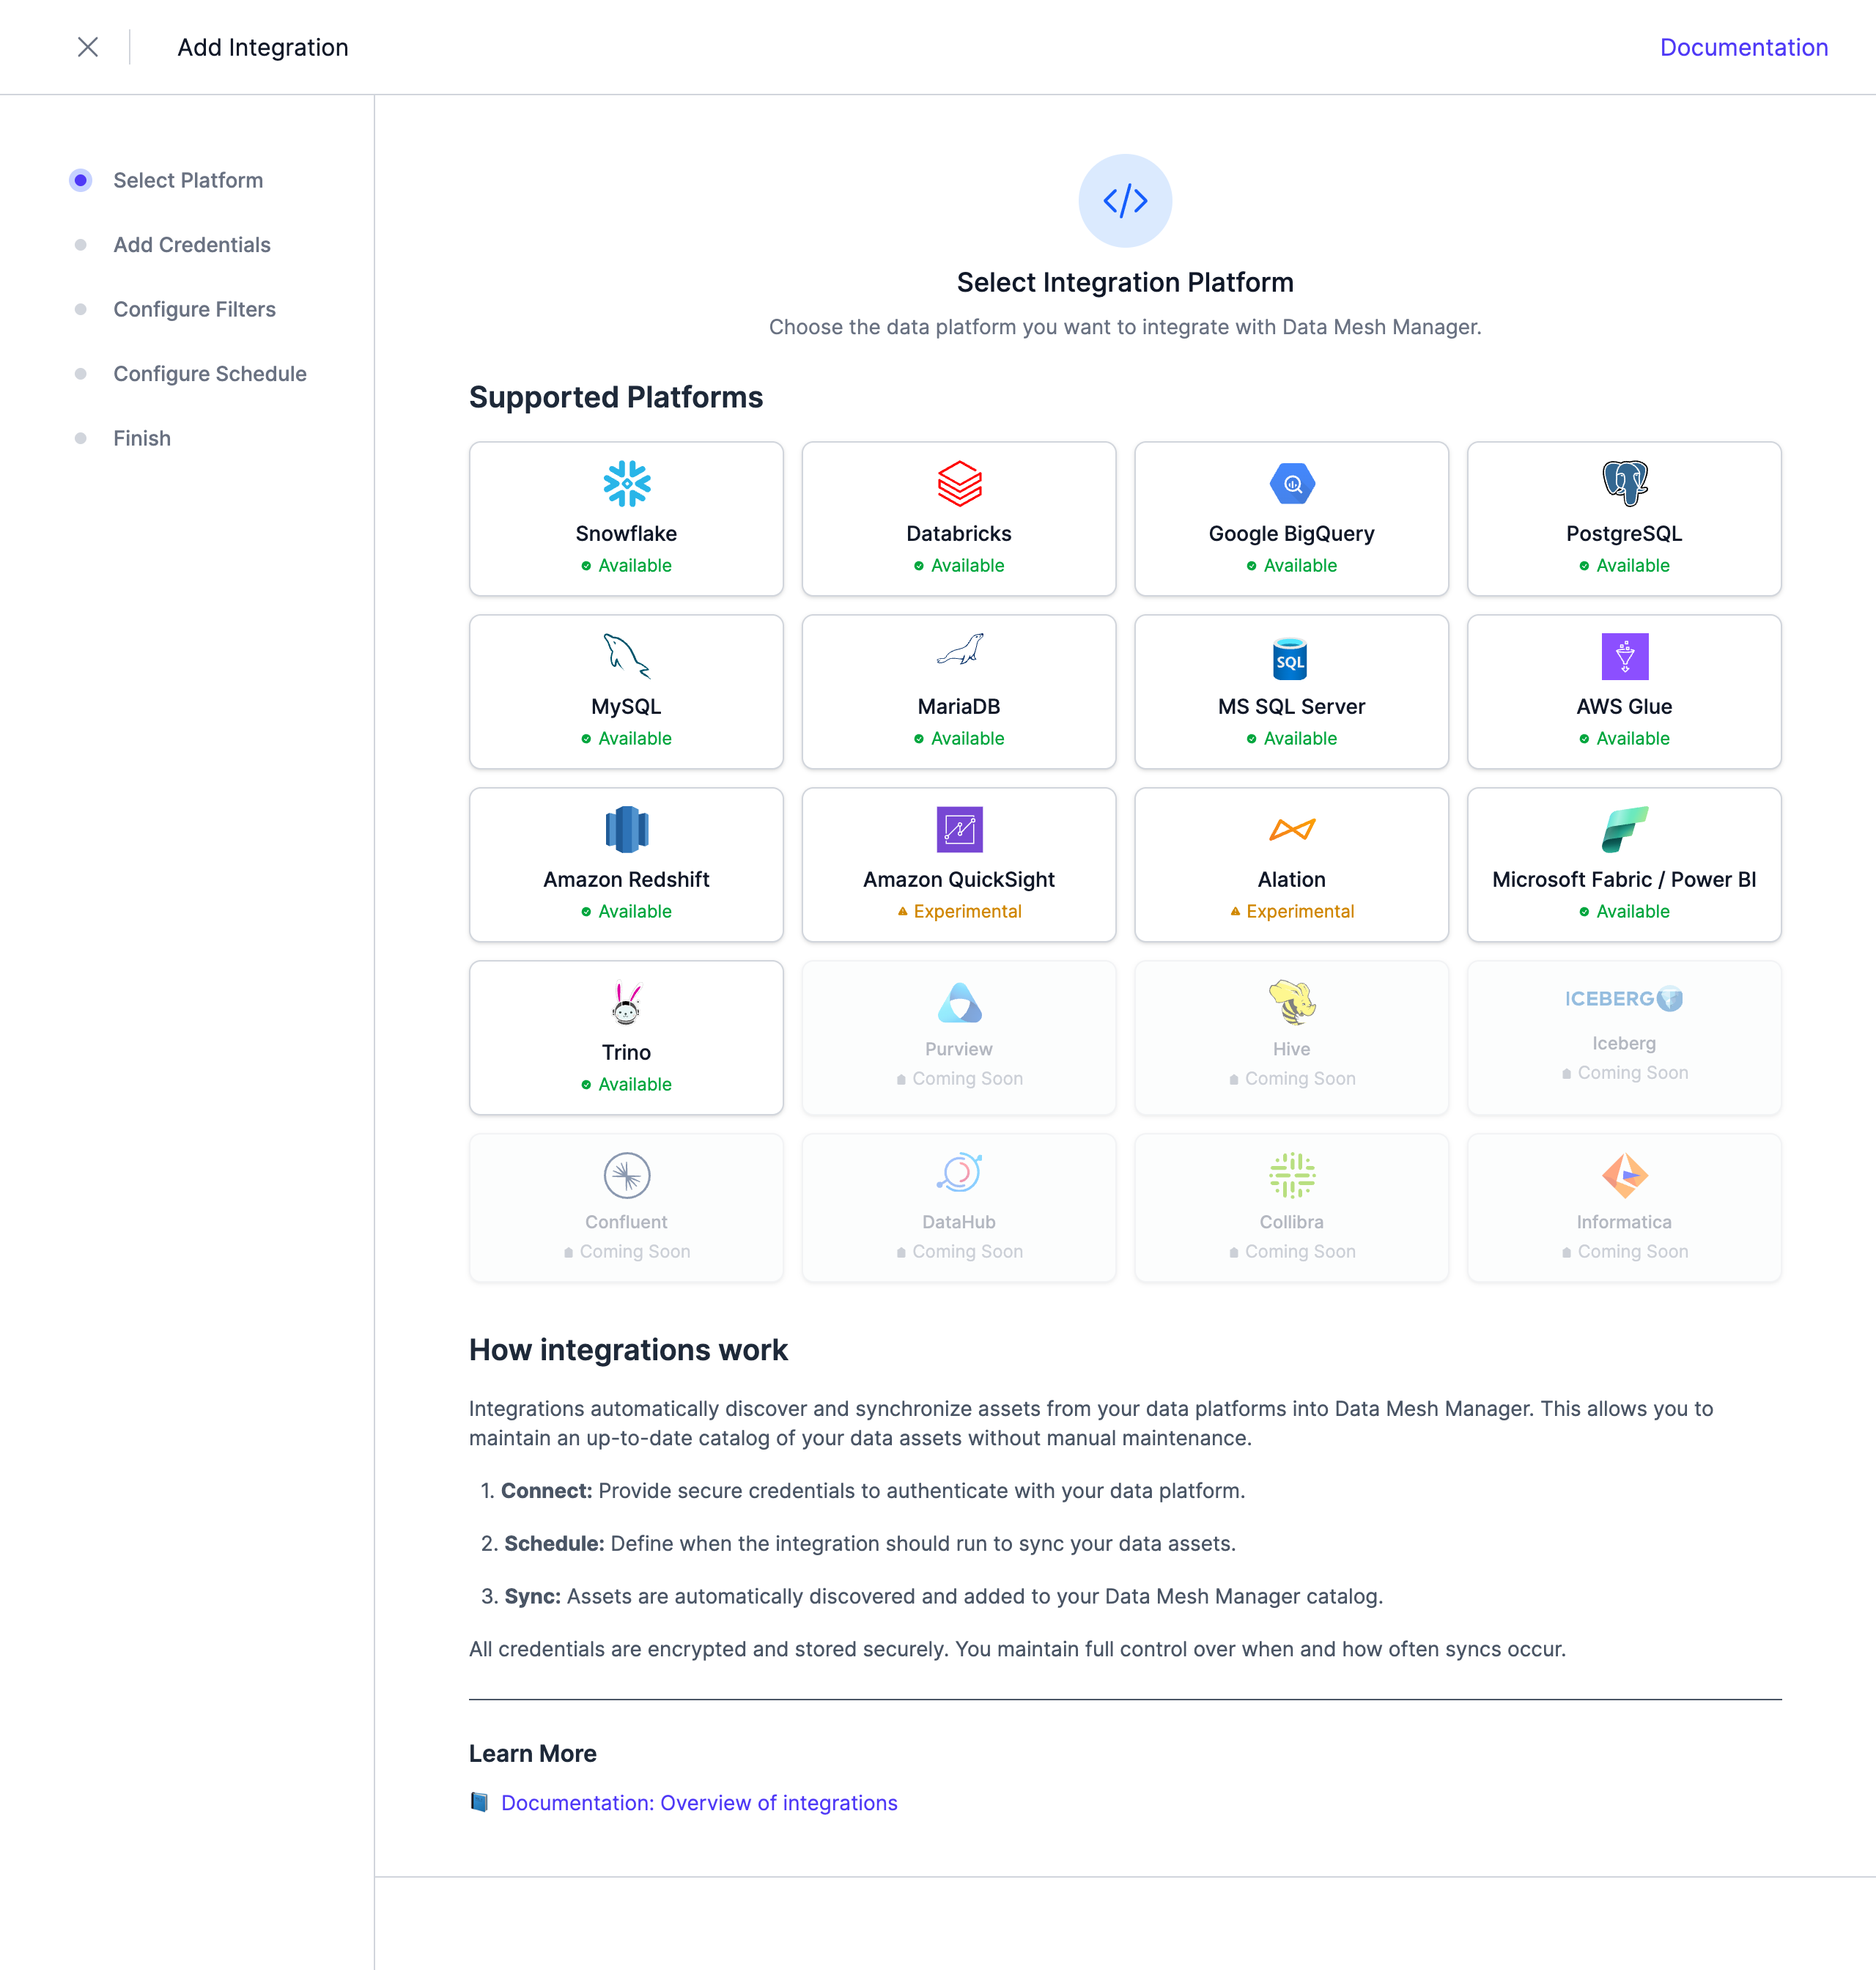 Select Databricks from the list of available integrations.
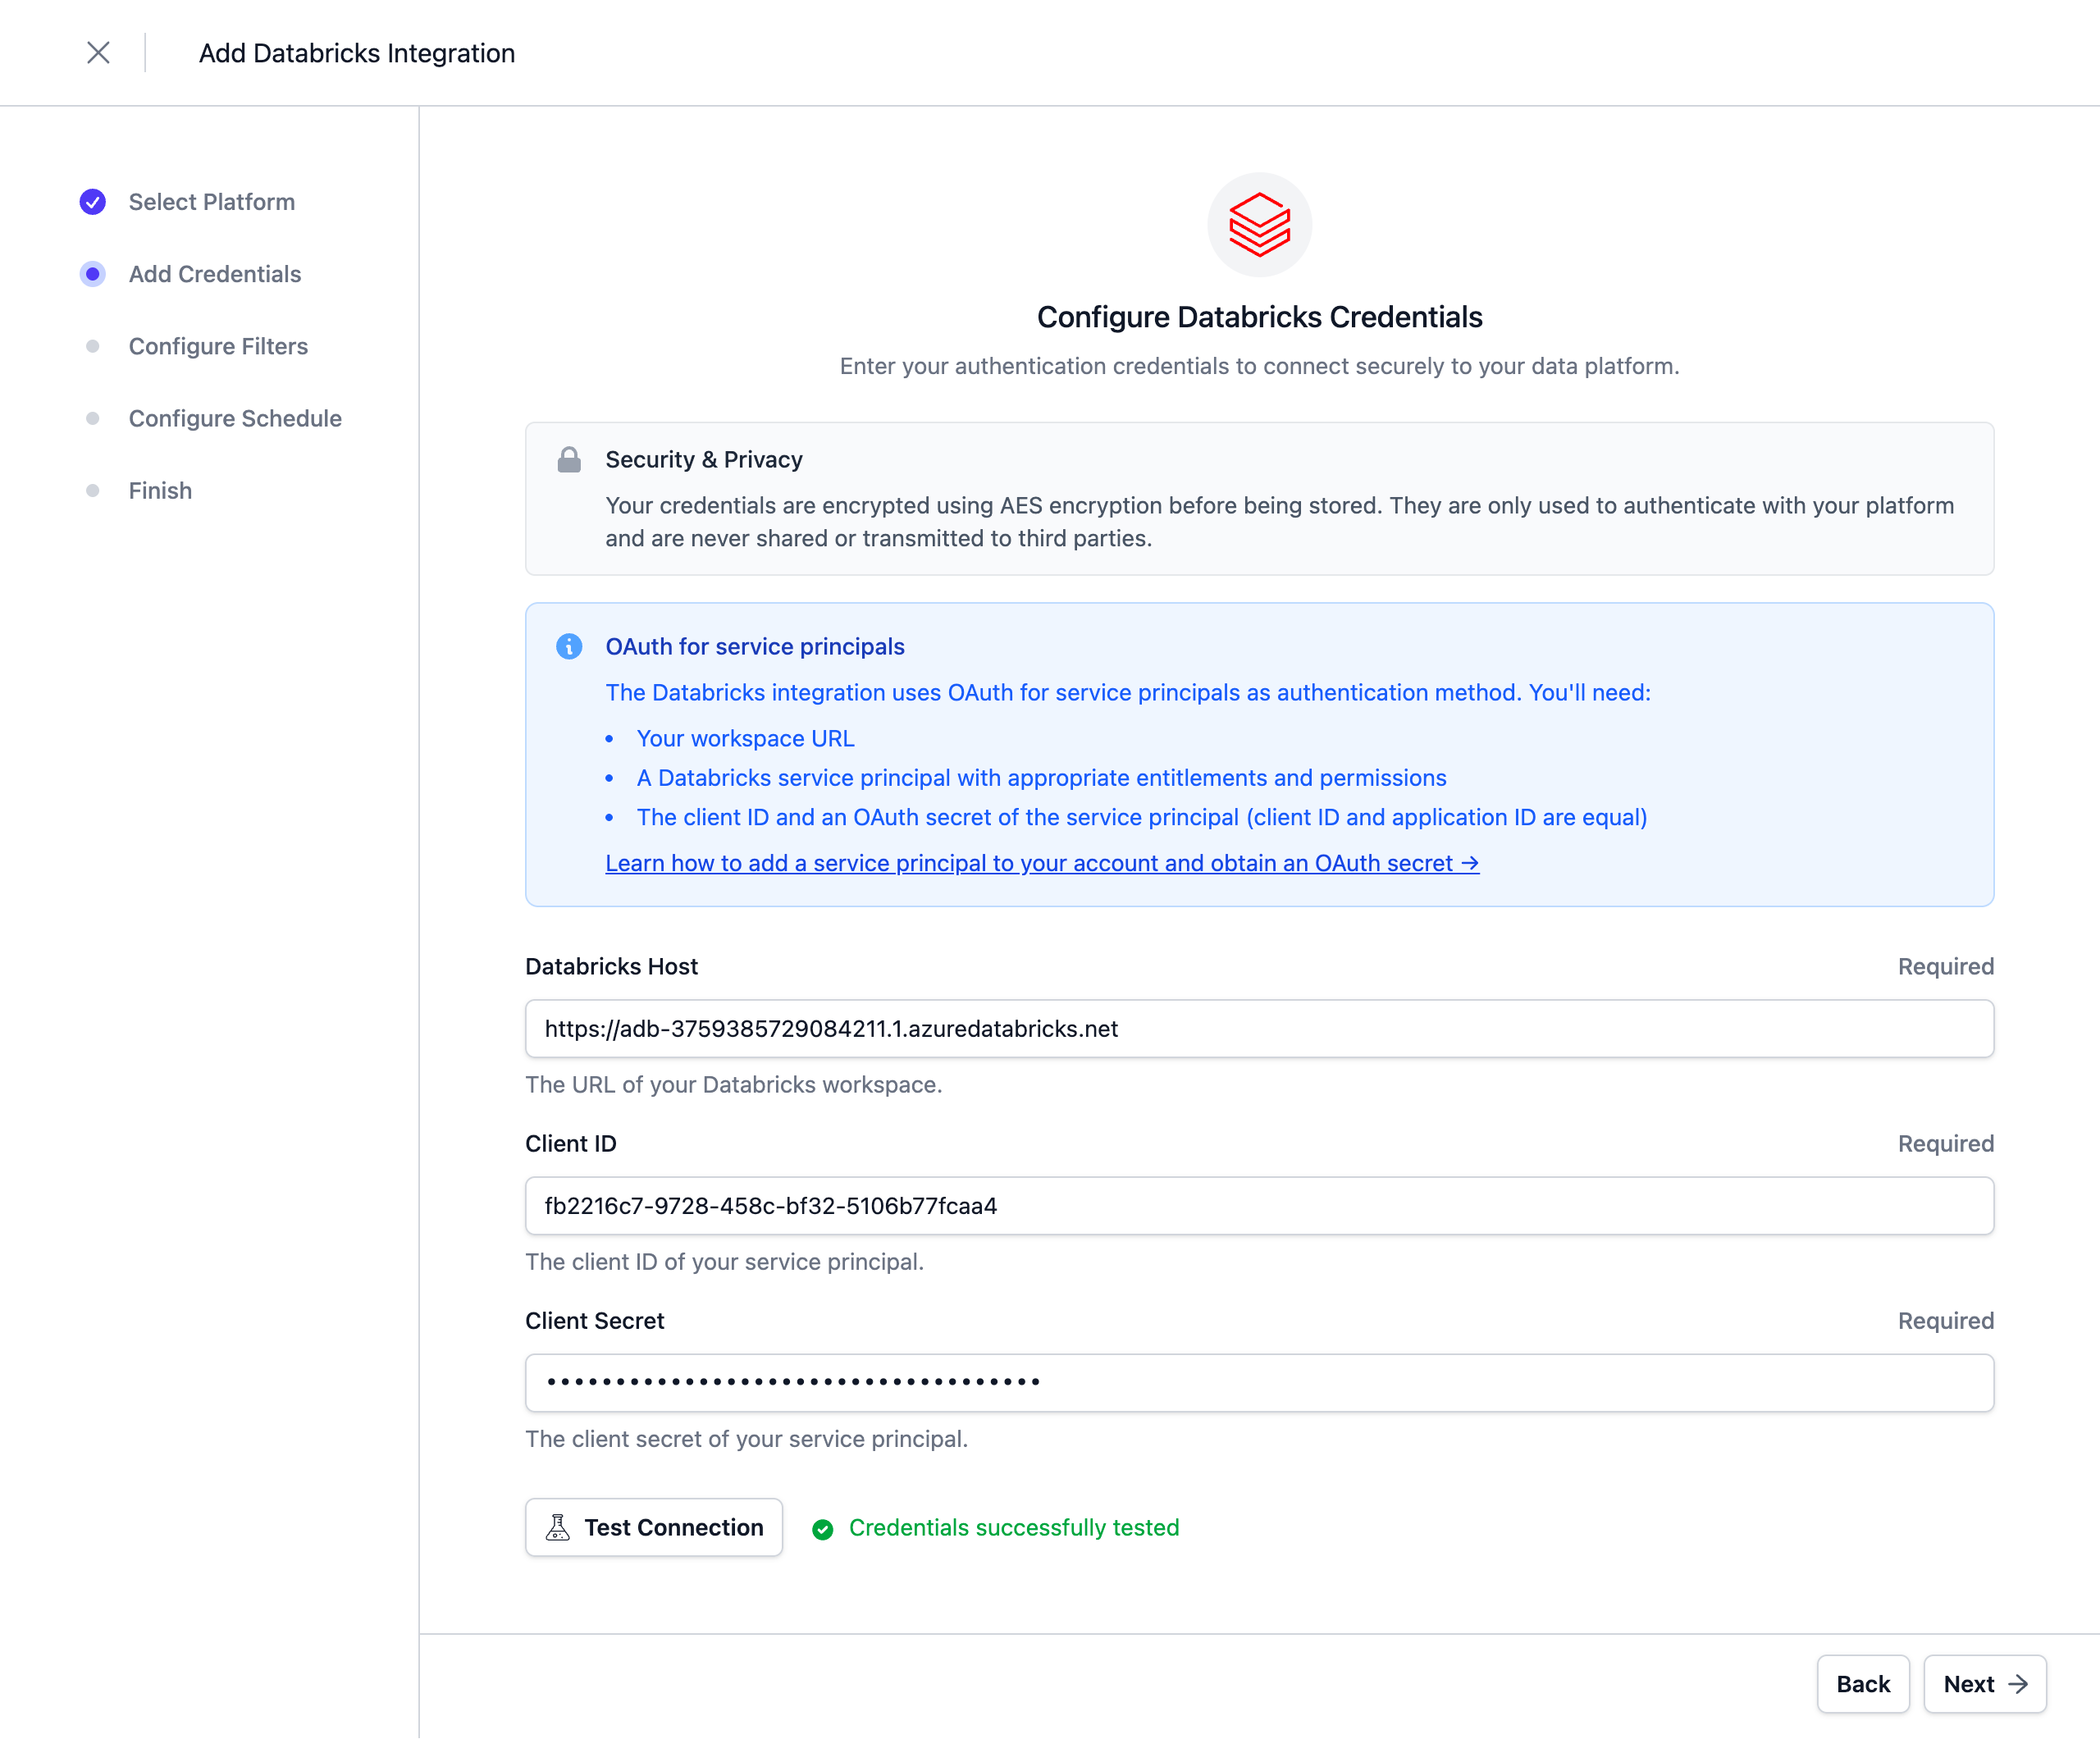
Configure the Credentials
The integration uses OAuth for service principals as authentication method. Refer to the Databricks documentation for adding a service principal to your account and obtaining an OAuth secret.
Note: Credentials are stored encrypted in the Entropy Data database. To enable encryption in your environment, set a 64 hex character
APPLICATION_ENCRYPTION_KEYSin your environment (see Configuration).
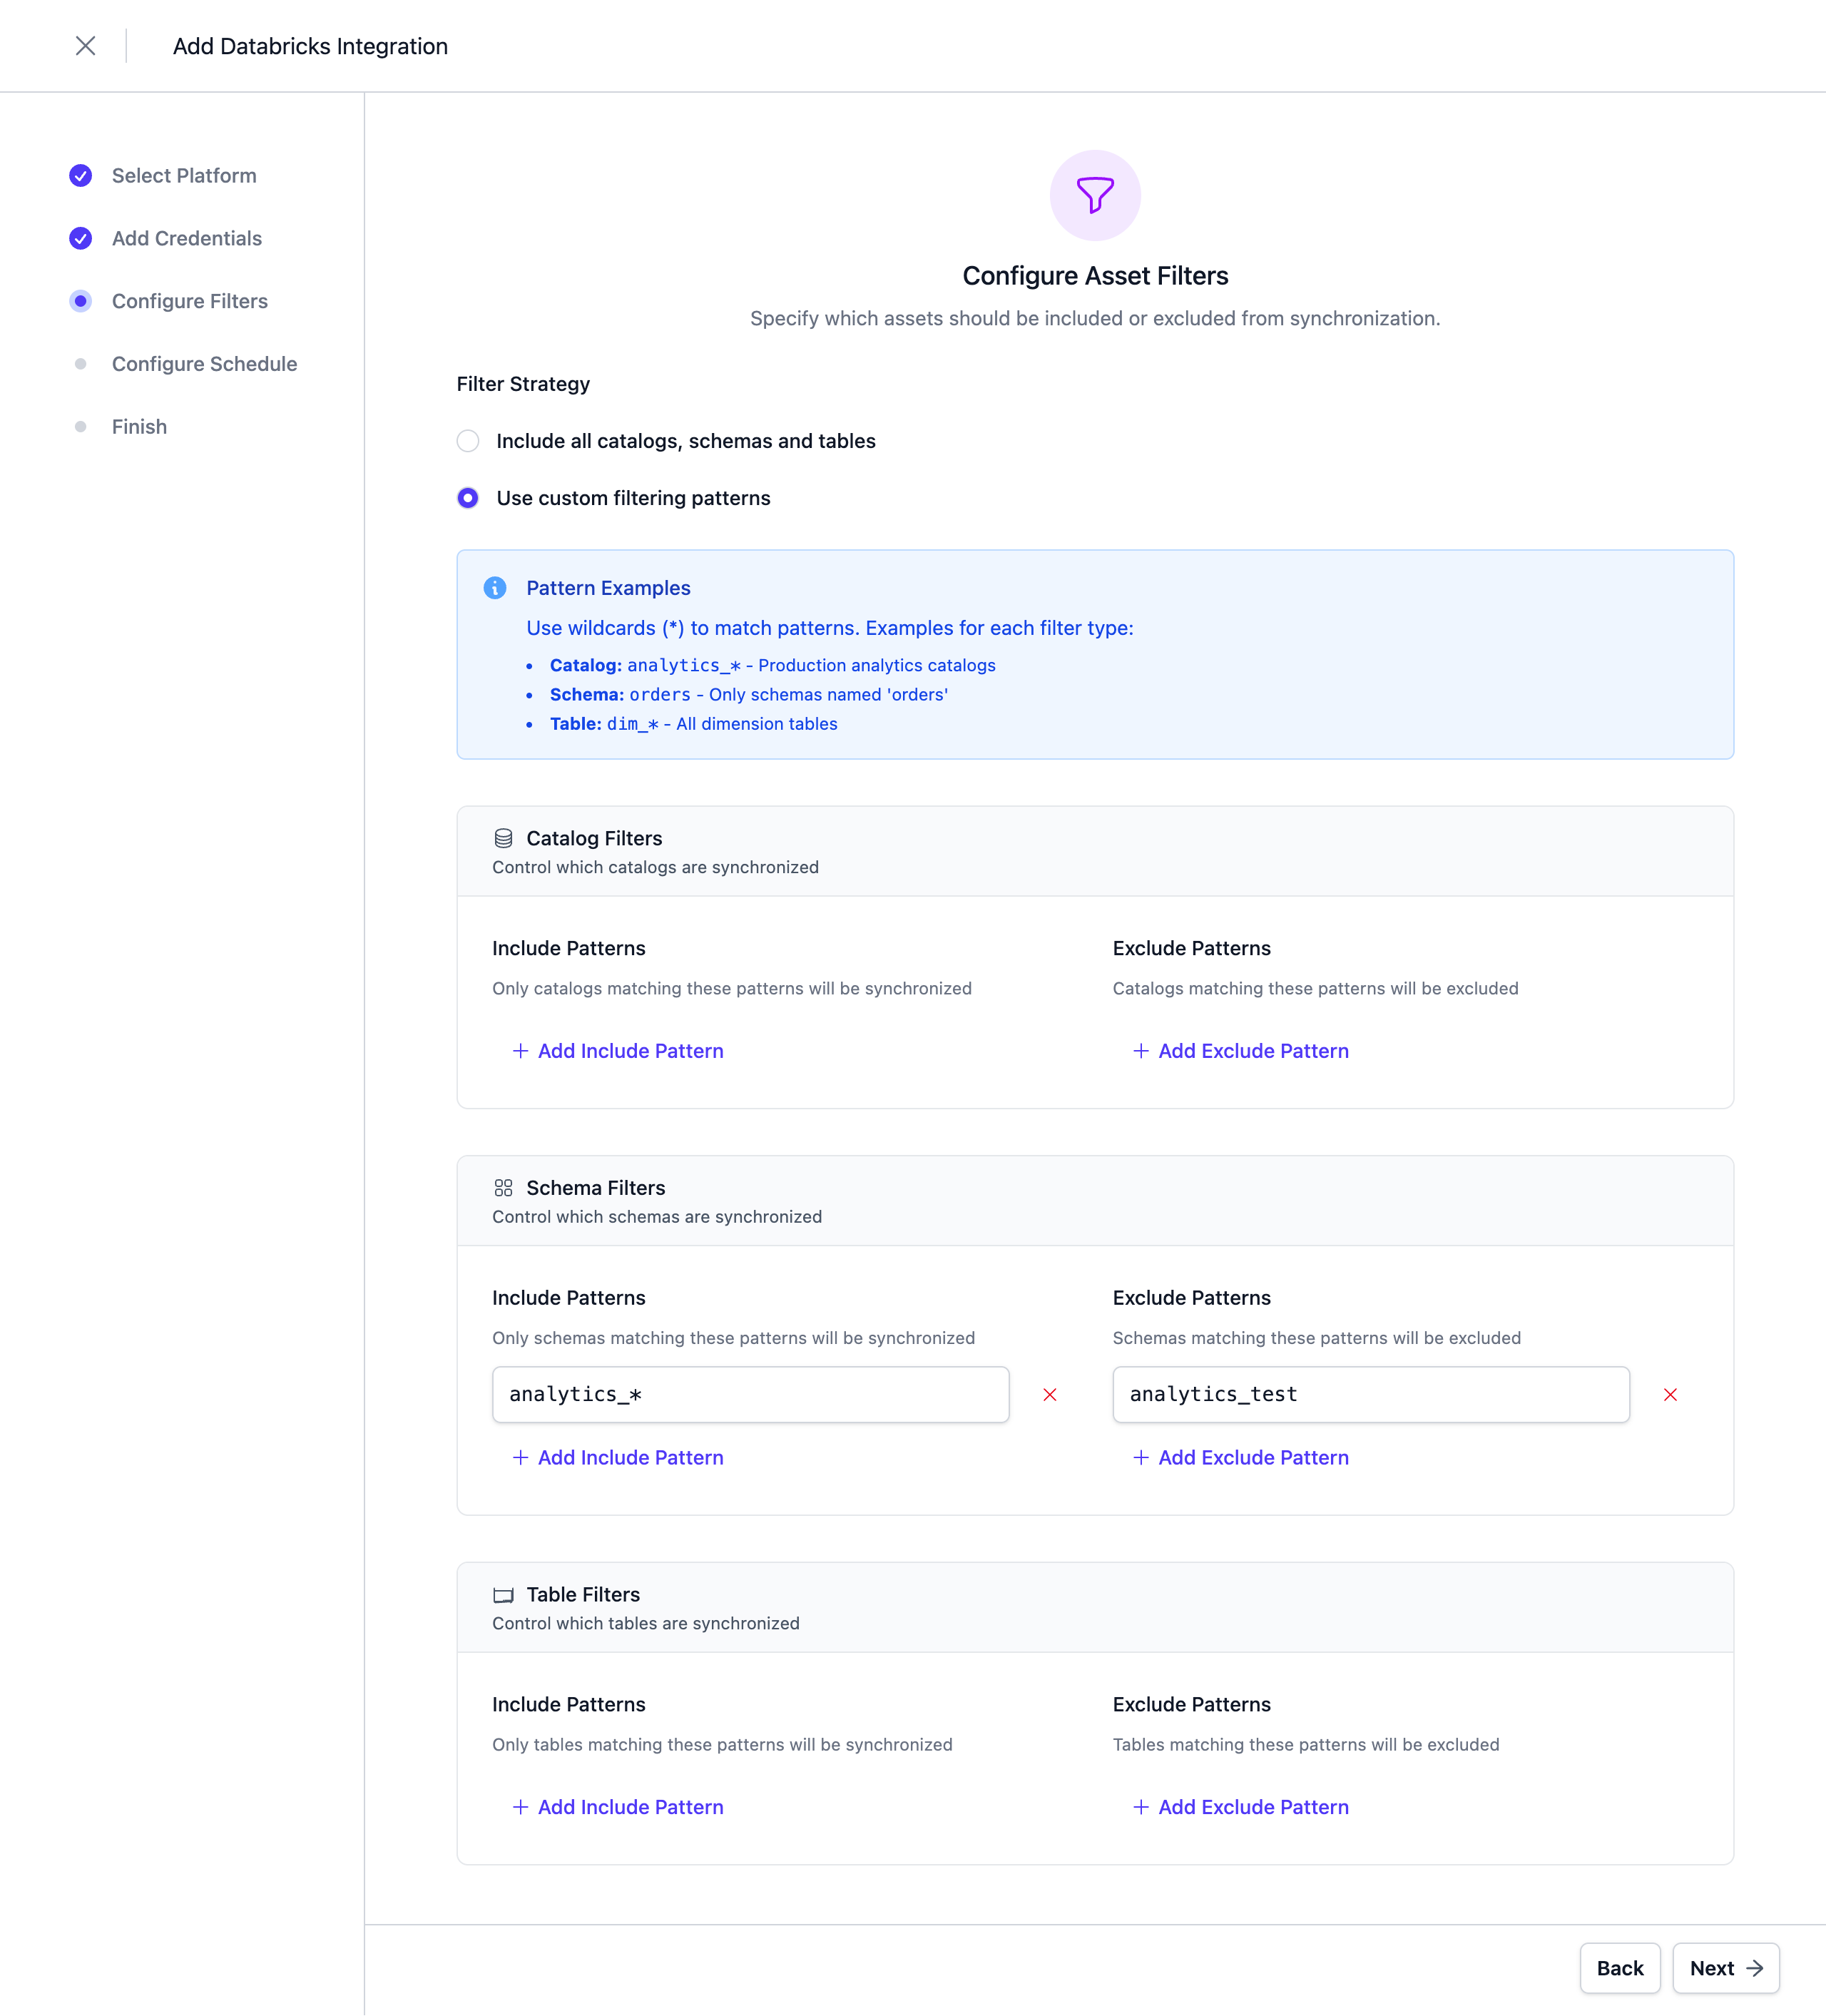
Configure Filters
Configure filters to limit which assets are synchronized. Both include and exclude filters are supported. For Databricks, filters can be applied to Catalogs, Schemas, and Tables.
Filters support '*' as a wildcard character to match any number of characters.
Configure Schedule
Set a schedule to automatically synchronize assets. You can choose from predefined schedules or define a custom schedule using the cron expression format.
Note: All schedules use the UTC timezone, so make sure to take this into account when configuring your schedule. Please do not synchronize the assets more than once or twice per day. We reserve the right to disable the integration if this happens. You will be able to trigger a synchronization manually if you need an immediate update.
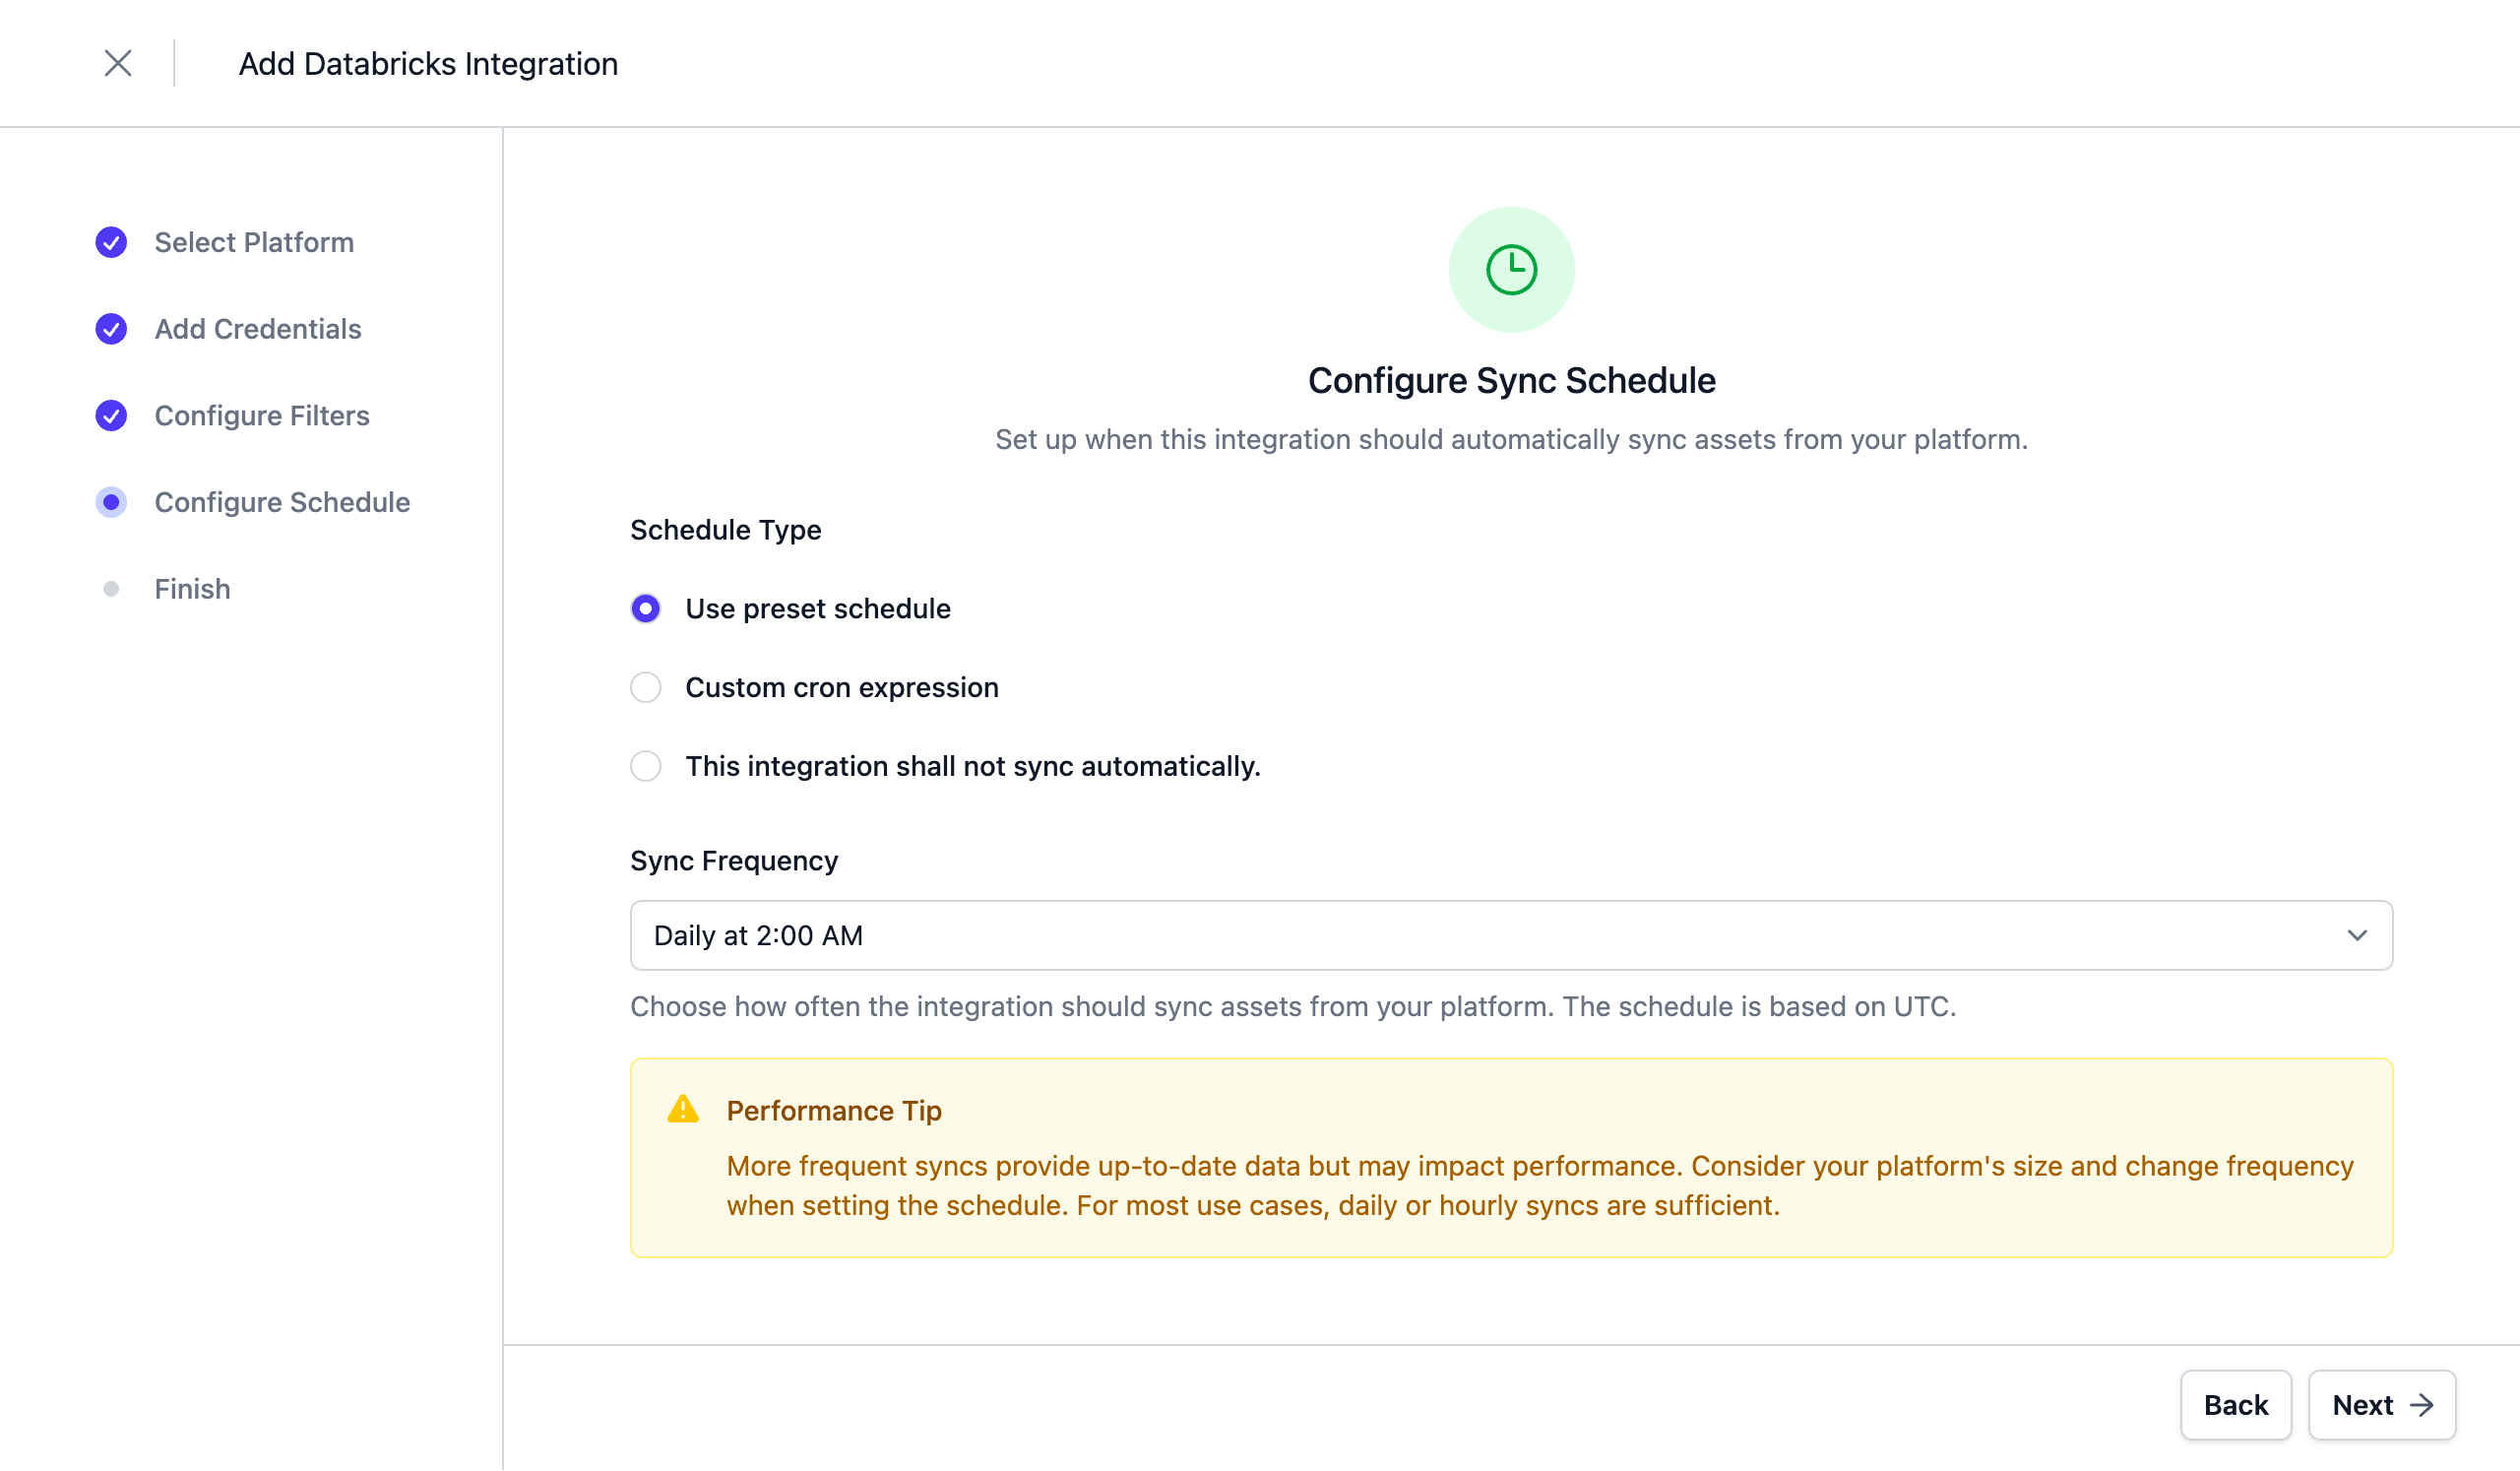
Complete the Integration Configuration
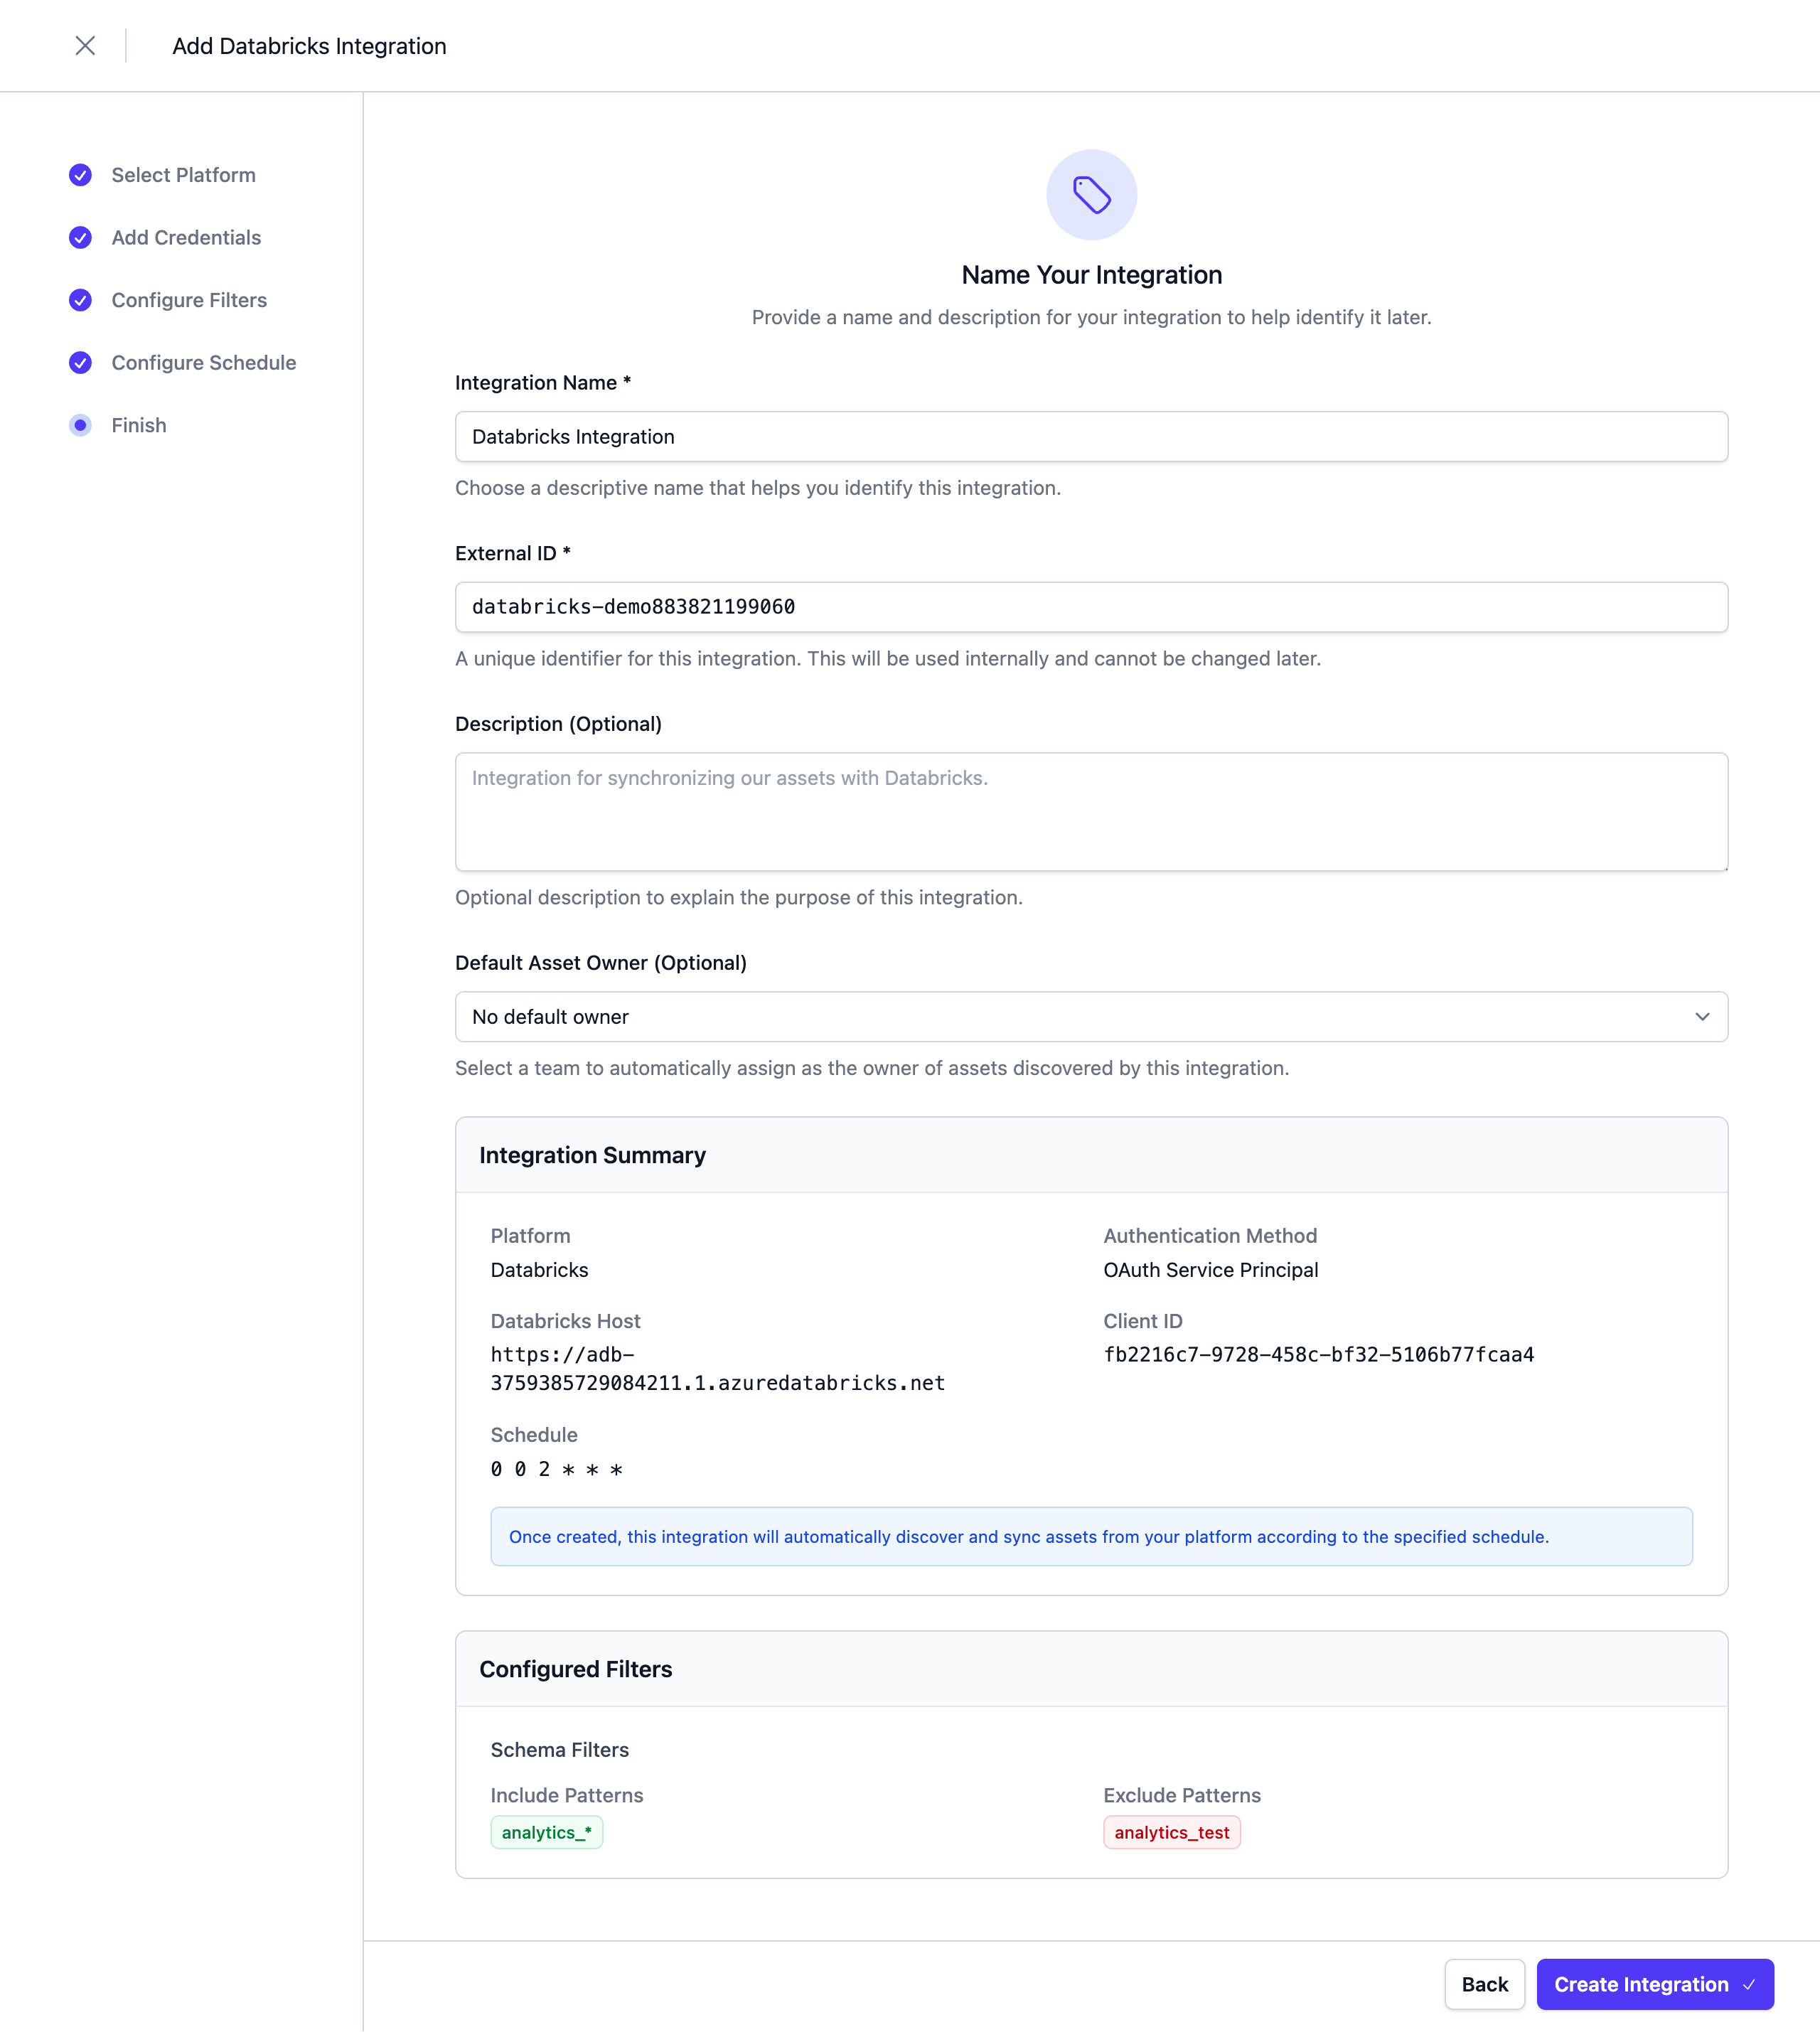
Choose a unique name for the integration, review your configuration, and click Create Integration.
What is synced
| Direction | Object | Handled by |
|---|---|---|
| Databricks → Entropy Data | Catalogs, schemas, tables, views, columns, column comments | the integration, on every run |
| Databricks → Entropy Data | Tags and ownership of an asset | the Assets API, from your own job or catalog |
| Entropy Data → Databricks | Grants for approved access | the connector |
| Entropy Data → Databricks | Descriptions, tags, ownership | a customization of the connector |
Next Steps
The integration is now configured and will run according to the schedule. To check the integration status, navigate to Settings > Integrations. Here you'll find the current status and the last 10 integration runs.
You can adjust the integration configuration and credentials at any time. The configuration is saved in YAML format with syntax validation support in the editor.
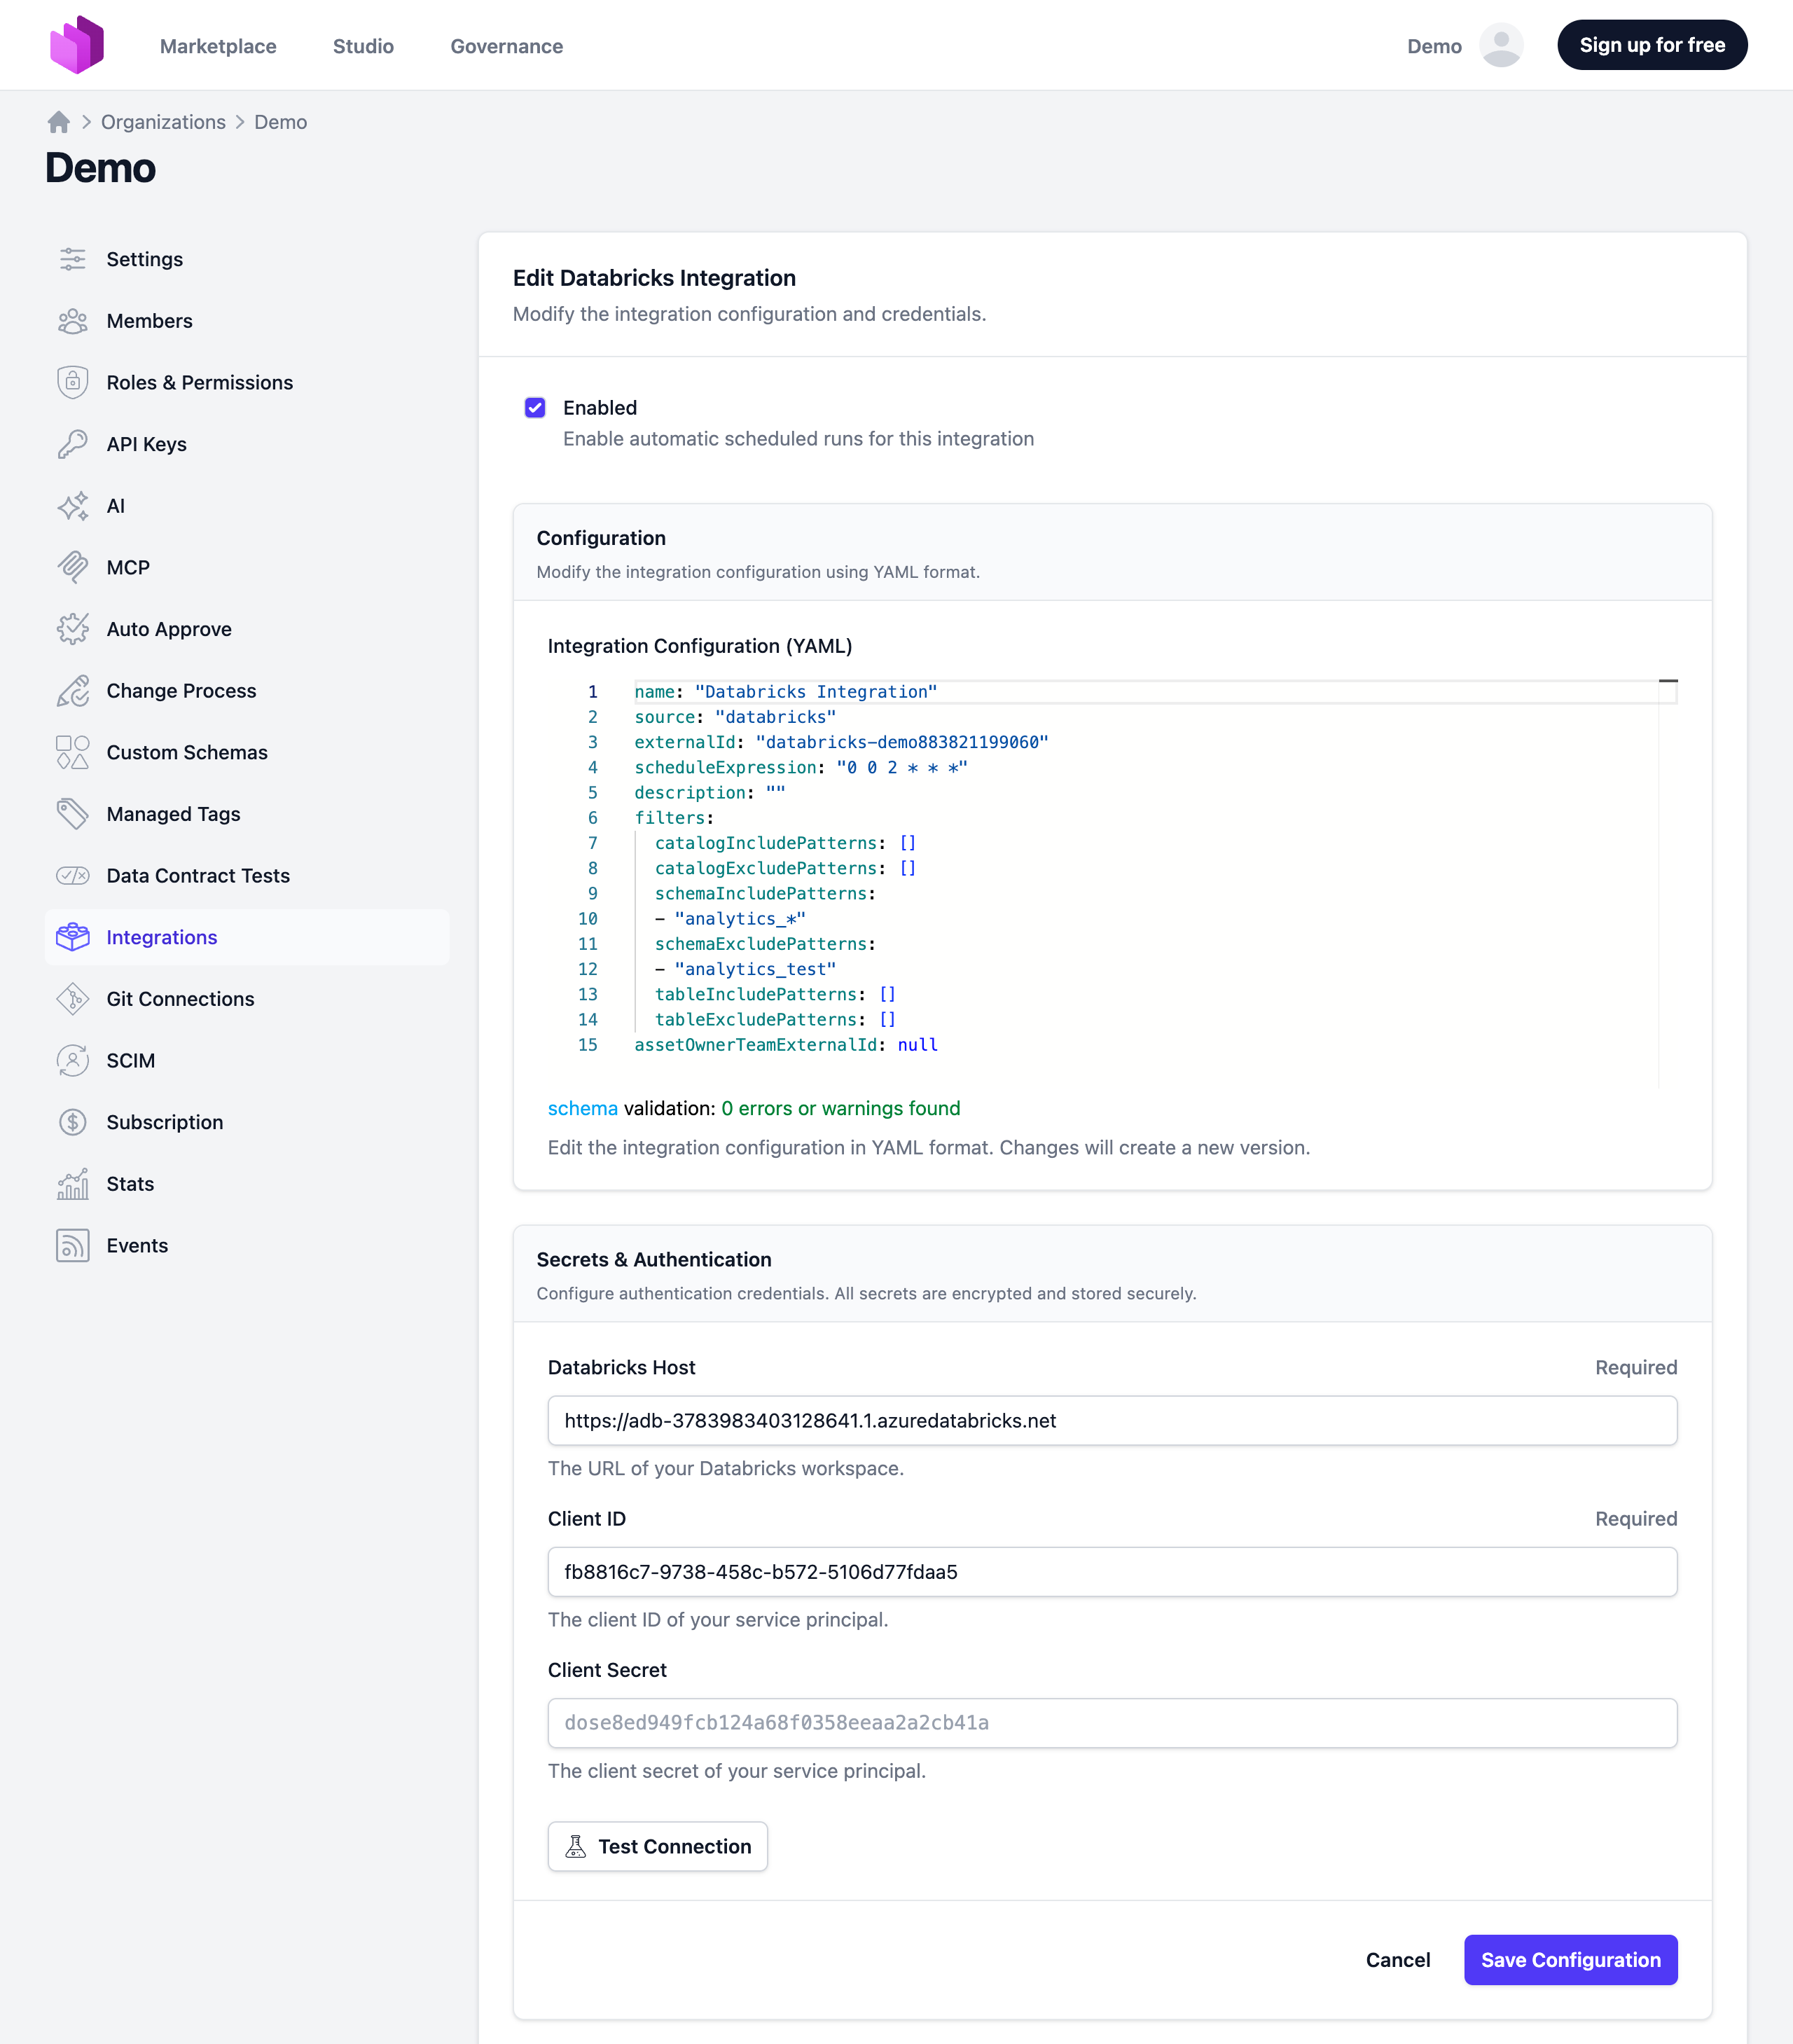
Note: The previously stored client secret is not displayed in the edit view for security reasons.
Deselecting the Enabled checkbox disables the automatic schedule. Manual integration runs are still possible.
2. Connector-based Integration
The Databricks Connector is an open-source component that integrates Entropy Data with Databricks. It is based on the SDK and available as a Docker image. The source code can be forked to implement custom integrations.
Features
- Asset Synchronization: Sync catalogs, schemas, and tables from Databricks to Entropy Data as Assets.
- Access Management: Listen for AccessActivated and AccessDeactivated events in Entropy Data and grant access on Databricks to the data consumer.
Deploying the Connector
To get started, we need to set up docker to run the connector. Beforehand you will need to get some secrets and configuration data from Databricks to enable the Connector to fetch the correct data.
You find an overview of the configuration parameters in the README of the connector.
ENTROPYDATA_CLIENT_APIKEY: API Key for Entropy Data (see: Authentication)ENTROPYDATA_CLIENT_HOST: URL of the Entropy Data API (default:https://api.entropy-data.com/api)ENTROPYDATA_CLIENT_DATABRICKS_WORKSPACE_HOST: URL of the Databricks workspace (e.g.adb-1973318500000000.17.azuredatabricks.net, see Databricks Authentication)ENTROPYDATA_CLIENT_DATABRICKS_WORKSPACE_CLIENTID: Client ID of the Databricks workspaceENTROPYDATA_CLIENT_DATABRICKS_WORKSPACE_CLIENTSECRET: Client Secret of the Databricks workspaceENTROPYDATA_CLIENT_DATABRICKS_ACCOUNT_HOST: URL of the Databricks account (e.g.https://accounts.azuredatabricks.com, see Databricks Account Settings)ENTROPYDATA_CLIENT_DATABRICKS_ACCOUNT_CLIENTID: Client ID of the Databricks accountENTROPYDATA_CLIENT_DATABRICKS_ACCOUNT_CLIENTSECRET: Client Secret of the Databricks account
You can use different service principals (hence, different Client IDs and Client Secrets) for the workspace and account authentication. The connector will use the workspace authentication to fetch the data from Databricks and the account authentication to manage authentication.
The service principal for the workspace authentication needs the USE CATALOG, USE SCHEMA, and MODIFY permissions on the catalogs and schemas it manages, and the workspace admin role to grant access to other principals. The service principal for the account authentication needs the account admin role, because the connector creates and deletes account groups and service principals.
If you have all configuration in place, you can now start the connector with the following command. Adopt these if you run the container in managed container environments like Kubernetes, Azuer Container Apps, or AWS EKS.
    docker run \
    -e ENTROPYDATA_CLIENT_APIKEY='dmm_live_5TJYRn6CrsWELldNiffii6oKdYNMuEYWinBoOoxRrvXaLW4y9A5Xck12as9dasw9' \
    -e ENTROPYDATA_CLIENT_DATABRICKS_WORKSPACE_HOST='https://adb-1973318500000000.17.azuredatabricks.net' \
    -e ENTROPYDATA_CLIENT_DATABRICKS_WORKSPACE_CLIENTID='d2e11498-4b63-43cd-9ebe-a00000000000' \
    -e ENTROPYDATA_CLIENT_DATABRICKS_WORKSPACE_CLIENTSECRET='dose79375ba79041c9c5250a190002a71cd9' \
    -e ENTROPYDATA_CLIENT_DATABRICKS_ACCOUNT_HOST='https://accounts.azuredatabricks.net' \
    -e ENTROPYDATA_CLIENT_DATABRICKS_ACCOUNT_ACCOUNTID='4675280120000000' \
    -e ENTROPYDATA_CLIENT_DATABRICKS_ACCOUNT_CLIENTID='d2e11498-4b63-43cd-9ebe-a00000000000' \
    -e ENTROPYDATA_CLIENT_DATABRICKS_ACCOUNT_CLIENTSECRET='dose000000000000c9c5250a190002a71cd9' \
    entropydata/entropy-data-connector-databricks:latest
After a successful start of the connector, you will find the following logs for your Connector Docker container:
2025-05-15T07:42:39.596Z  INFO 1 --- [cTaskExecutor-1] e.sdk.EntropyDataEventListener            : databricks-access-management: Start polling for events
2025-05-15T07:42:39.663Z  INFO 1 --- [cTaskExecutor-1] e.sdk.EntropyDataEventListener            : Fetching events with lastEventId=1f030d95-7eeb-67c4-b68c-7f053555cc14
2025-05-15T07:42:39.726Z  INFO 1 --- [           main] e.s.EntropyDataConnectorRegistration     : Registering integration connector databricks-assets
2025-05-15T07:42:39.748Z  INFO 1 --- [cTaskExecutor-1] e.sdk.EntropyDataEventListener            : Processing event 1f030d95-7f45-6d15-b68c-9fcae55fcd9a of type com.datamesh-manager.events.AccessDeactivatedEvent
2025-05-15T07:42:39.753Z  INFO 1 --- [cTaskExecutor-1] e.d.DatabricksAccessManagementHandler    : Processing AccessDeactivatedEvent 5sHEK6r9PydbE5CVpSk9BN
2025-05-15T07:42:39.789Z  INFO 1 --- [cTaskExecutor-2] e.s.EntropyDataAssetsSynchronizer      : databricks-assets: start syncing assets
The connector will subscribe to the Events API and save the current state (lastEventId) directly in Entropy Data.
Using Access Management
The connector will automatically create the permissions in Databricks for approved Access Requests for a Data Product's Output Port in Entropy Data: one account group access-<access id> per access, holding the consuming user, the consuming team's group team-<team id>, or a service principal dataproduct-<data product id> for a consuming data product, with USE CATALOG on the catalog and USE SCHEMA and SELECT on the output port's schema. Deactivation removes the group. Finer grants, masks, row filters, or ABAC policies are customizations of the connector; see Provisioning for the model and for the pattern of keying Unity Catalog policies on these groups.
Look at the documentation, how the access management flow works in detail.
Using Asset Synchronization
Assets are representations of actual data structures in Databricks. You can leverage them to import models and schemas from Databricks into Entropy Data. The connector will automatically create the assets in Entropy Data. You can link them with dataproducts and build derive Data Contracts from them.
The connector will automatically create assets in Entropy Data for all tables and views in the Databricks Unity Catalog.
Links
- Source Code: Entropy Data Connector for Databricks on GitHub
Databricks Asset Bundles
Databricks Asset Bundles (DABs) provide a standardized format for bundling data products on Databricks. They contain all necessary files to run a data product, including code and configuration. Our extended template builds on the standard open-source Databricks Asset Bundle template, adding Entropy Data integration that automatically registers the data product and its data contract via the REST API.
# Create a new Databricks Asset Bundle using the Entropy Data template
databricks bundle init https://github.com/datamesh-manager/databricks-bundle-python-template
Links
- Tutorial: How To Build a Data Product with Databricks
- Source Code: Entropy Data Asset Bundle Template For Databricks on GitHub
Query Execution
Once a Databricks data product is available, users can execute read-only SQL queries against its output ports through:
- MCP Interface: Use the
execute_querytool to run SQL queries on Databricks output ports. - Entropy Intelligence: Chat-based query execution with automatic connection setup.
To execute queries, each user needs to configure a personal Databricks connection in their profile under Connections. This ensures queries run on behalf of the individual user with their own Databricks credentials and permissions.