Publish to Power BI
Use data contract schemas directly in Microsoft Power BI as semantic models.
Experimental. Publish to Power BI is under active development. Behaviour may still change and some edge cases may not work as expected.
Publish to Power BI is a separate feature from the standard Power BI integration. The Power BI integration ingests existing semantic models and reports into Entropy Data as assets. This page covers the user-triggered publishing flow that goes the other way: from a data product's output port out to Power BI as a new semantic model.
Entropy Data integrates with Power BI for a seamless data consumer experience. From an existing data product's output port, a user can publish a Power BI semantic model into one of their own Fabric workspaces. Entropy Data generates the TMDL from the data contract, binds the semantic model to the underlying Snowflake or Databricks connection, and then creates a new data product in Entropy Data whose output port is linked to the newly published Power BI semantic model. This new data product is registered as consumer of the existing data product.
You will be able to use the origin source in Power BI to build reports, extend the semantic model with metrics and combine with existing data sources. You can use Entropy Data to follow business lineage and be sure how your data flows.

Architecture
A business or data analyst triggers the publish flow from the Publish to Power BI dialog in Entropy Data. Authentication goes through Microsoft Entra ID (OAuth 2.0 / OIDC). Entropy Data converts the output port's Data Contract into a TMDL definition, POSTs it to the Power BI REST API as a new Semantic Model, and binds it to a Fabric Connection. The resulting model is registered back in Entropy Data as a governed consumer Data Product; at runtime, Power BI reads the underlying data source (e.g. Databricks) via the bound connection.
How it works
- An organization owner turns on the feature by configuring Power BI app credentials for the organization — either SSO-based (if members sign in via Microsoft Entra SSO) or a custom Entra application registered for Entropy Data.
- Each user connects their own Microsoft Entra account to Entropy Data once, granting the permissions needed to read Fabric workspaces and create semantic models on their behalf. Tokens are stored encrypted in Entropy Data and refreshed automatically.
- When a user opens the Publish to Power BI action on an output port, Entropy Data:
- generates a TMDL semantic model from the output port's data contract (ODCS),
- creates it in the Fabric workspace the user selects, using the chosen storage mode,
- binds it to a Fabric connection — an existing one, or a new connection created during publishing,
- creates a consumer data product and an approved data-usage agreement in Entropy Data so the published model is visible in lineage and reuse.
- Semantic models already published from an output port are listed in the dialog under Already connected to Power BI, so users can jump straight to them in Power BI.
Supported output port types for the underlying Fabric connection: Snowflake and Databricks.
Authentication flow
Getting the integration working is a two-step process: an organization owner configures the OAuth application once, then each user connects their own Microsoft account on first use. After that, cached tokens are reused and refreshed in the background.

Prerequisites
- An Entropy Data Enterprise License or the Cloud Edition.
- A Microsoft Entra ID tenant with either:
- Option A — SSO-based credentials. Your organization's members sign in to Entropy Data via Entra ID / Microsoft SSO. The existing SSO application is reused for the Power BI user-delegation flow.
- Option B — Custom Entra application. A dedicated application registration in your Entra tenant with the permissions and redirect URI described below.
Cloud Edition
Encryption and signing keys are already configured and managed for you. No environment variables to set — skip straight to Option A or Option B to register the Entra application.
Self-hosted
Publish to Power BI has no global feature flag — it becomes available for an organization as soon as an organization owner saves its Power BI credentials (Option A or Option B). The only environment variable to set beforehand is the encryption key. See Configuration for the full reference.
| Variable | Purpose |
|---|---|
APPLICATION_ENCRYPTION_KEYS | 64-hex-character key; encrypts stored client secrets and user tokens at rest |
Option A: SSO-based credentials
If your organization already uses Microsoft Entra SSO to log in to Entropy Data, the same Entra application can be used for Publish to Power BI.
- In the Entra portal, open your Entropy Data SSO application and add the following redirect URI under Authentication → Web:
https://entropy-data.example.com/powerbi/callback
Only the host changes — the /powerbi/callback path must be exactly as shown.
- Under API permissions, add the delegated permissions listed in the Required permissions section below.
- In Entropy Data, navigate to
Settings>Power BI(as an organization owner) and select Use SSO credentials. - Save. The settings page displays the resolved application name from Microsoft Graph so you can confirm you are pointing at the right app.
Option B: Custom Entra application
When Entropy Data SSO does not use Microsoft, or you prefer a dedicated application for Publish to Power BI, register a new Entra application (see https://learn.microsoft.com/de-de/entra/identity-platform/quickstart-register-app).
- In the Entra portal, Register a new application. Give it a descriptive name like Entropy Data — Power BI.
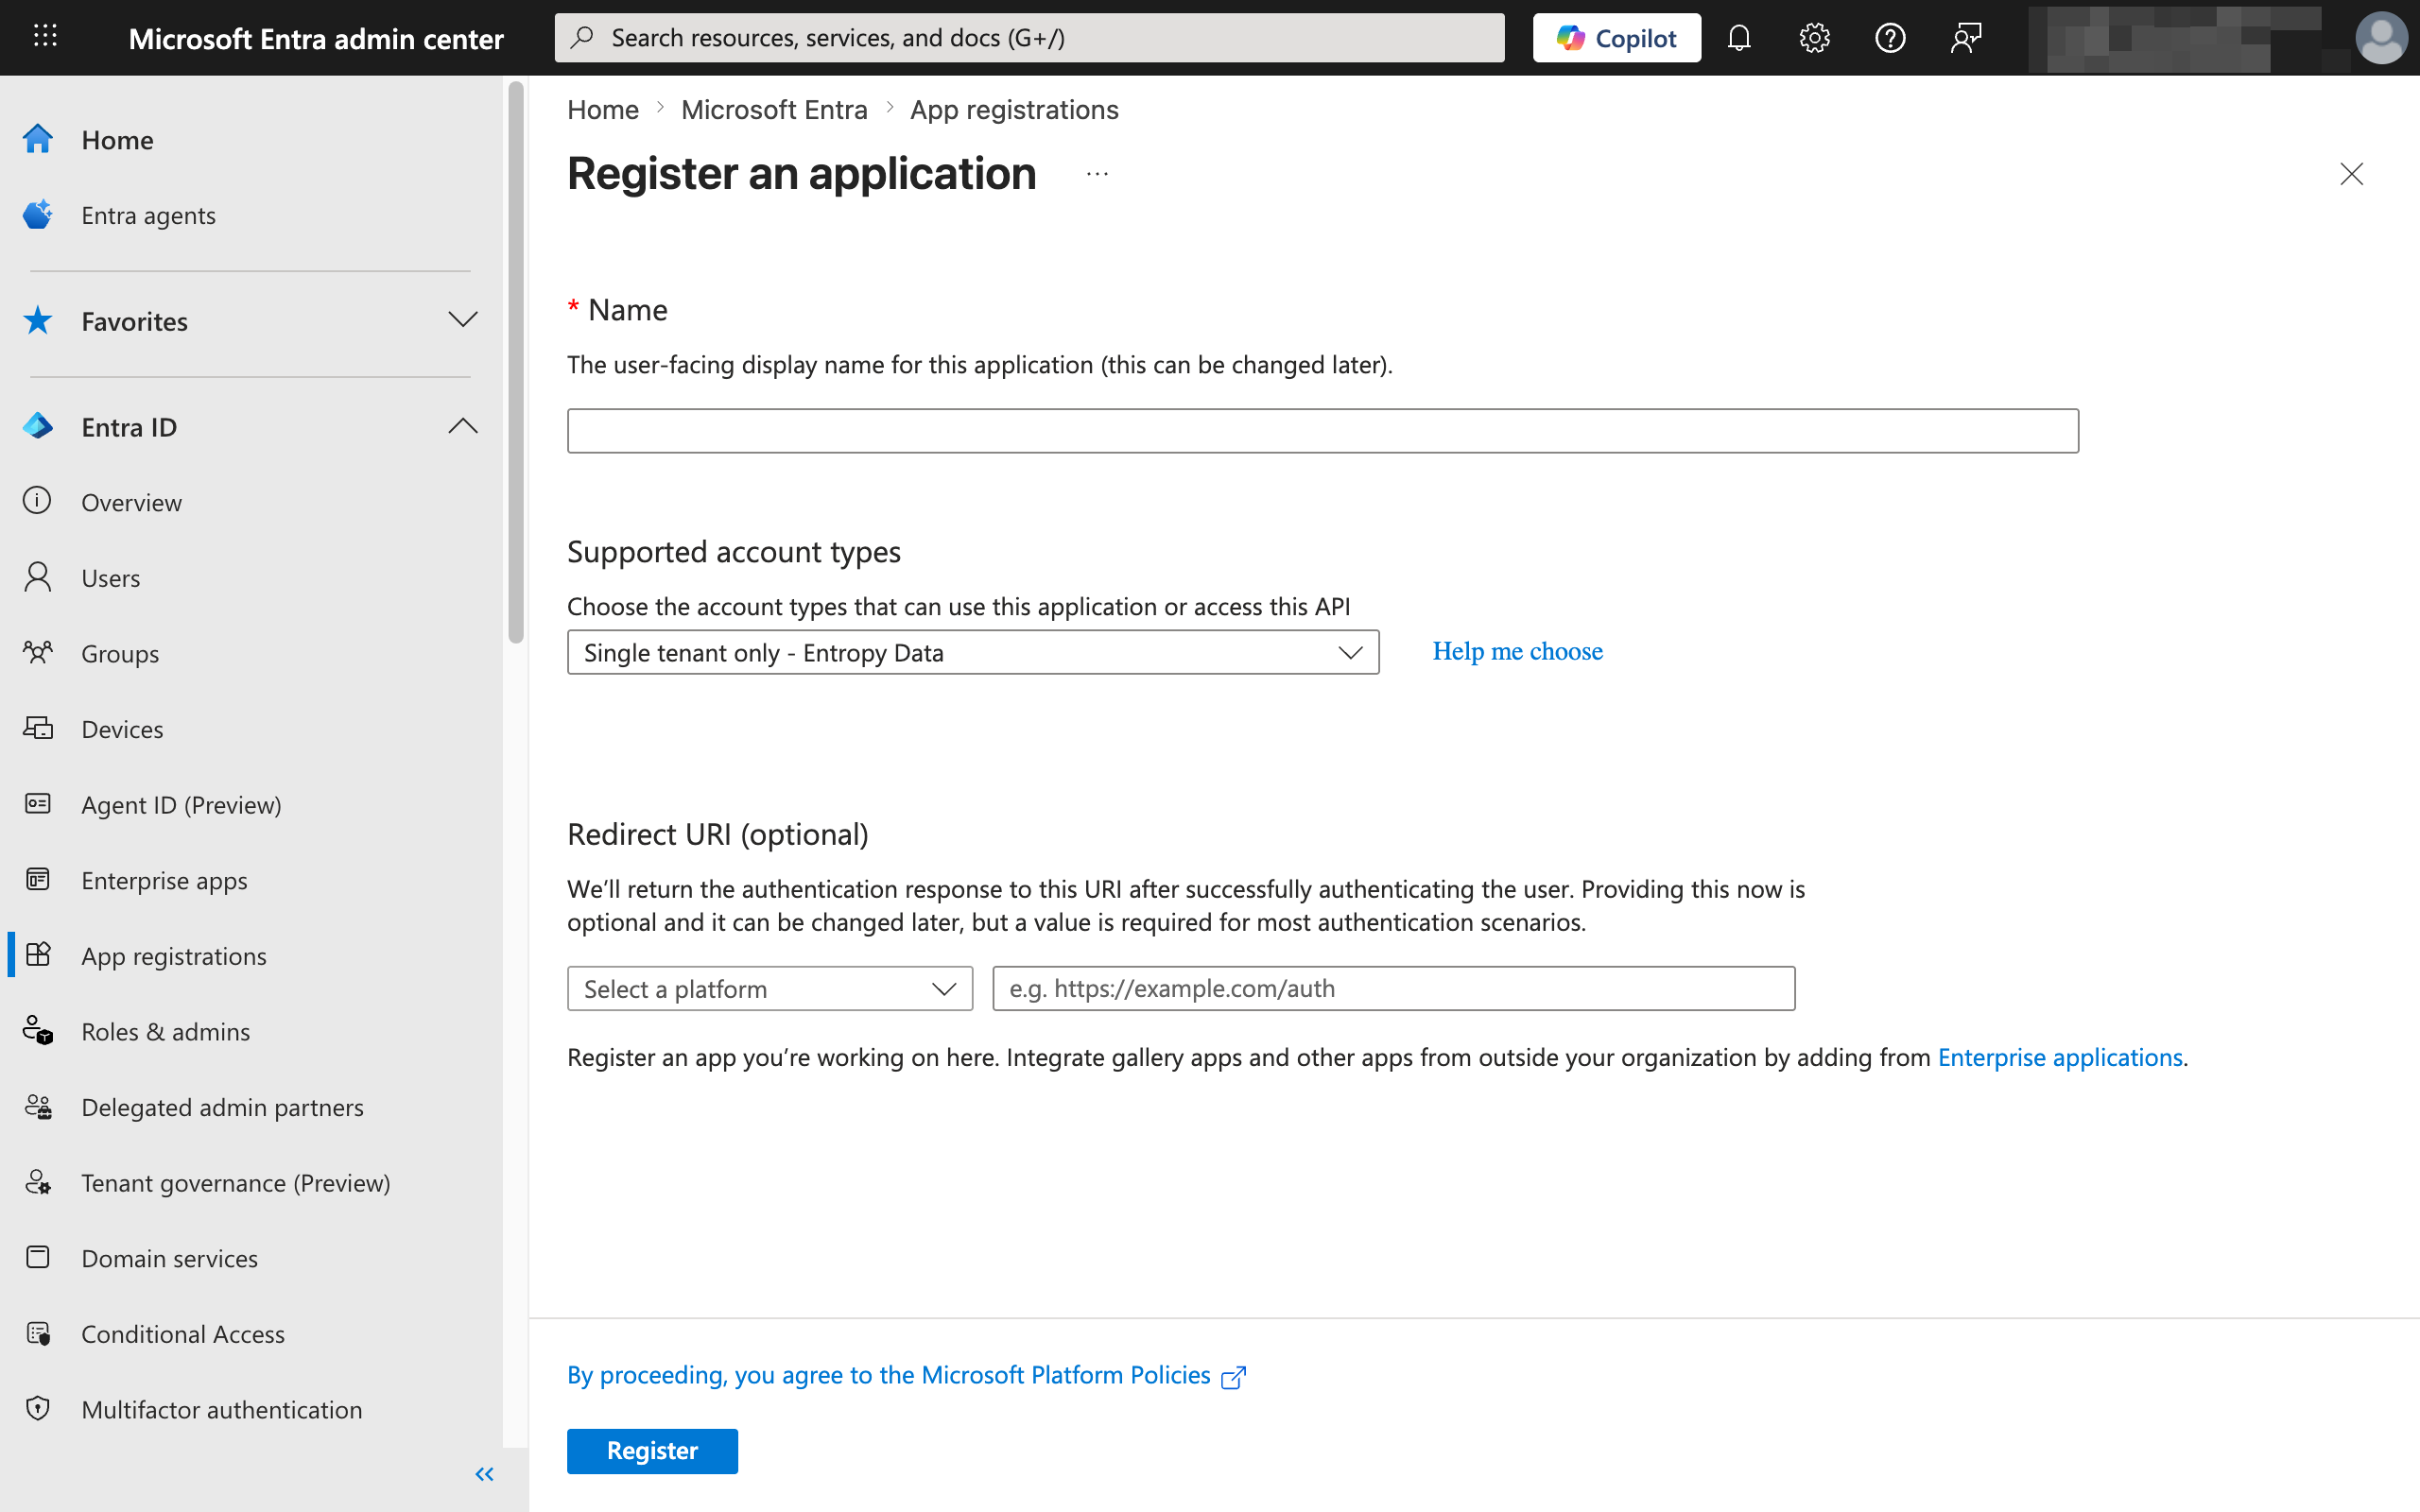
- Under Authentication → Web, add the redirect URI:
https://entropy-data.example.com/powerbi/callback
Only the host changes — the /powerbi/callback path must be exactly as shown.
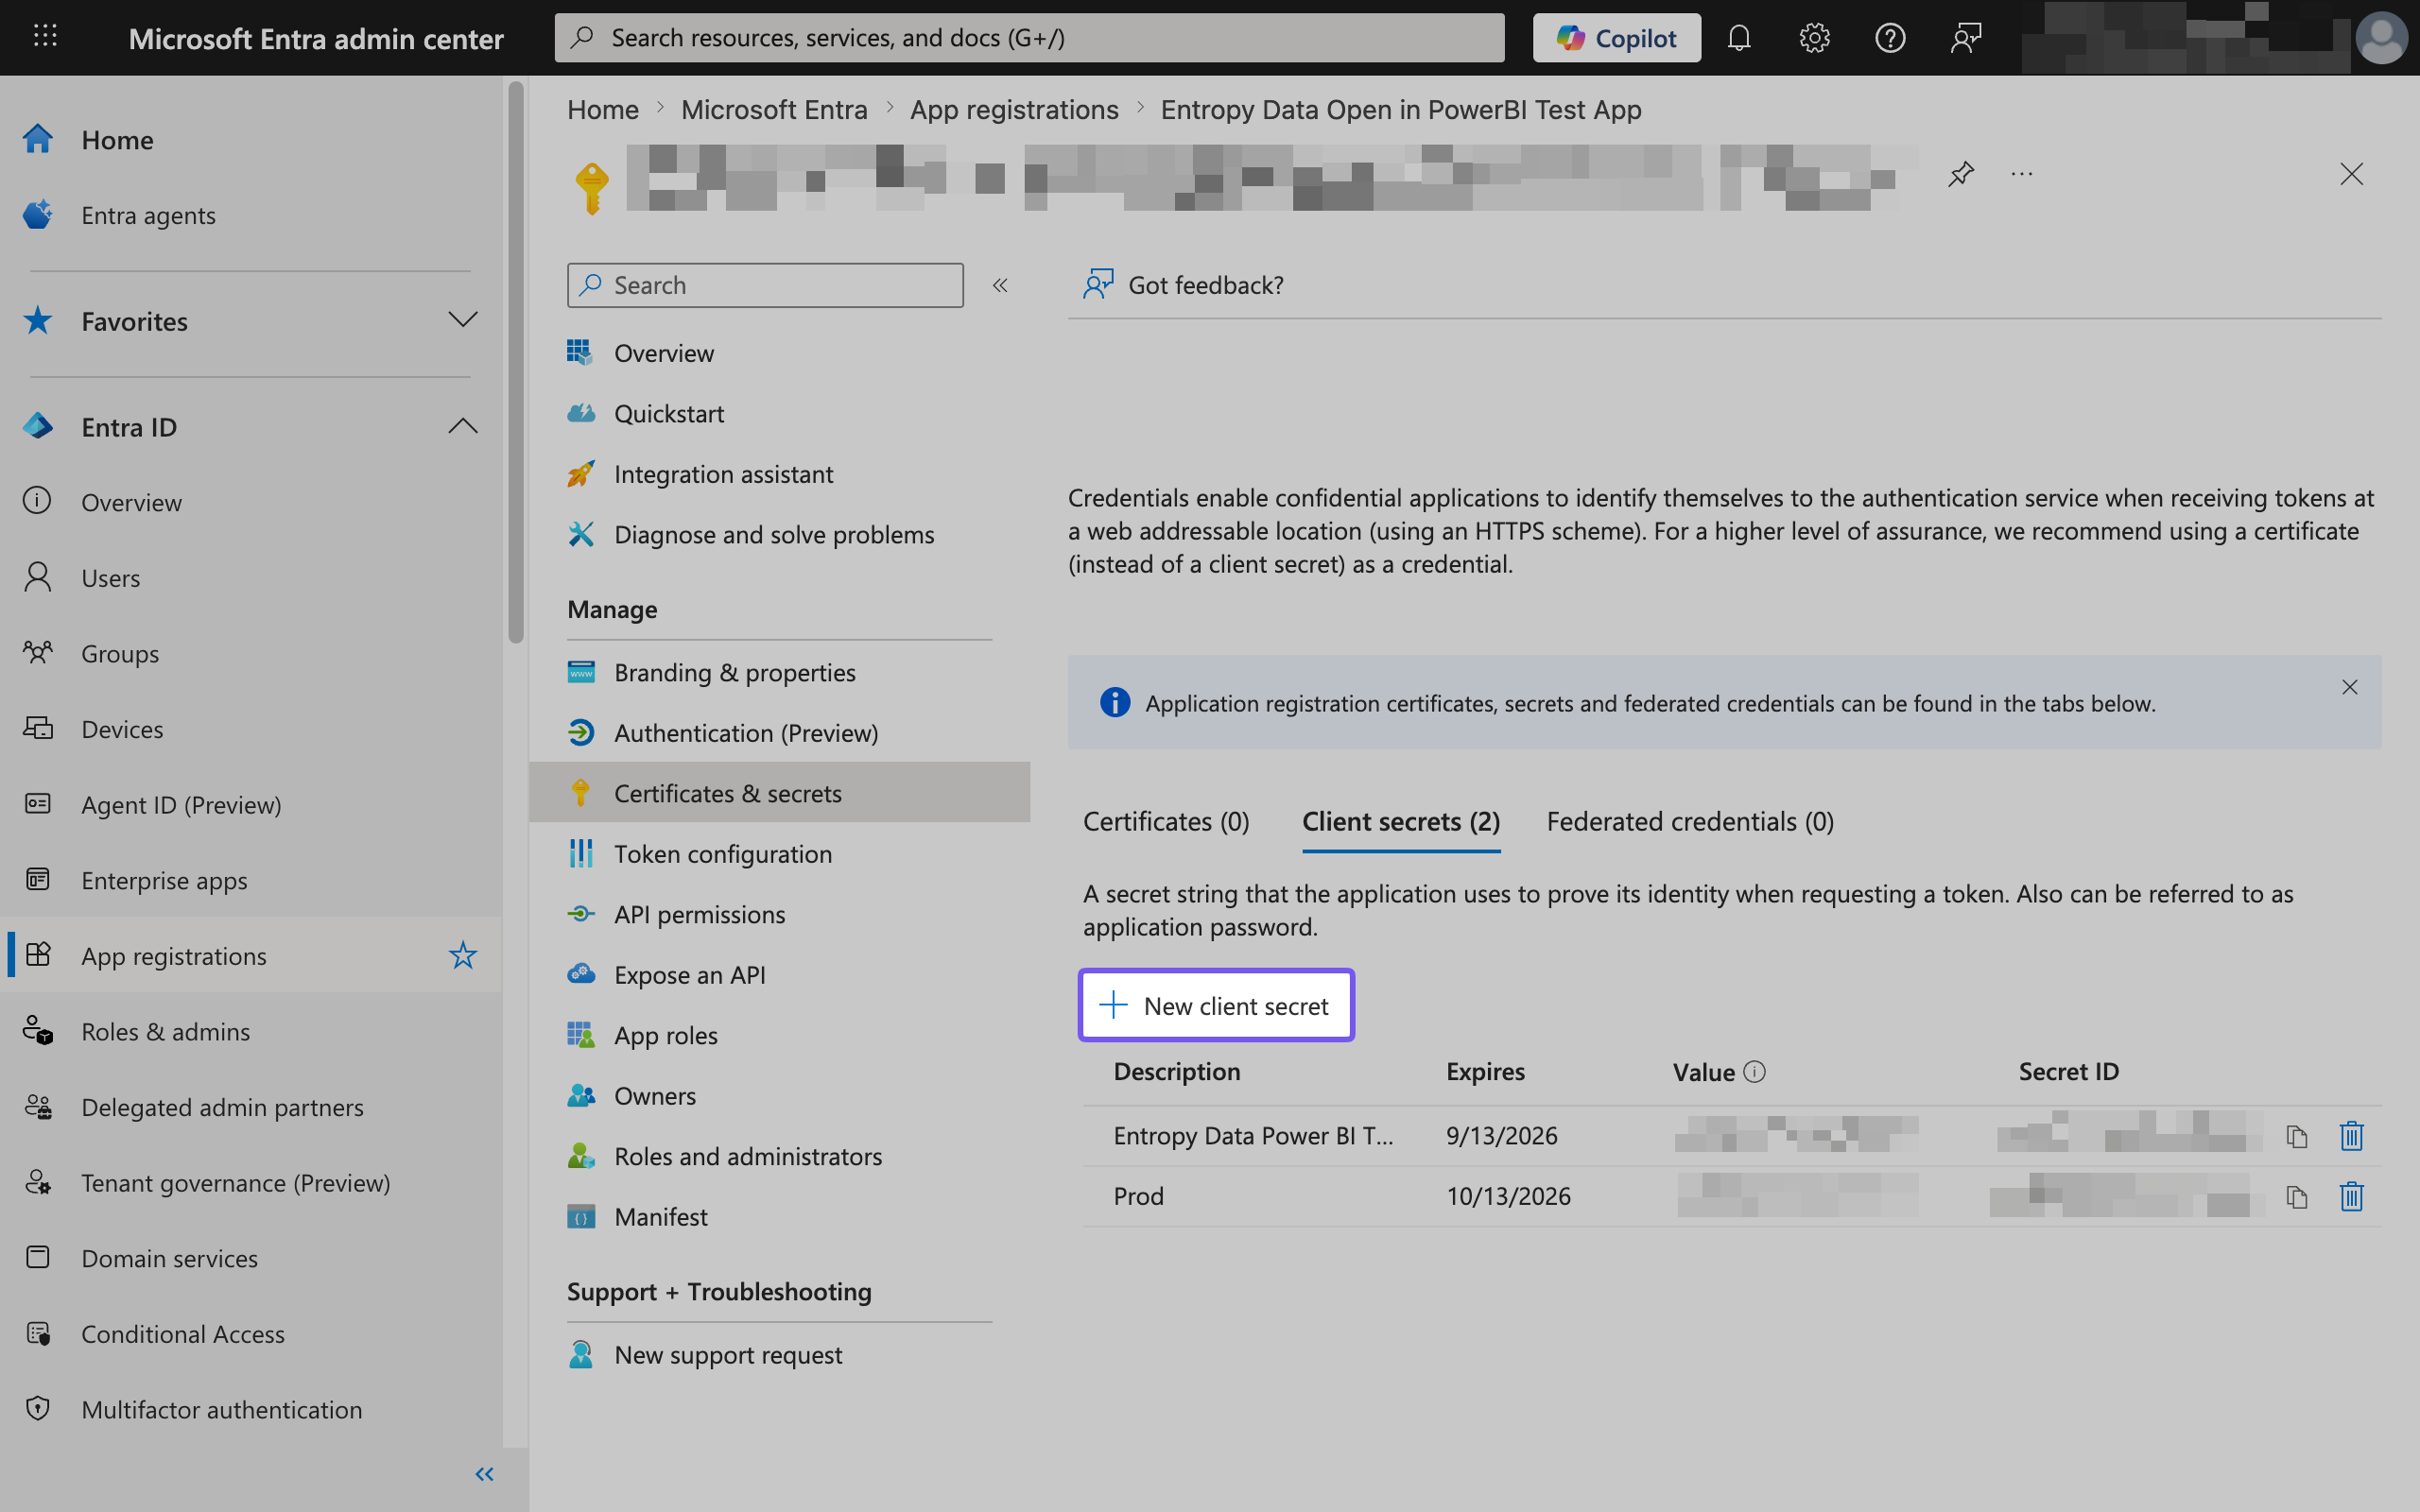
- Under Certificates & secrets, create a new Client secret and note the value — it is shown only once.
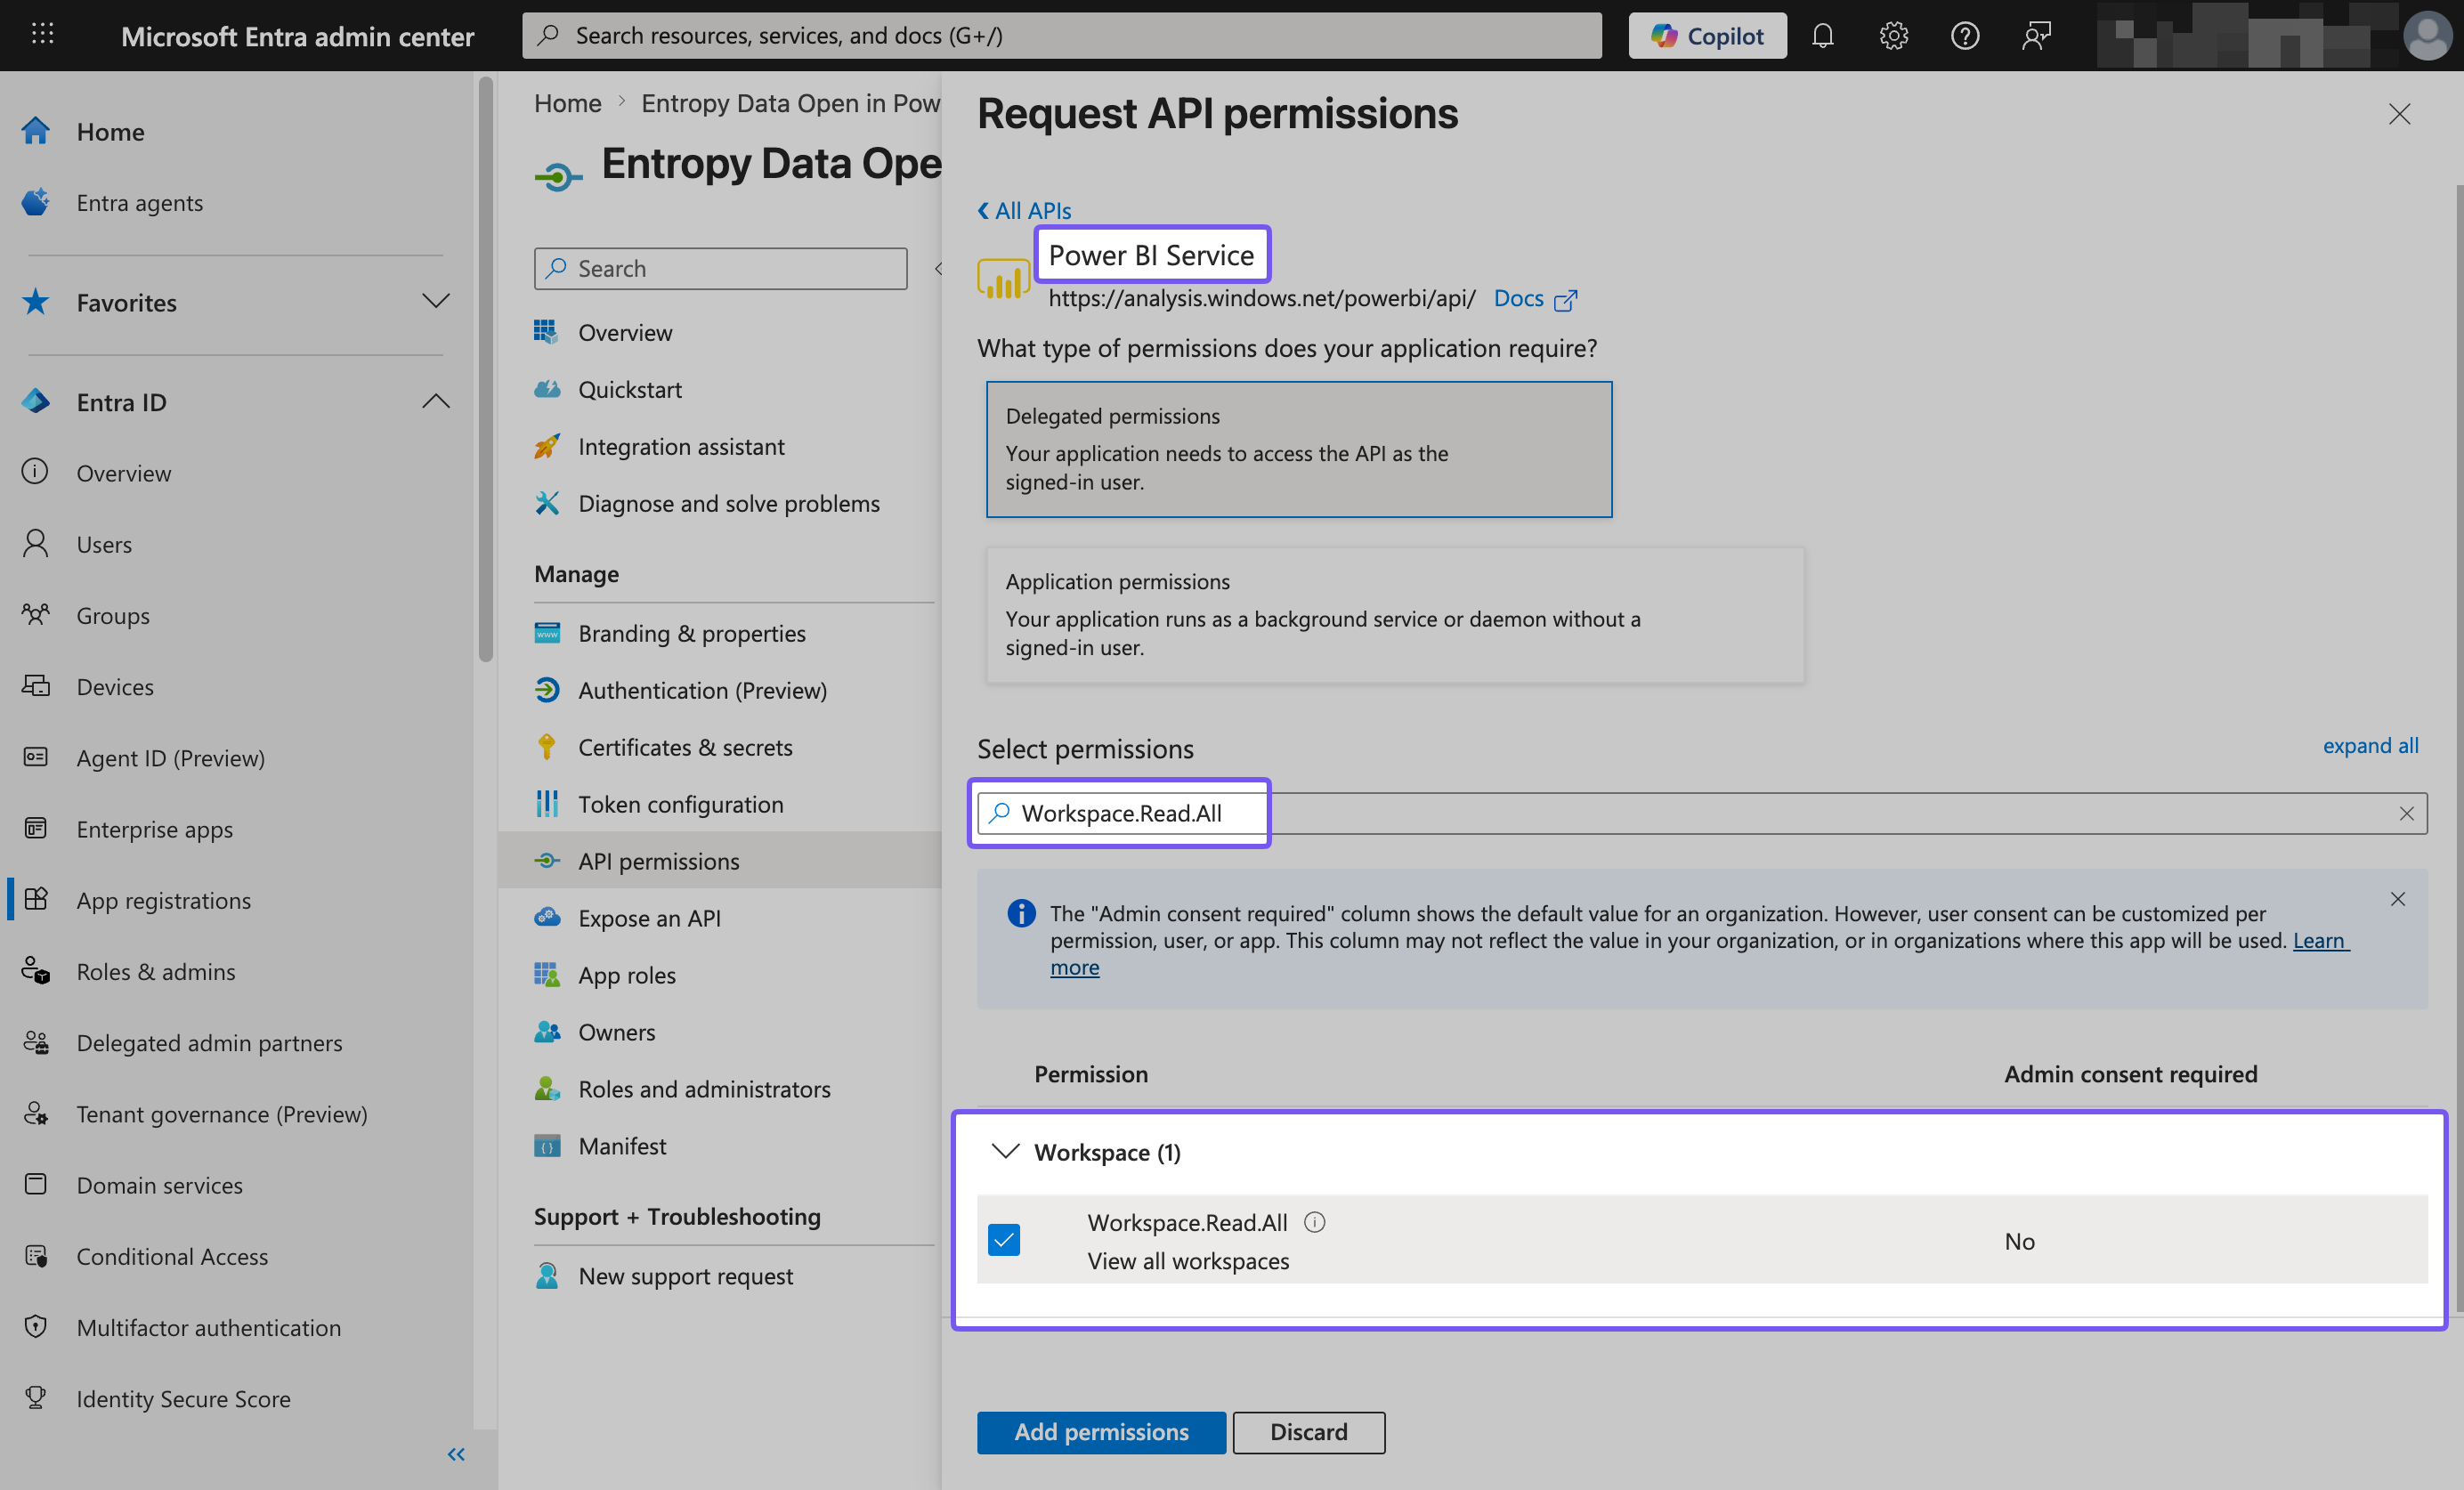
- Under API permissions, add the delegated permissions listed below and grant admin consent for your tenant.
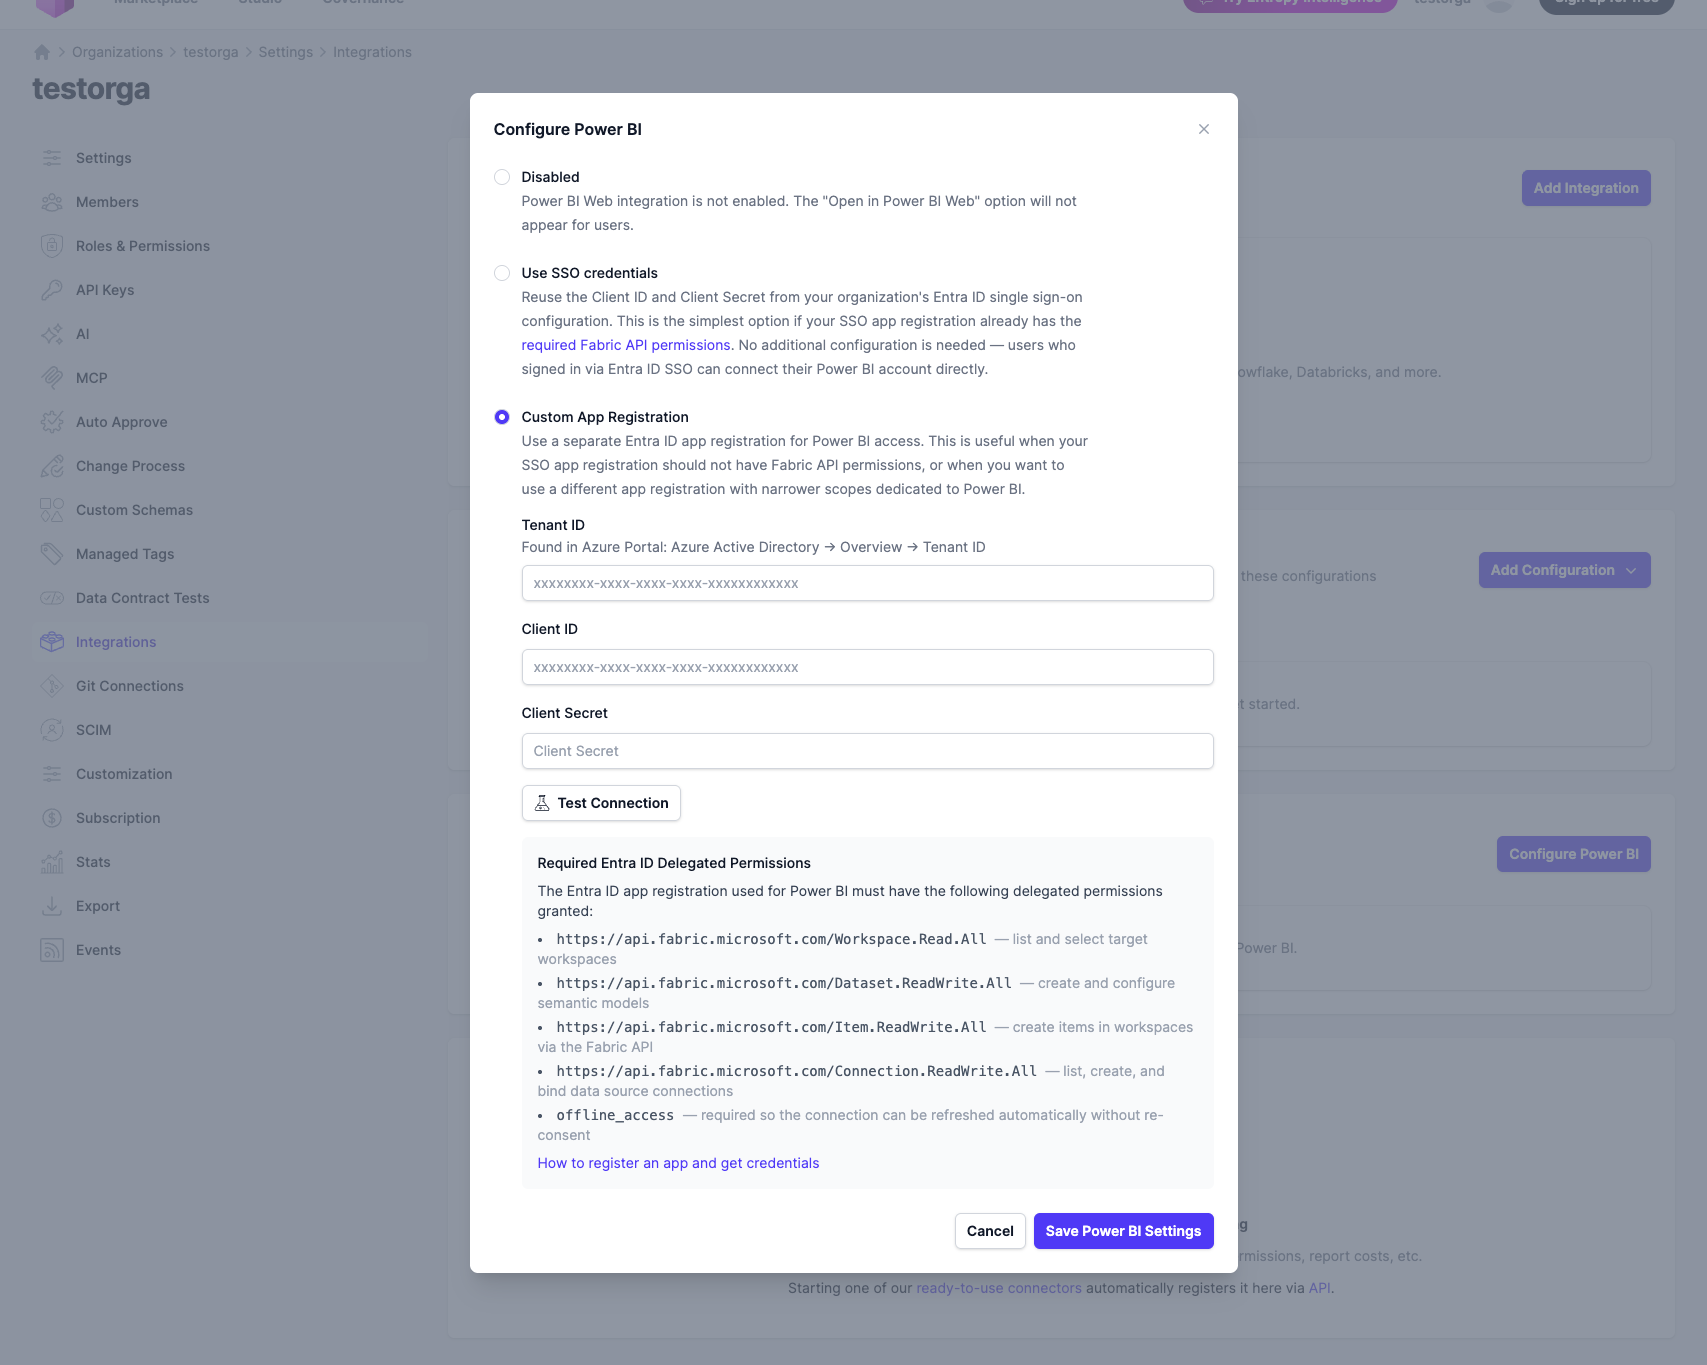
- In Entropy Data, navigate to
Settings>Power BI(as an organization owner) and select Use custom credentials. Enter the Tenant ID, Client ID, and Client Secret of your new application, then click Test connection to verify. You find your Tenant ID and Client ID on the overview page of the Entra application:
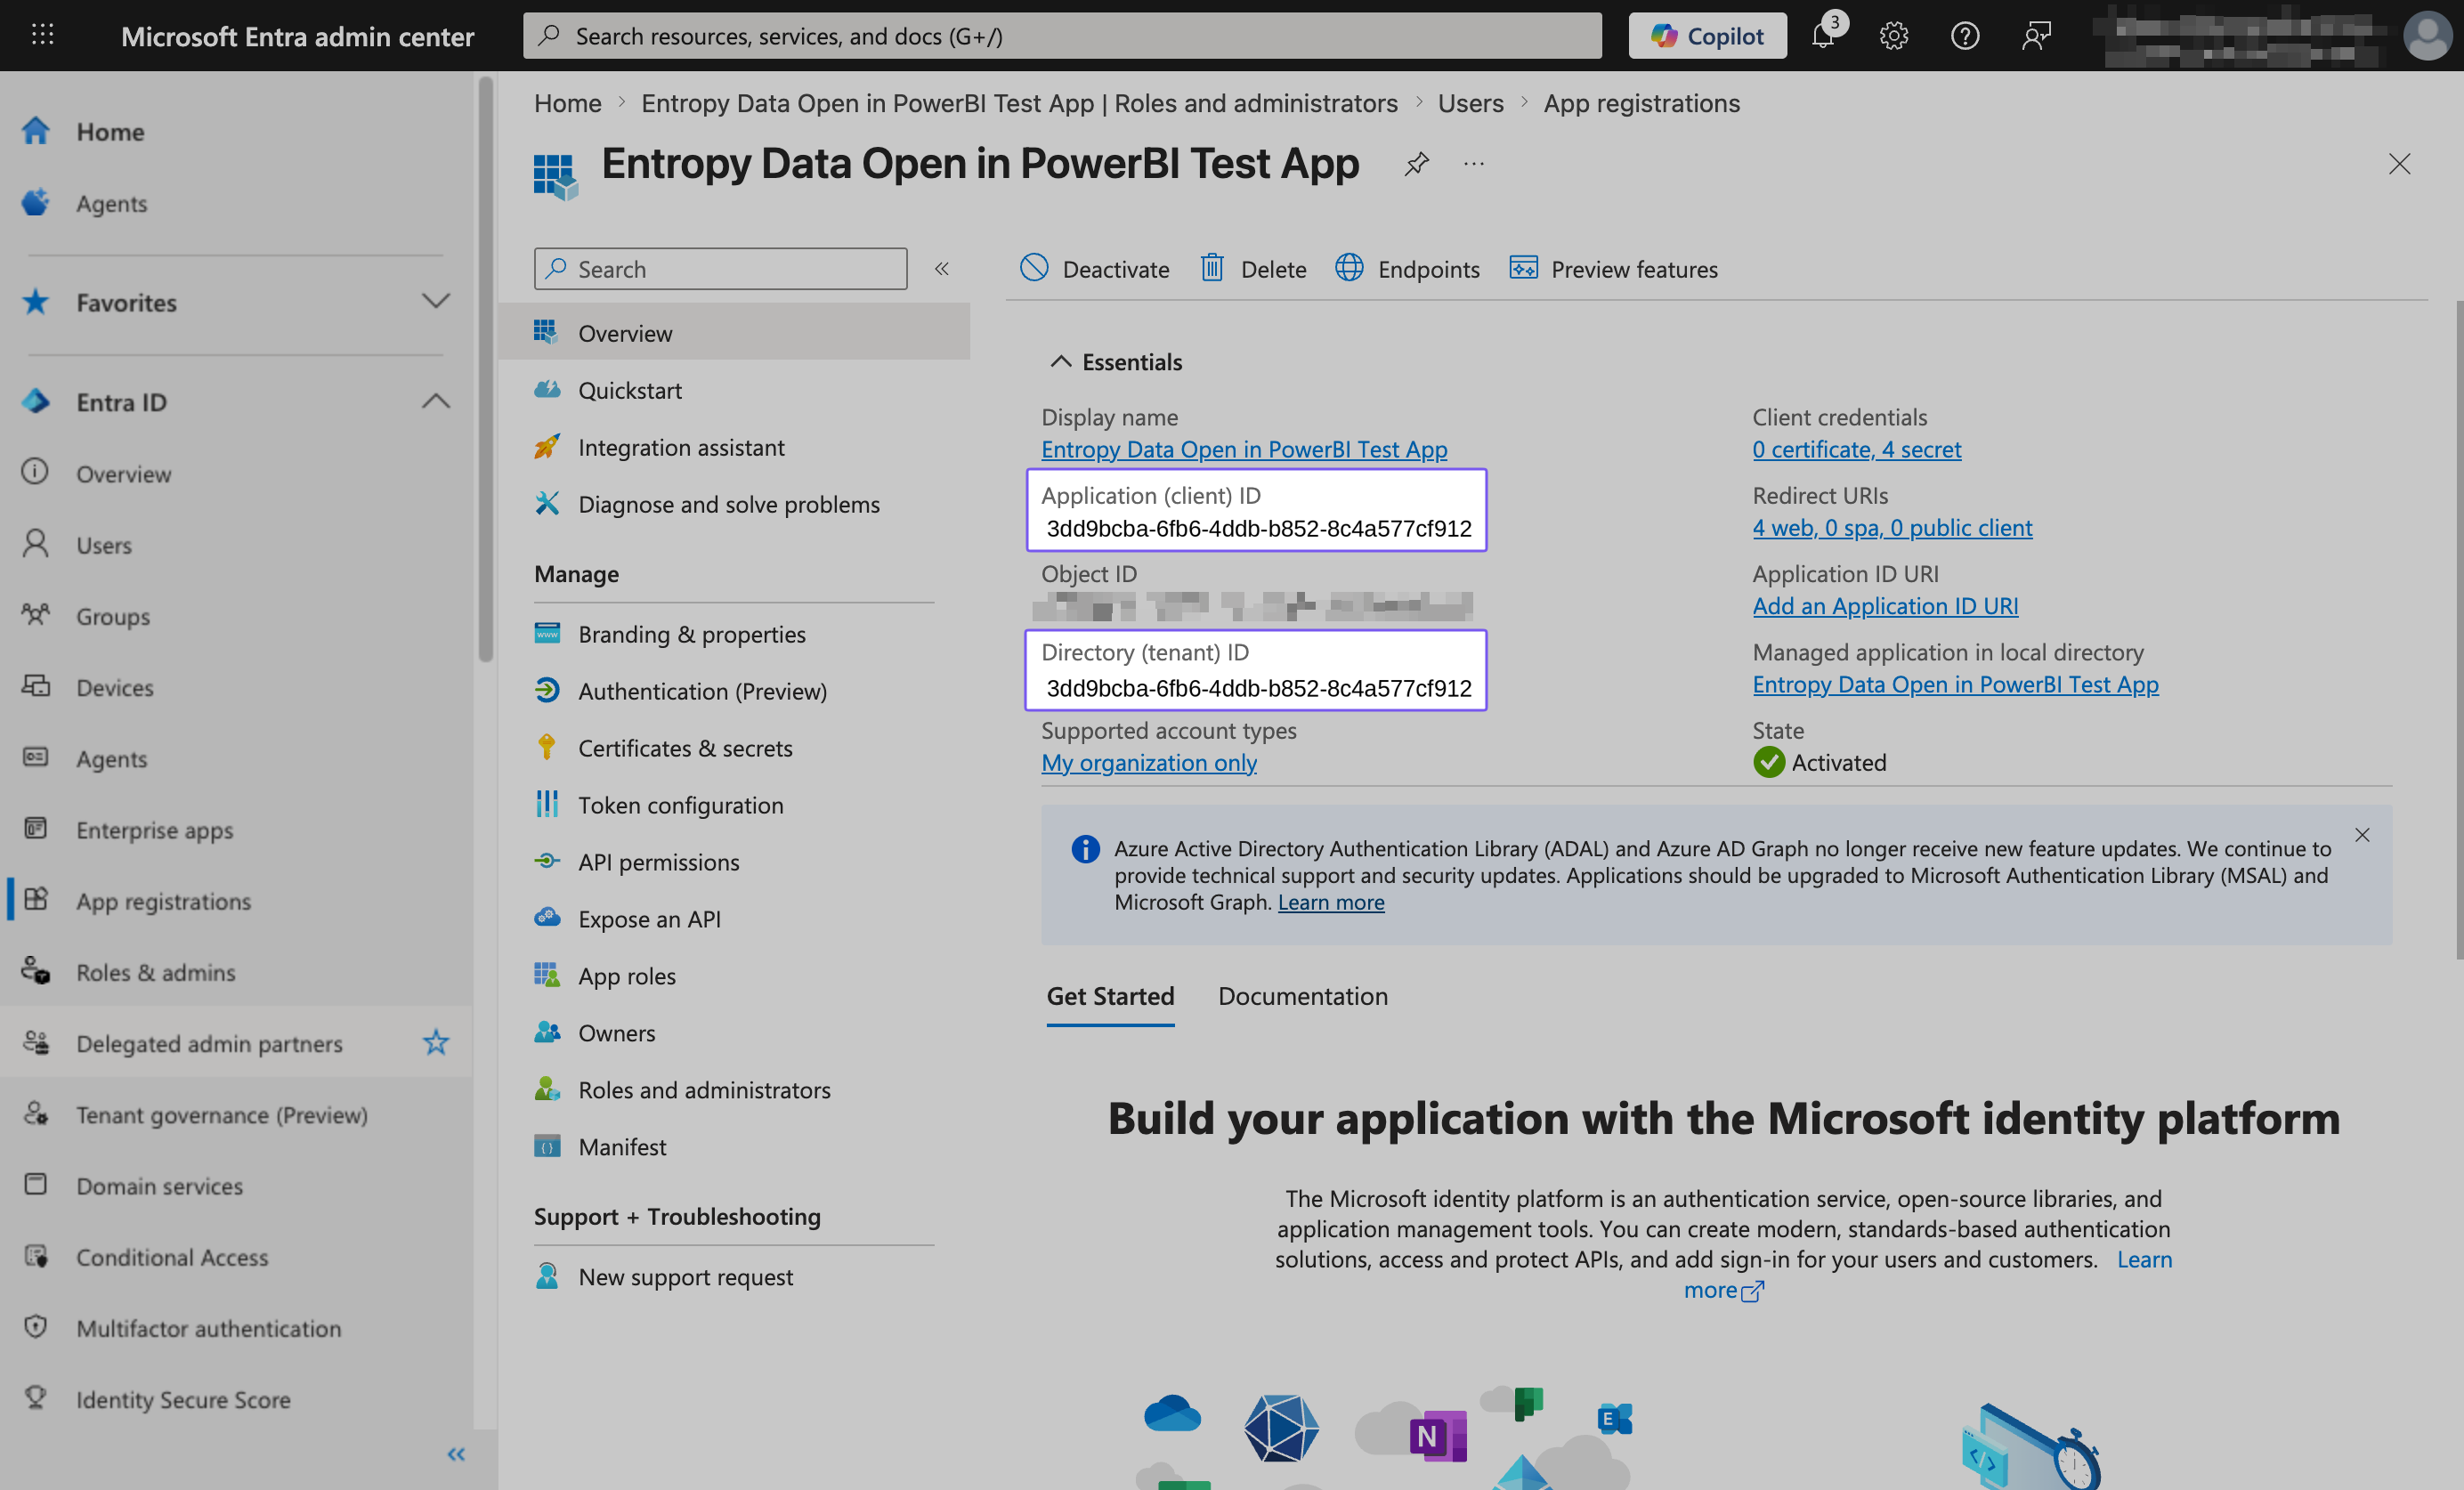
Note that the Client ID is the Application (client) ID shown on the overview page — not the Secret ID listed under Certificates & secrets. The Secret ID only identifies the secret entry in Entra; the value you need for Client Secret is the secret value you copied when creating it in step 3.
- Save. Credentials are encrypted at rest and the client secret is never returned from the API after save.
Required permissions
The Entra application needs the following delegated Microsoft API permissions:
| API | Permission | Purpose |
|---|---|---|
| Power BI Service | Workspace.Read.All | List the user's Fabric workspaces |
| Power BI Service | Dataset.ReadWrite.All | Create and update semantic models |
| Power BI Service | Item.ReadWrite.All | Create Fabric items (semantic models as Fabric items) |
| Power BI Service | Connection.ReadWrite.All | Create Fabric connections for new data sources |
| Microsoft Graph | offline_access | Refresh tokens so users do not need to reconnect every session |
offline_access is required so Entropy Data can refresh the user's access token in the background. Without it, publishing works for the first few minutes after connect and then fails.
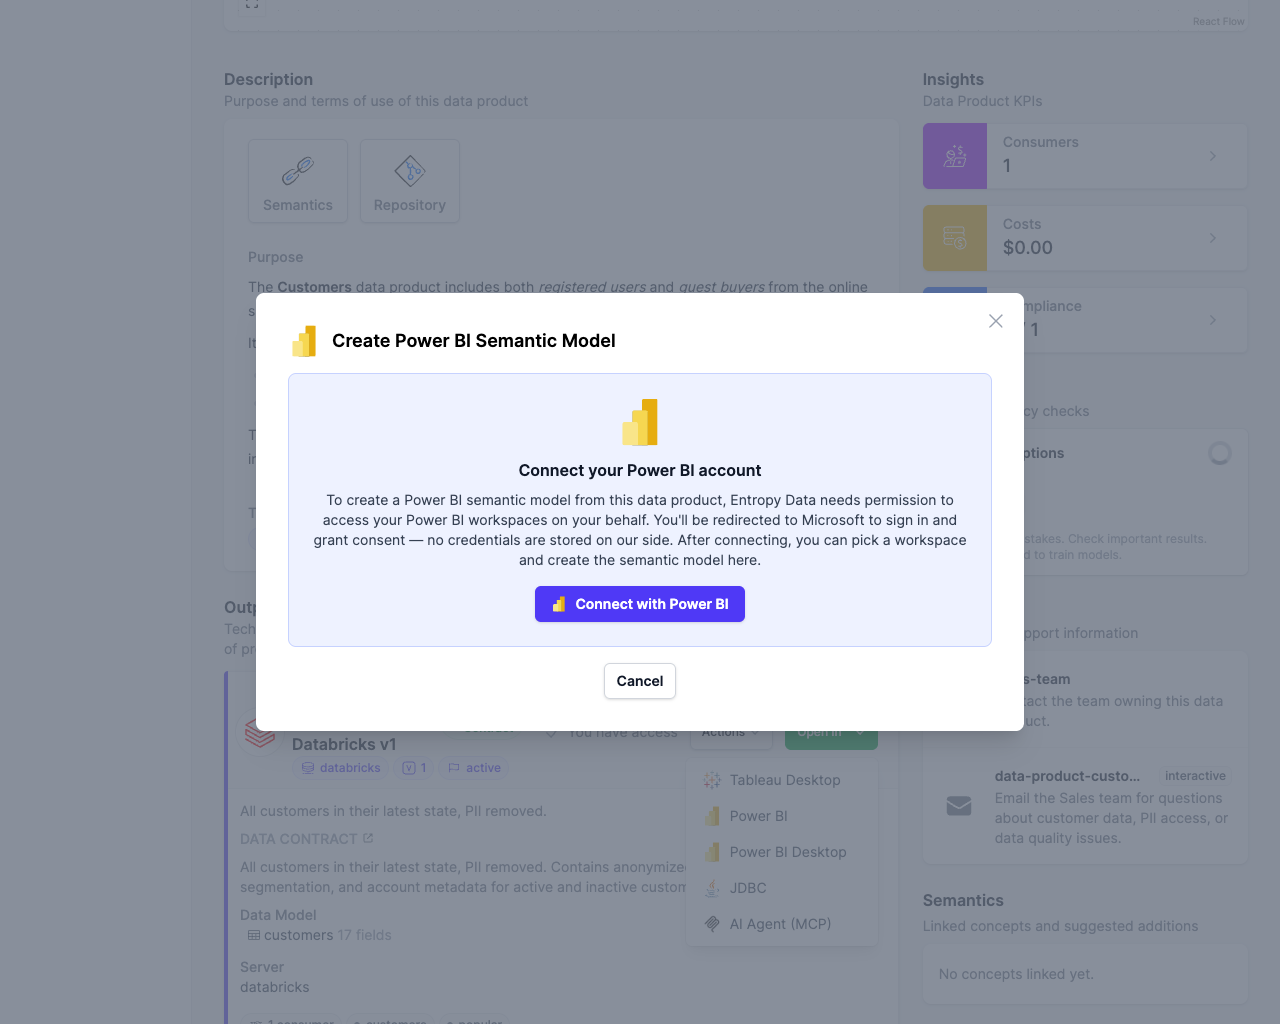
Connecting your Microsoft account
Each user connects once by clicking Connect with Power BI inside the Publish to Power BI dialog on an output port. Users can disconnect at any time from their profile (Your Profile → Power BI Connections); disconnecting revokes the user's authentication.
The consent dialog is shown on the initial connect. A Reconnect link is available under Power BI Connections and explicitly re-prompts for consent (useful if new permissions were added to the Entra application).
Publishing a semantic model
On a data product page, open a Snowflake or Databricks output port and choose Publish to Power BI from the Open In dropdown.

The dialog walks through:
- Semantic Model Name — defaults to the output port name.
- Workspace — one of your Fabric workspaces.
- Storage mode — Import or DirectQuery (see Storage mode).
- Connection — pick an existing Fabric connection, or create a new one.
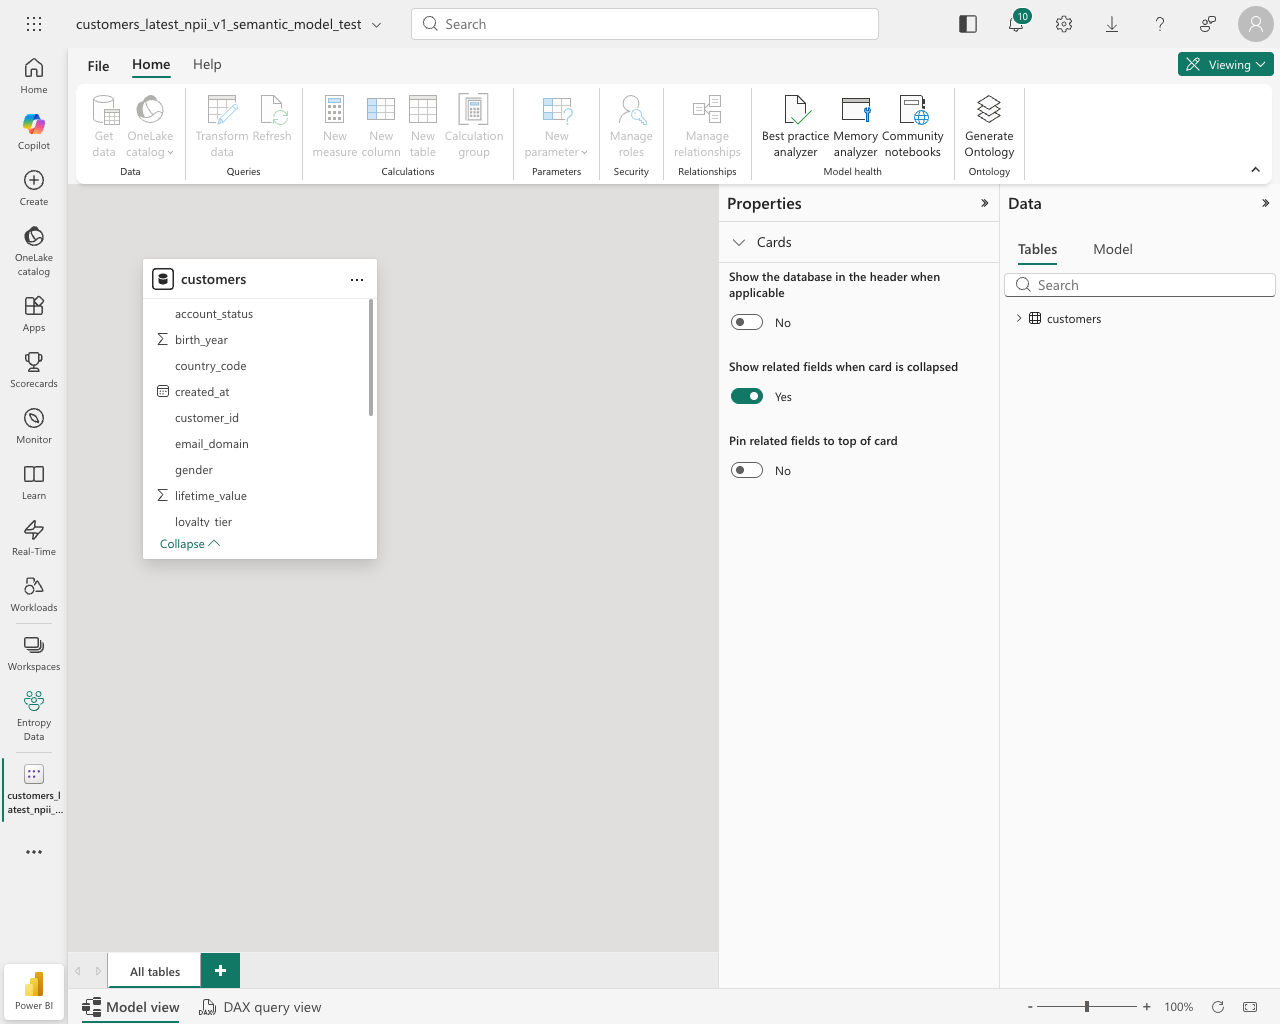
Click Publish to Power BI to start. Publishing runs asynchronously and reports progress through its stages — validating, creating the connection, creating the model, binding the connection, and finalizing. On success the new semantic model opens in Power BI in a new tab, showing the tables and columns generated from the output port's Data Contract.
Each successful publish creates a consumer data product plus an approved data-usage agreement in Entropy Data, so the relationship between the source output port and the downstream Power BI model appears in lineage.
The sequence below shows what the single Publish to Power BI click actually does behind the scenes — from loading the user's Fabric connections, through TMDL generation and semantic-model creation, to registering the result as a governed consumer Data Product in Entropy Data.

Storage mode
When you publish, you choose how the Power BI semantic model holds its data:
- Import (default) — data is loaded into Power BI and refreshed on a schedule. This is the standard Power BI storage mode and the right choice for most semantic models.
- DirectQuery — Power BI queries the source system live instead of importing the data. Choose this when you need always-current results or want to avoid copying large datasets.
The chosen mode is written into the generated TMDL and applies to every table in the semantic model.
Semantic models created through the Power BI REST API in DirectQuery mode may not have their data source auto-discovered, so binding the connection can fail. If that happens, open the model once in Power BI Desktop to bind the connection manually. Import mode is not affected.
Creating a Power BI connection
A Power BI semantic model needs a Fabric connection to the underlying data source. If a suitable connection already exists, pick it from the Connection dropdown. If none exist — or you want a dedicated one — you can create a connection as part of publishing.
The credentials you enter here are not stored by Entropy Data. They are sent to Power BI once to create the Fabric connection; Power BI stores and uses them from then on.
The connection form has two steps — Credentials and Review — and the fields depend on the source type. Values Entropy Data already knows from the data contract (account, database, workspace URL, catalog, …) are shown read-only on the review step; you only enter what is missing.
Snowflake
- Snowflake user and Password — the account Power BI uses to query Snowflake.
- Warehouse — pre-filled from the data contract when available, and editable.
- Account, database, and role come from the data contract.
Databricks
- Authentication — choose Personal access token or Service principal.
- For a personal access token: the Personal access token value.
- For a service principal: Tenant ID, Client ID, and Client secret.
- HTTP path — the SQL warehouse HTTP path; pre-filled from the data contract when available, and editable.
- Workspace URL and catalog come from the data contract.
On the Review step, confirm the details and click Create connection and open. Entropy Data creates the Fabric connection, then publishes the semantic model and binds it — in a single step. If binding fails, the newly created connection is cleaned up automatically.
Opening an existing semantic model
Once a semantic model has been published, you can open it again from either side of the lineage:
- From the semantic model data product — click the location link on the output port to jump straight to the model in Power BI.
- From the source data product — choose Publish to Power BI from the Open In dropdown. Semantic models already published from the output port are listed under Already connected to Power BI, each with its name, creation date, and author, so you can reopen one instead of publishing another. A Create a new semantic model anyway link reveals the publish form when you do want an additional model.
Limitations
- Only Snowflake and Databricks are supported as Fabric connection sources today. If you need support for additional sources, please reach out to us.
- Publishing creates new semantic models; it does not update existing ones with the same name. Double-click / retry of the publish button within the same in-flight job is collapsed into one publish, but re-publishing after completion produces a fresh model with a suffix.
- Power BI itself allows duplicate display names inside a workspace. Choose distinct names if you intend to publish the same output port multiple times.
- Per-user tokens expire after ~1 hour and are refreshed automatically so long as
offline_accessis granted.