
AWS Glue Integration
Integration of AWS Glue Data Catalog with Entropy Data.
The AWS Glue integration is managed within Entropy Data. Configure the connection and sync schedule to start syncing with AWS Glue Data Catalog.
No additional deployments are needed.
Features
- Asset Synchronization: Sync databases and tables from AWS Glue Data Catalog to Entropy Data as Assets.
- S3 Folder Ingestion: Sync S3 folders as data sources, in addition to Glue tables. For unsupported Glue table types (e.g., external tables pointing to S3), the integration automatically falls back to ingesting the underlying S3 folder.
Prerequisites
To start, navigate to Settings > Integrations > Add Integration.
This opens a wizard that guides you through configuring the integration.
Configuration
Select the Integration Type
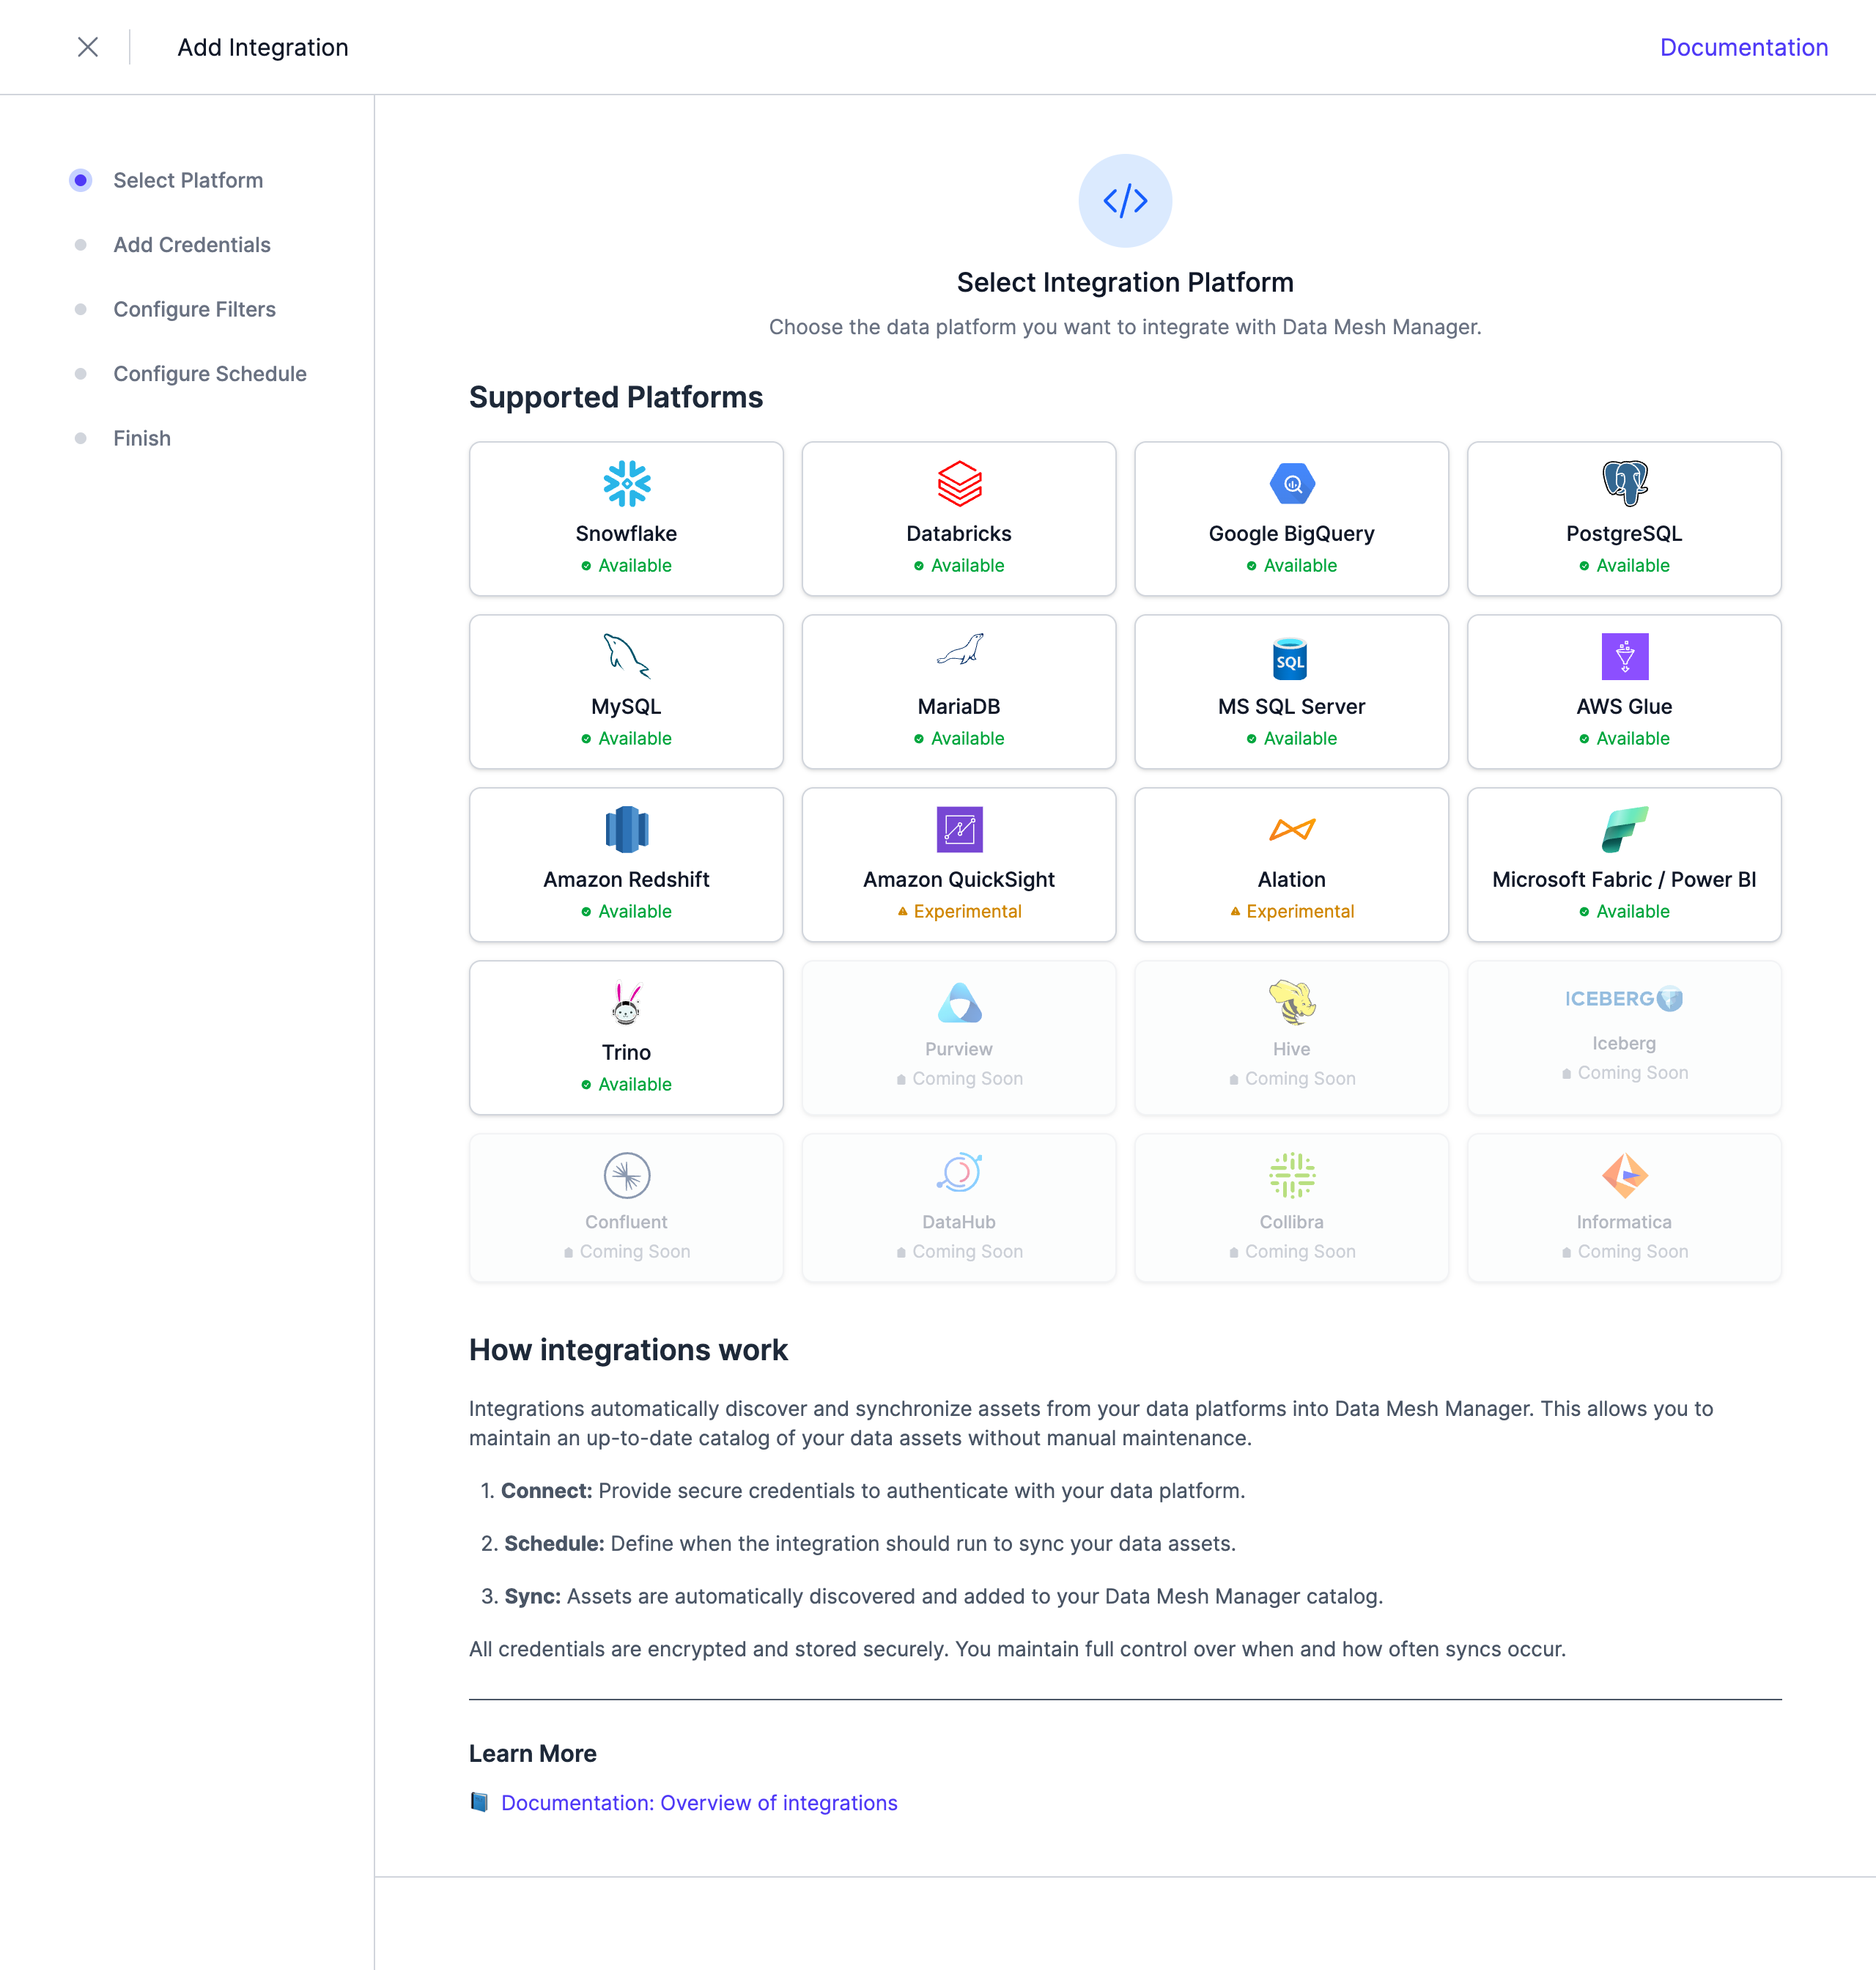 Select AWS Glue from the list of available integrations.
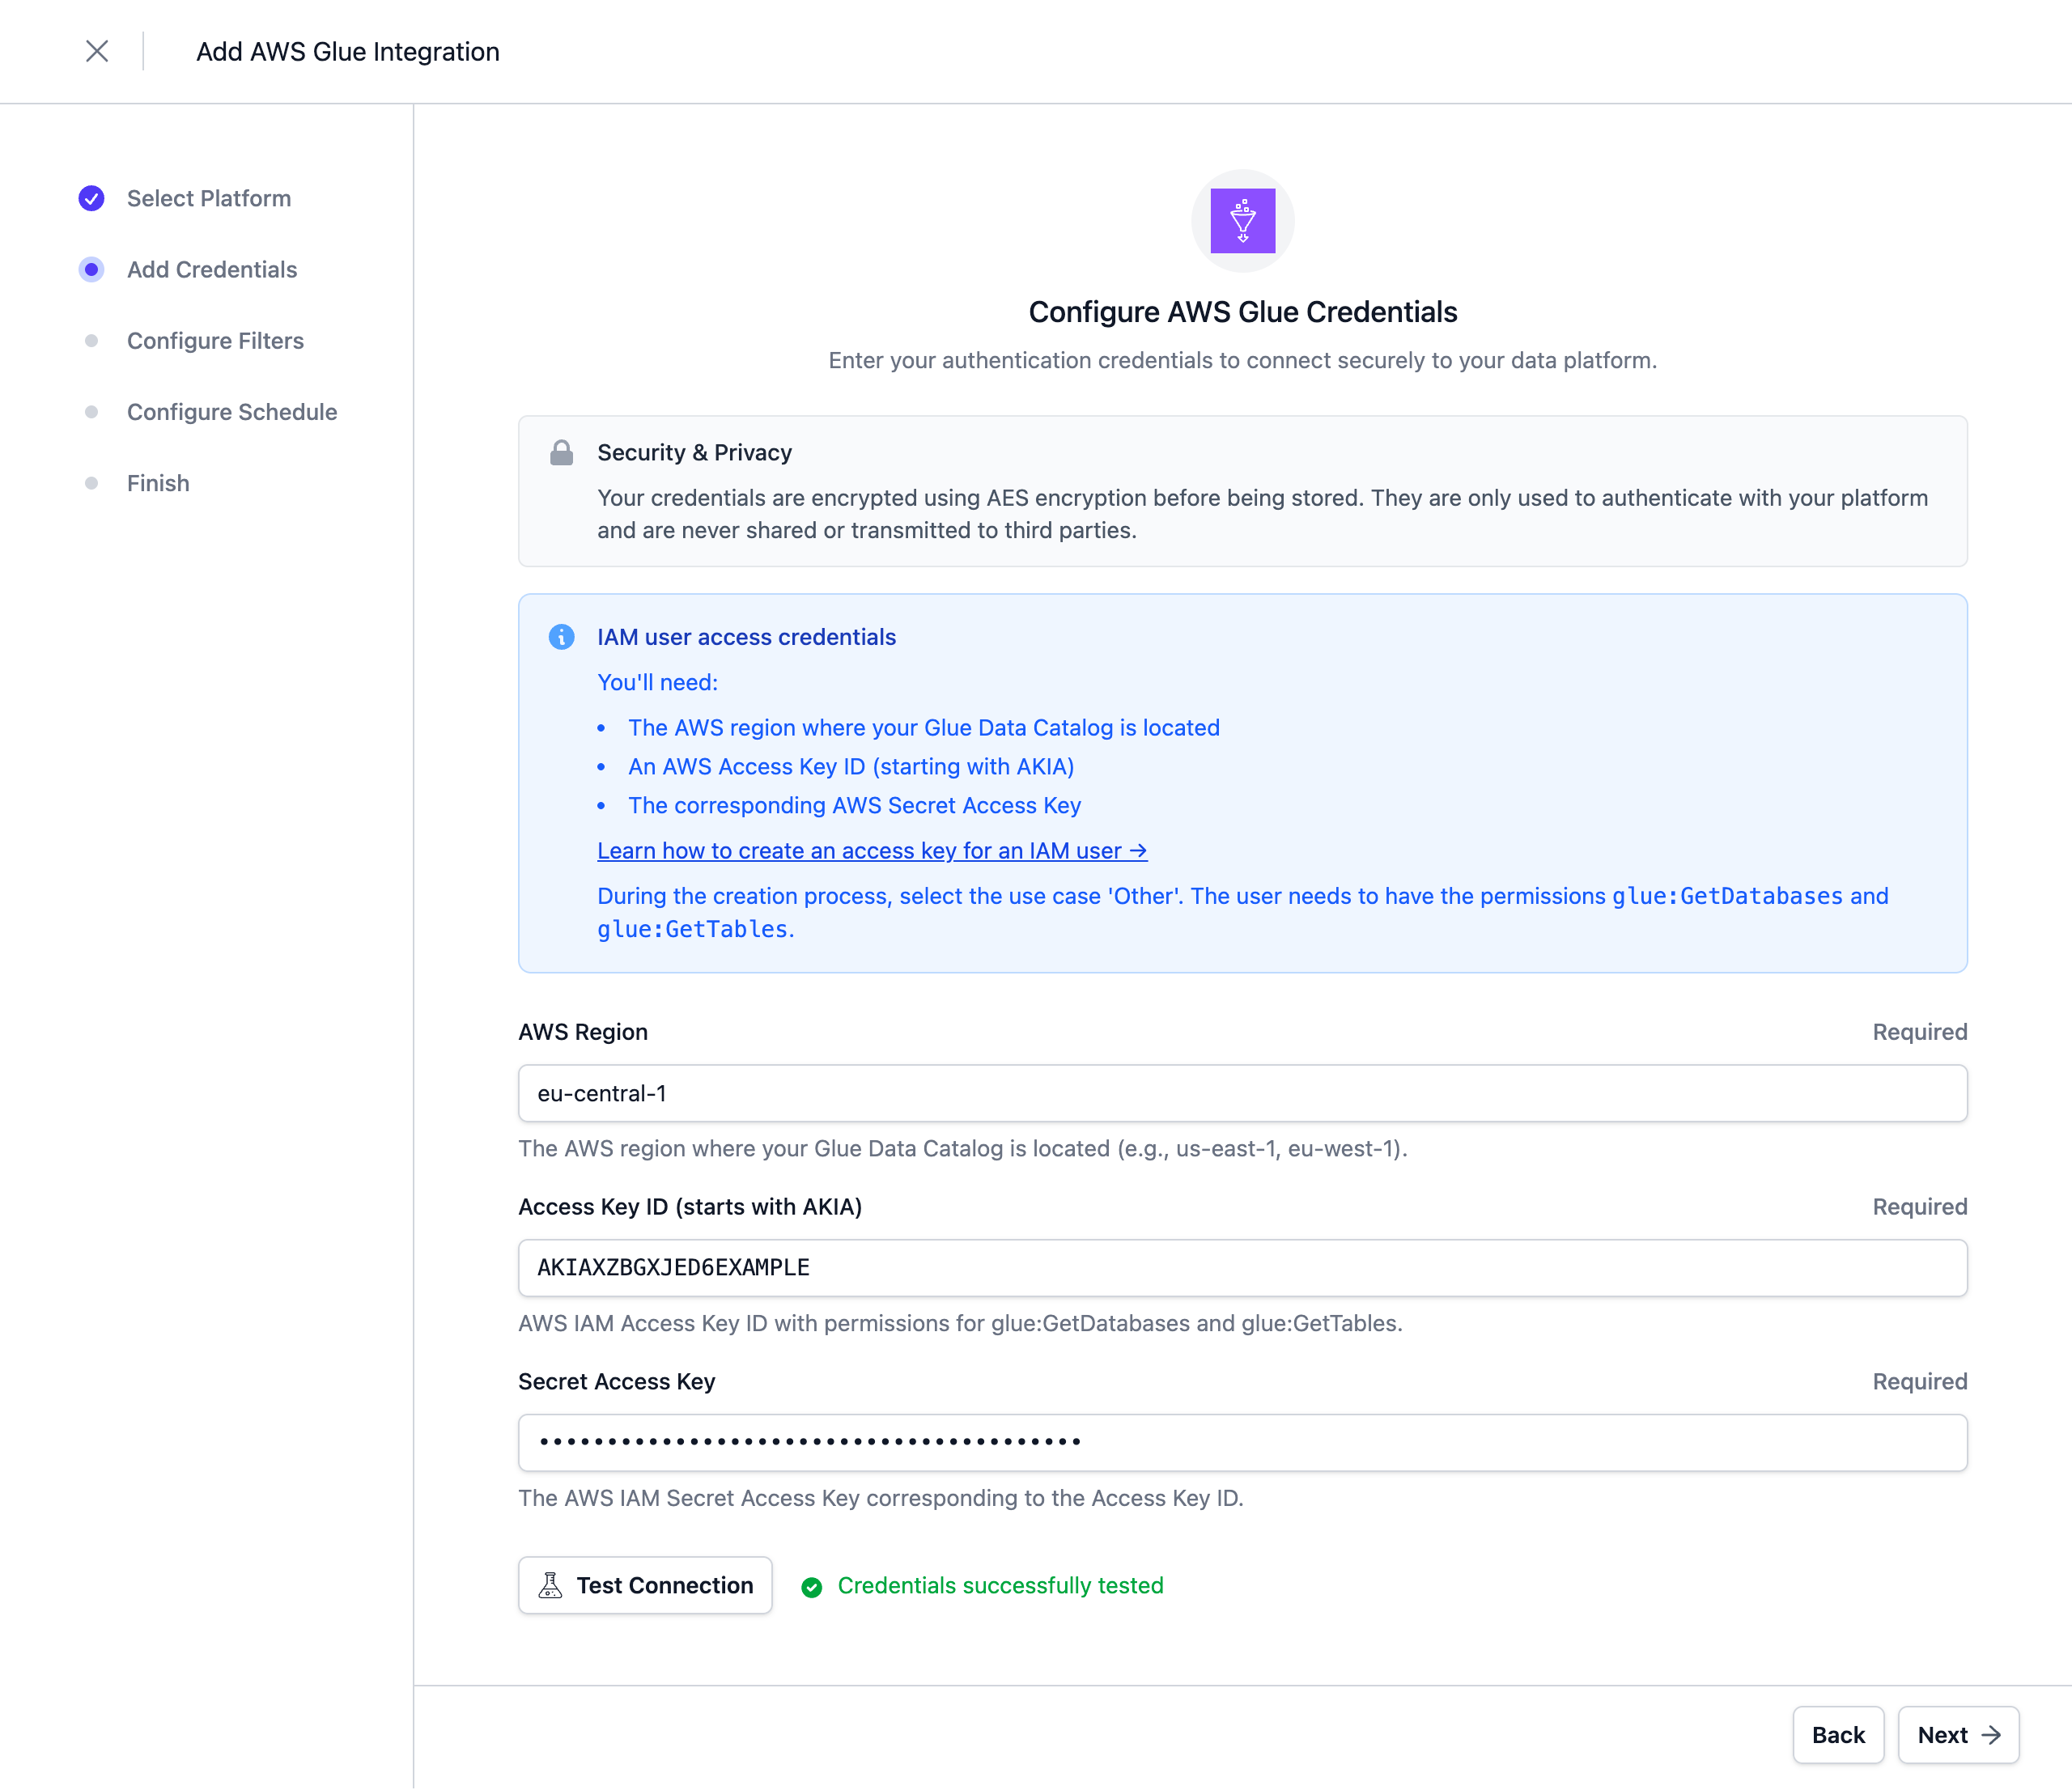
Configure the Credentials
AWS Glue supports two authentication methods. Choose one in the Authentication Method section of the wizard.
Whichever method you use, the effective AWS identity needs permissions for glue:GetDatabases and glue:GetTables. You may use the following AWS policy to grant them:
{
    "Version": "2012-10-17",
    "Statement": [
        {
            "Effect": "Allow",
            "Action": [
                "glue:GetTables",
                "glue:GetDatabases"
            ],
            "Resource": "*"
        }
    ]
}
IAM User Access Credentials
Authenticate with a long-lived AWS access key. Refer to the AWS documentation for creating a new access key. While creating the access key, select the use case 'Other'.
| Parameter | Description |
|---|---|
| AWS Region | The AWS region where your Glue Data Catalog is located (e.g., eu-central-1) |
| AWS Access Key ID | The IAM access key ID (starts with AKIA) |
| AWS Secret Access Key | The corresponding secret access key |
| Assume Role ARN | Optional. ARN of an IAM role to assume for cross-account access. Leave empty to use the access key directly. |
Cross-account access. When you set an Assume Role ARN, Entropy Data calls AWS STS AssumeRole with the access key and uses the returned temporary credentials to read the target account's Glue catalog. The IAM user additionally needs the sts:AssumeRole permission, and the target role's trust policy must allow that IAM user to assume it.
Entra Federation
Authenticate to AWS using Microsoft Entra ID as an OIDC identity provider via STS AssumeRoleWithWebIdentity — no IAM user access keys are stored. Entropy Data obtains a token from Entra and exchanges it for temporary AWS credentials on the target role.
This option is only selectable once an administrator has configured Entra federation for your organization; otherwise it is disabled in the wizard.
| Parameter | Description |
|---|---|
| AWS Region | The AWS region where your Glue Data Catalog is located (e.g., eu-central-1) |
| Role ARN | An IAM Role ARN whose trust policy federates your Entra identity provider (used with AssumeRoleWithWebIdentity) |
Note: The central Entra credentials are configured at deployment time by an administrator, per organization, via
application.integration.aws.entra.<organization-id>.*properties — either client credentials (tenant-id,client-id,client-secret,scope) or a user-assigned managed identity (managed-identity-client-id,resource). See Configuration.
Note: Credentials are stored encrypted in the Entropy Data database. To enable encryption in your environment, set a 64 hex character
APPLICATION_ENCRYPTION_KEYSin your environment (see Configuration).
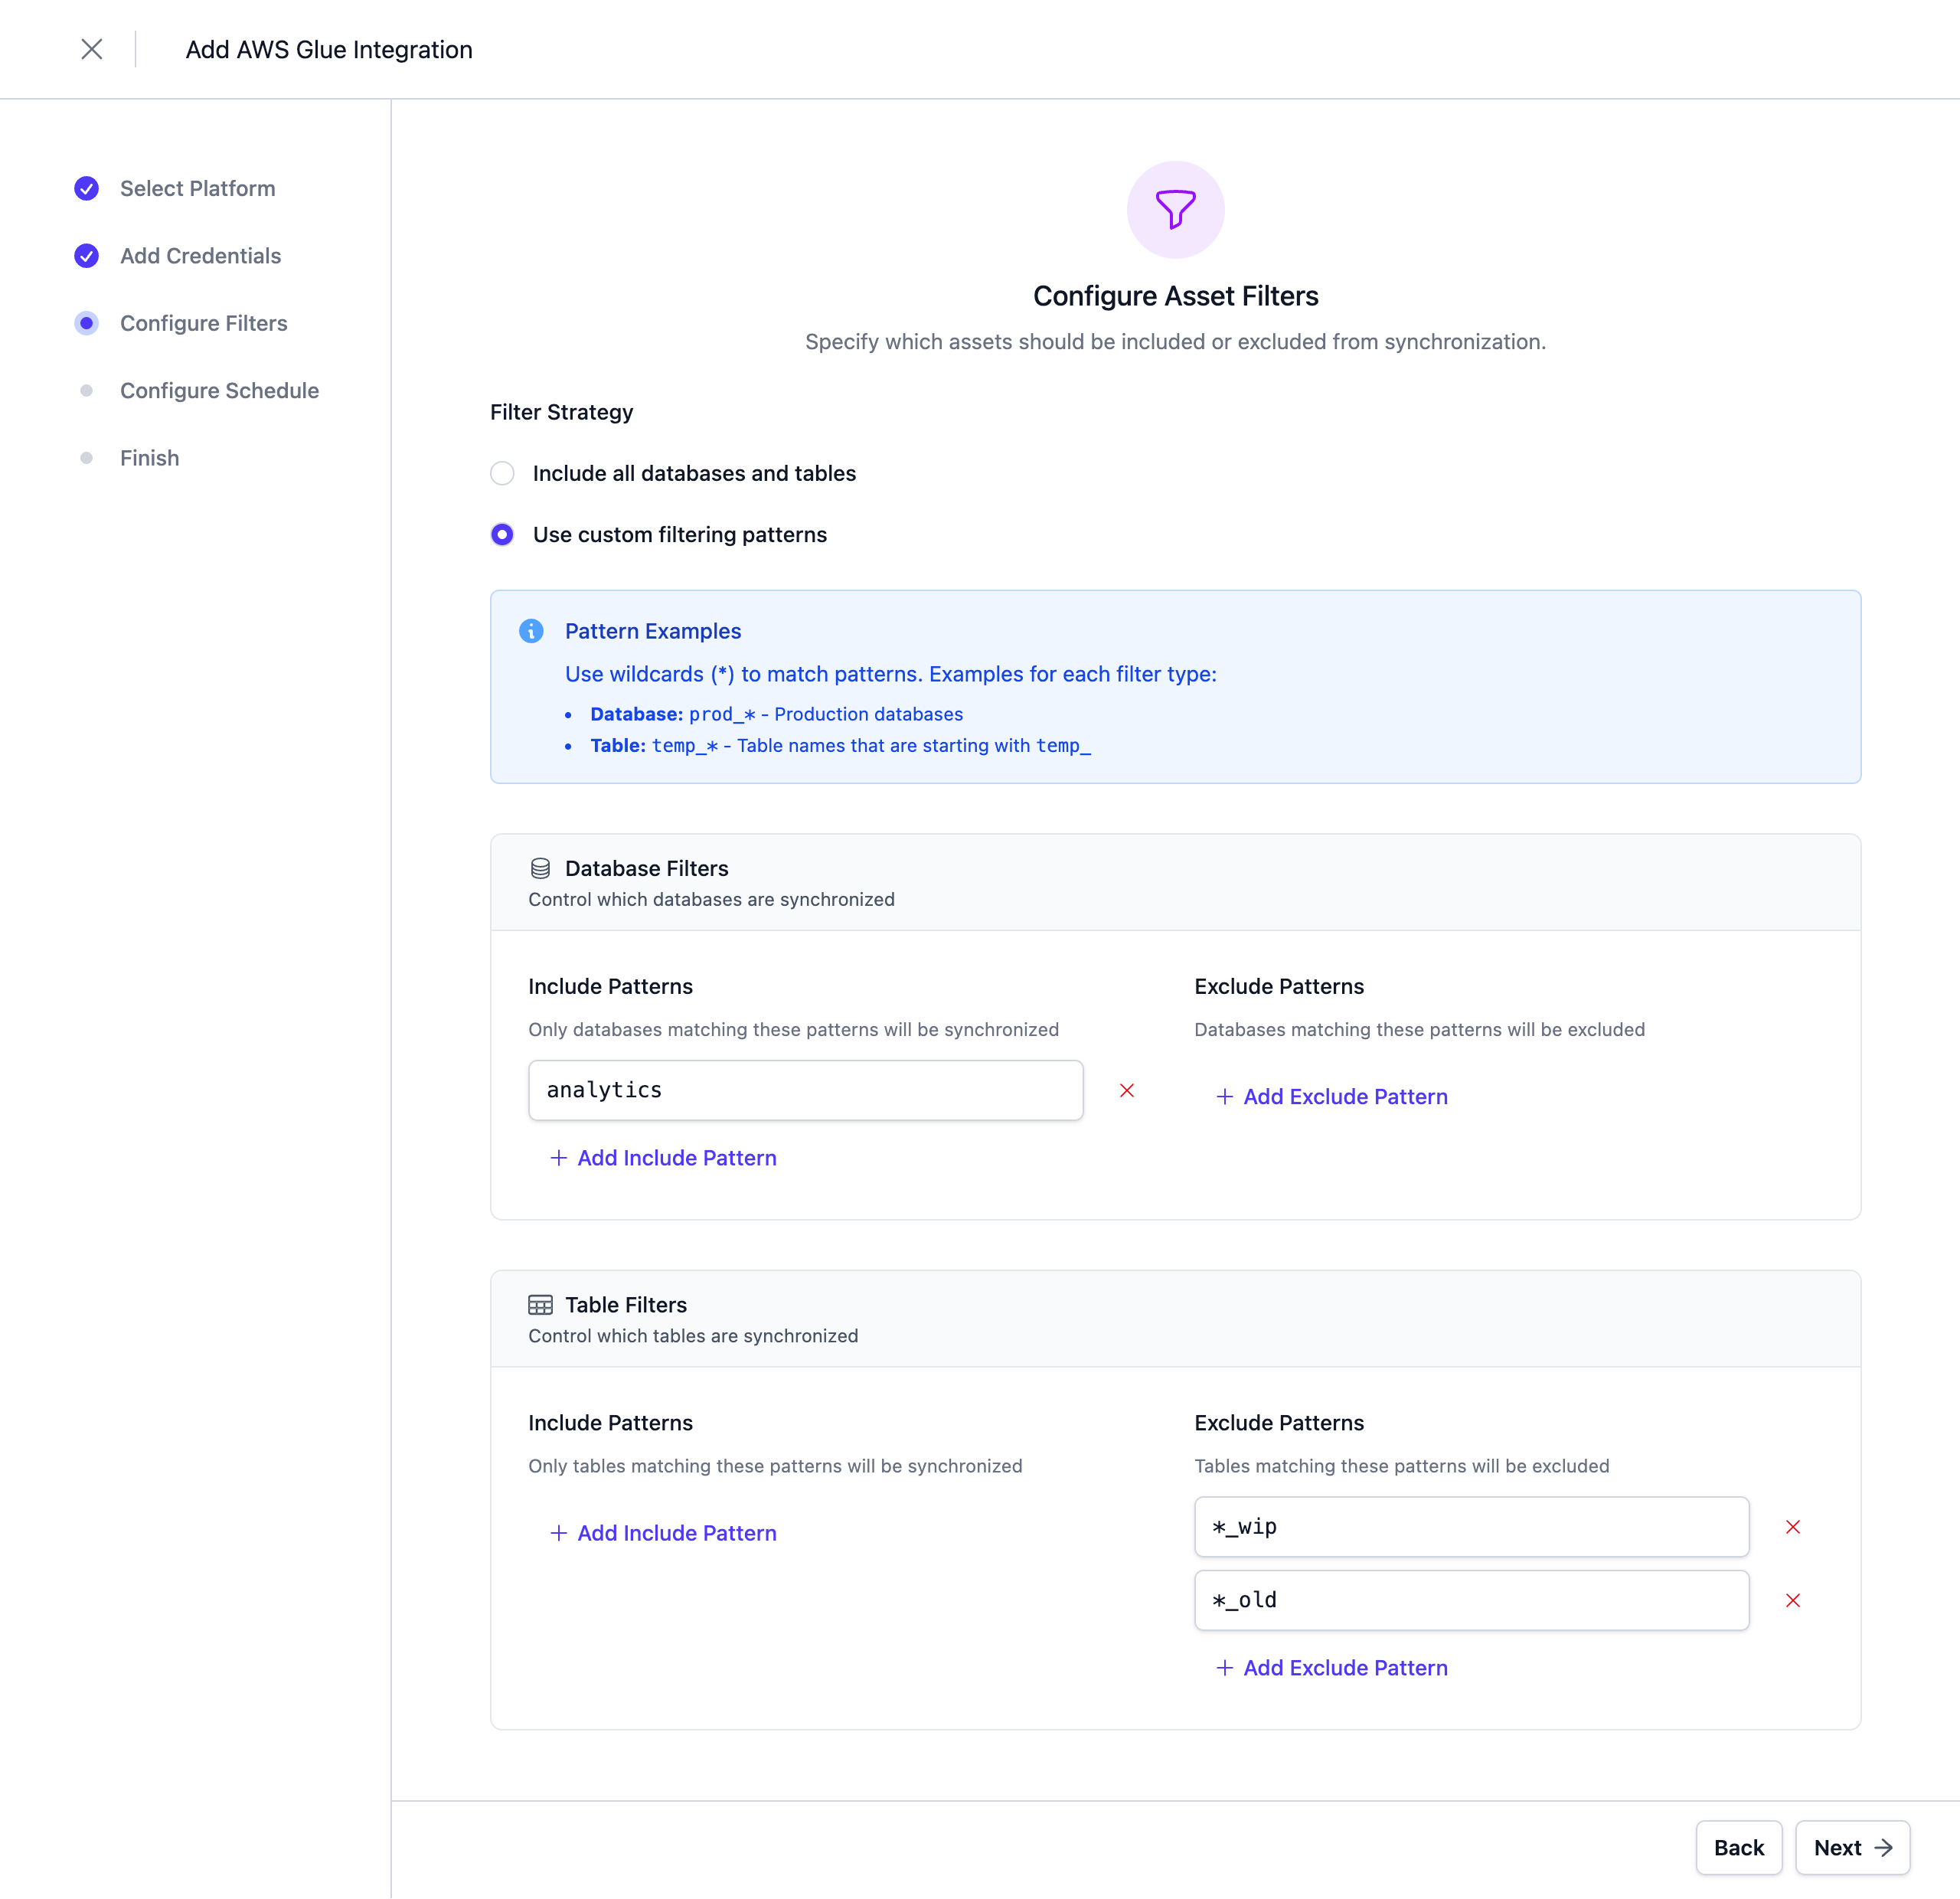
Configure Filters
Configure filters to limit which assets are synchronized. Both include and exclude filters are supported. For AWS Glue, filters can be applied to Databases and Tables.
Filters support '*' as a wildcard character to match any number of characters.
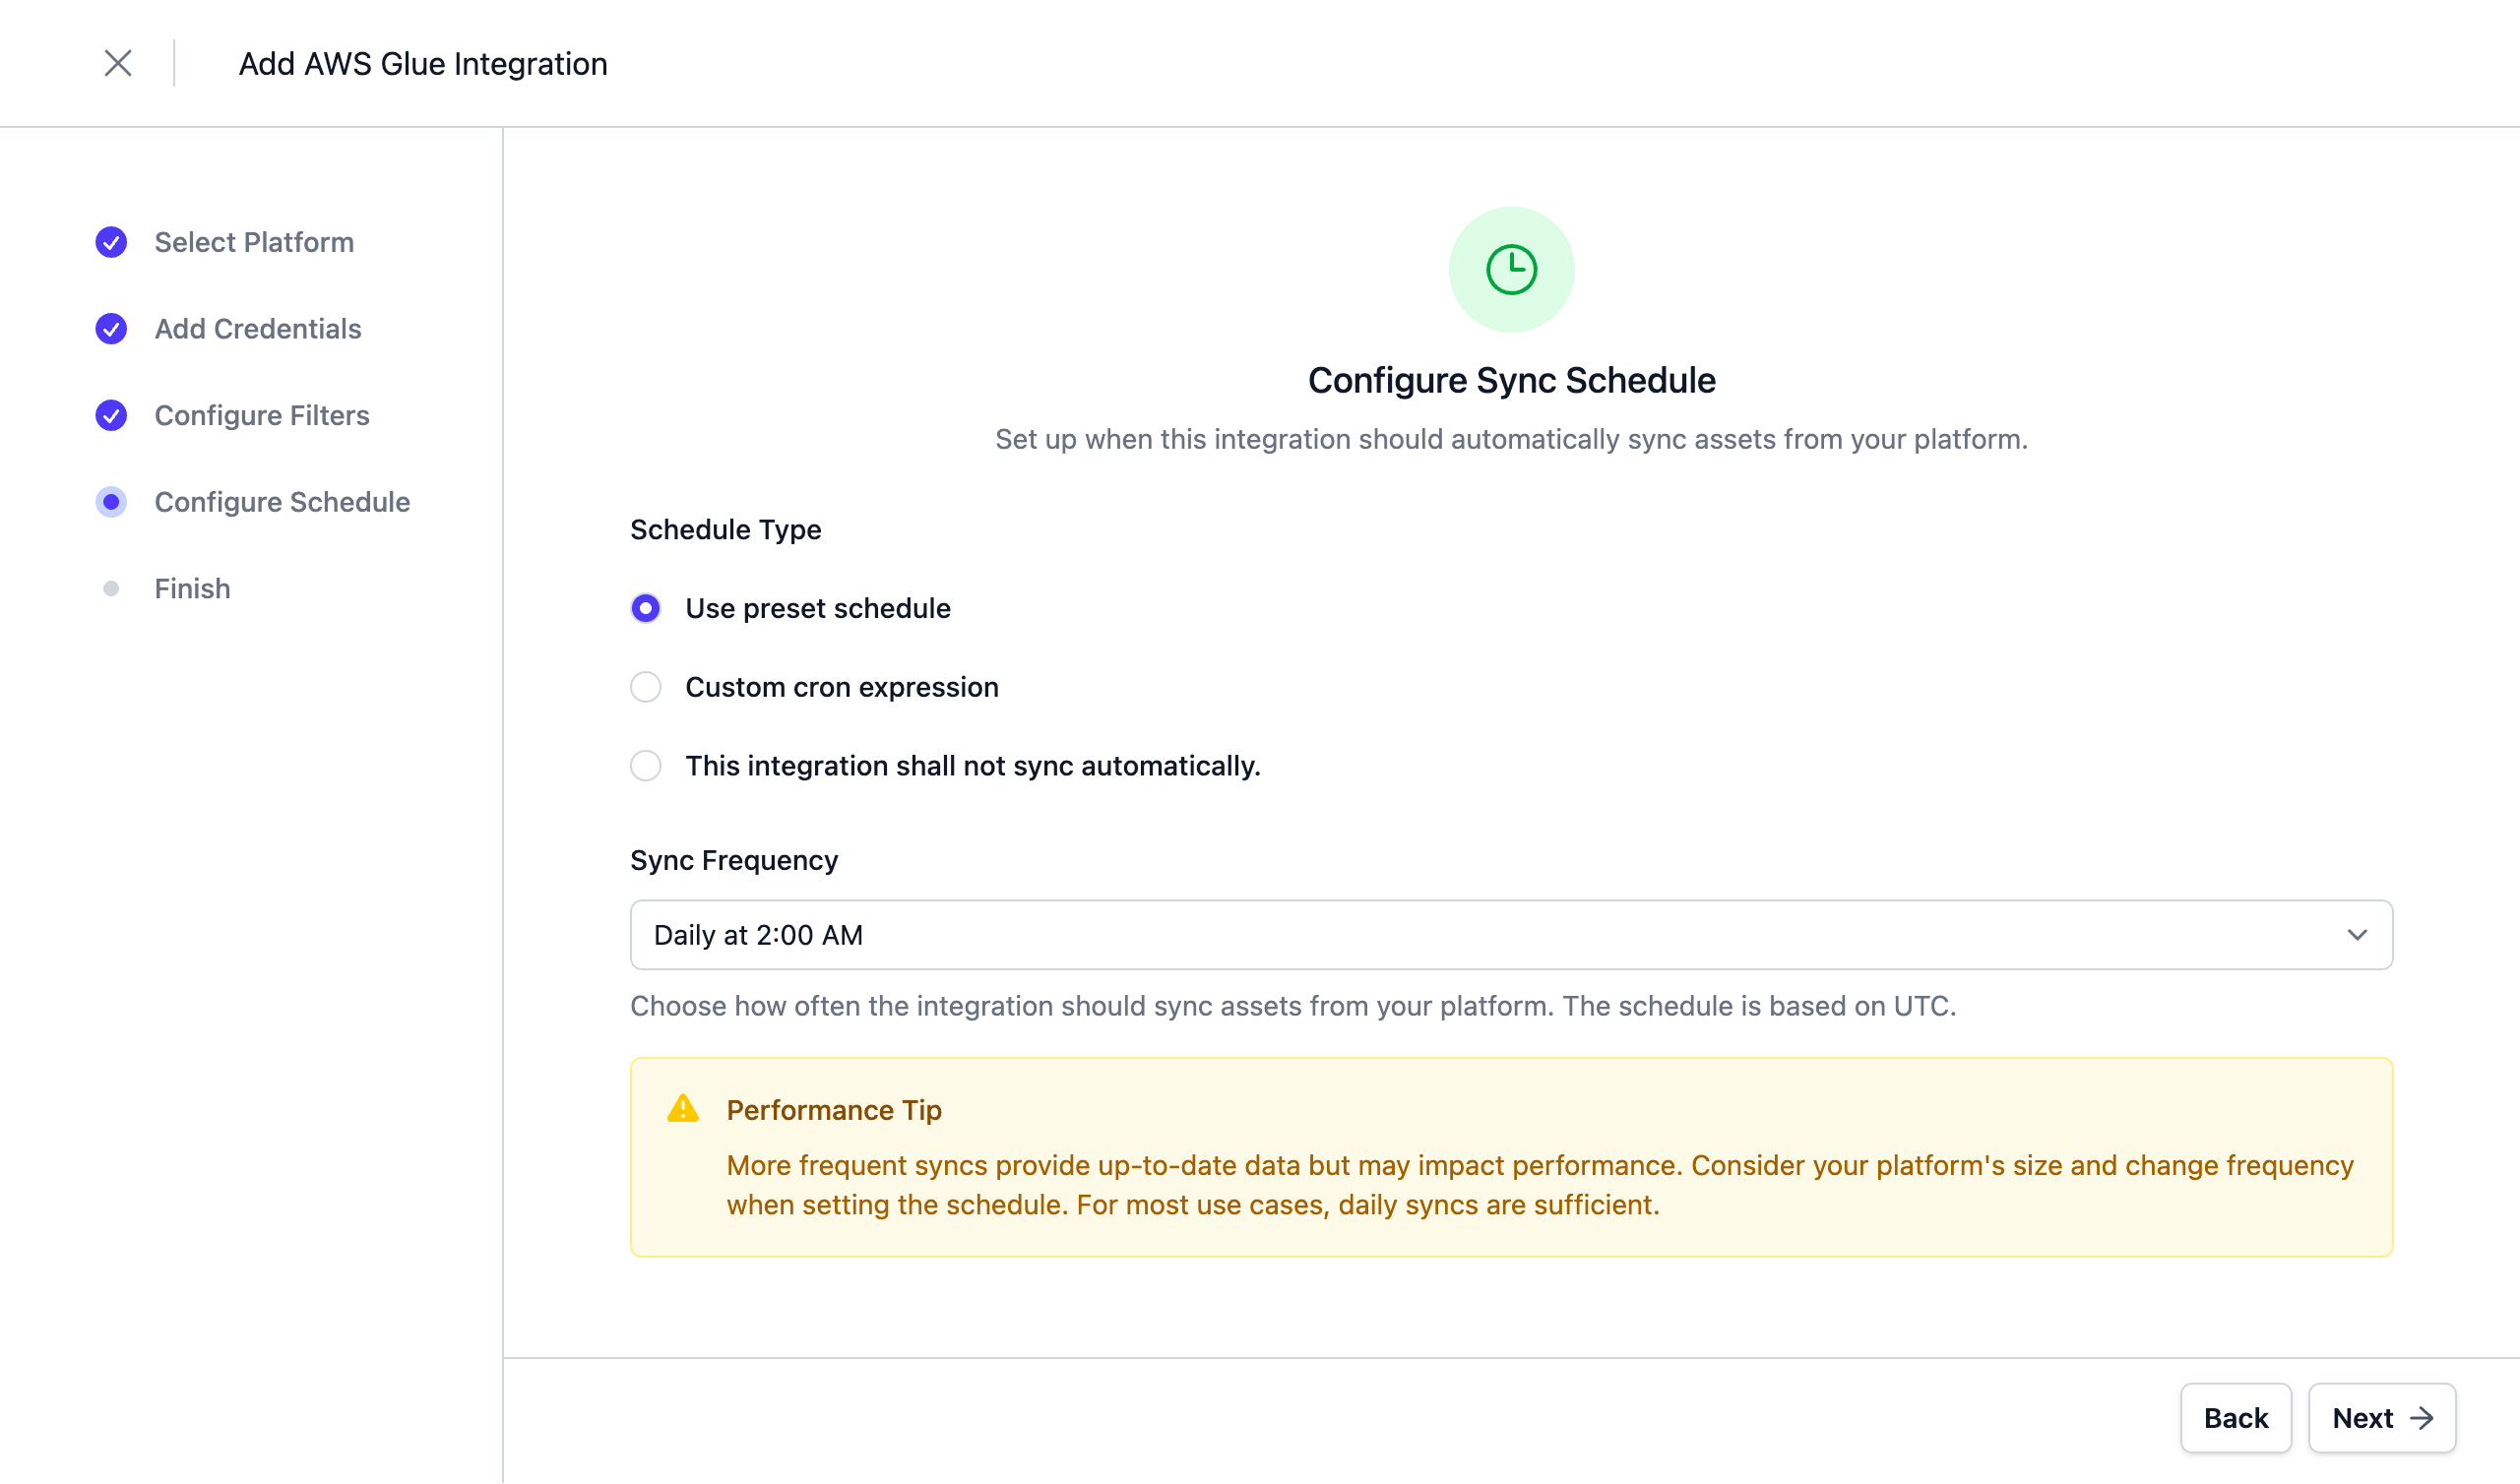
Configure Schedule
Set a schedule to automatically synchronize assets. You can choose from predefined schedules or define a custom schedule using the cron expression format.
Note: All schedules use the UTC timezone, so make sure to take this into account when configuring your schedule. Please do not synchronize the assets more than once or twice per day. We reserve the right to disable the integration if this happens. You will be able to trigger a synchronization manually if you need an immediate update.
Complete the Integration Configuration
Choose a unique name for the integration, review your configuration, and click Create Integration.
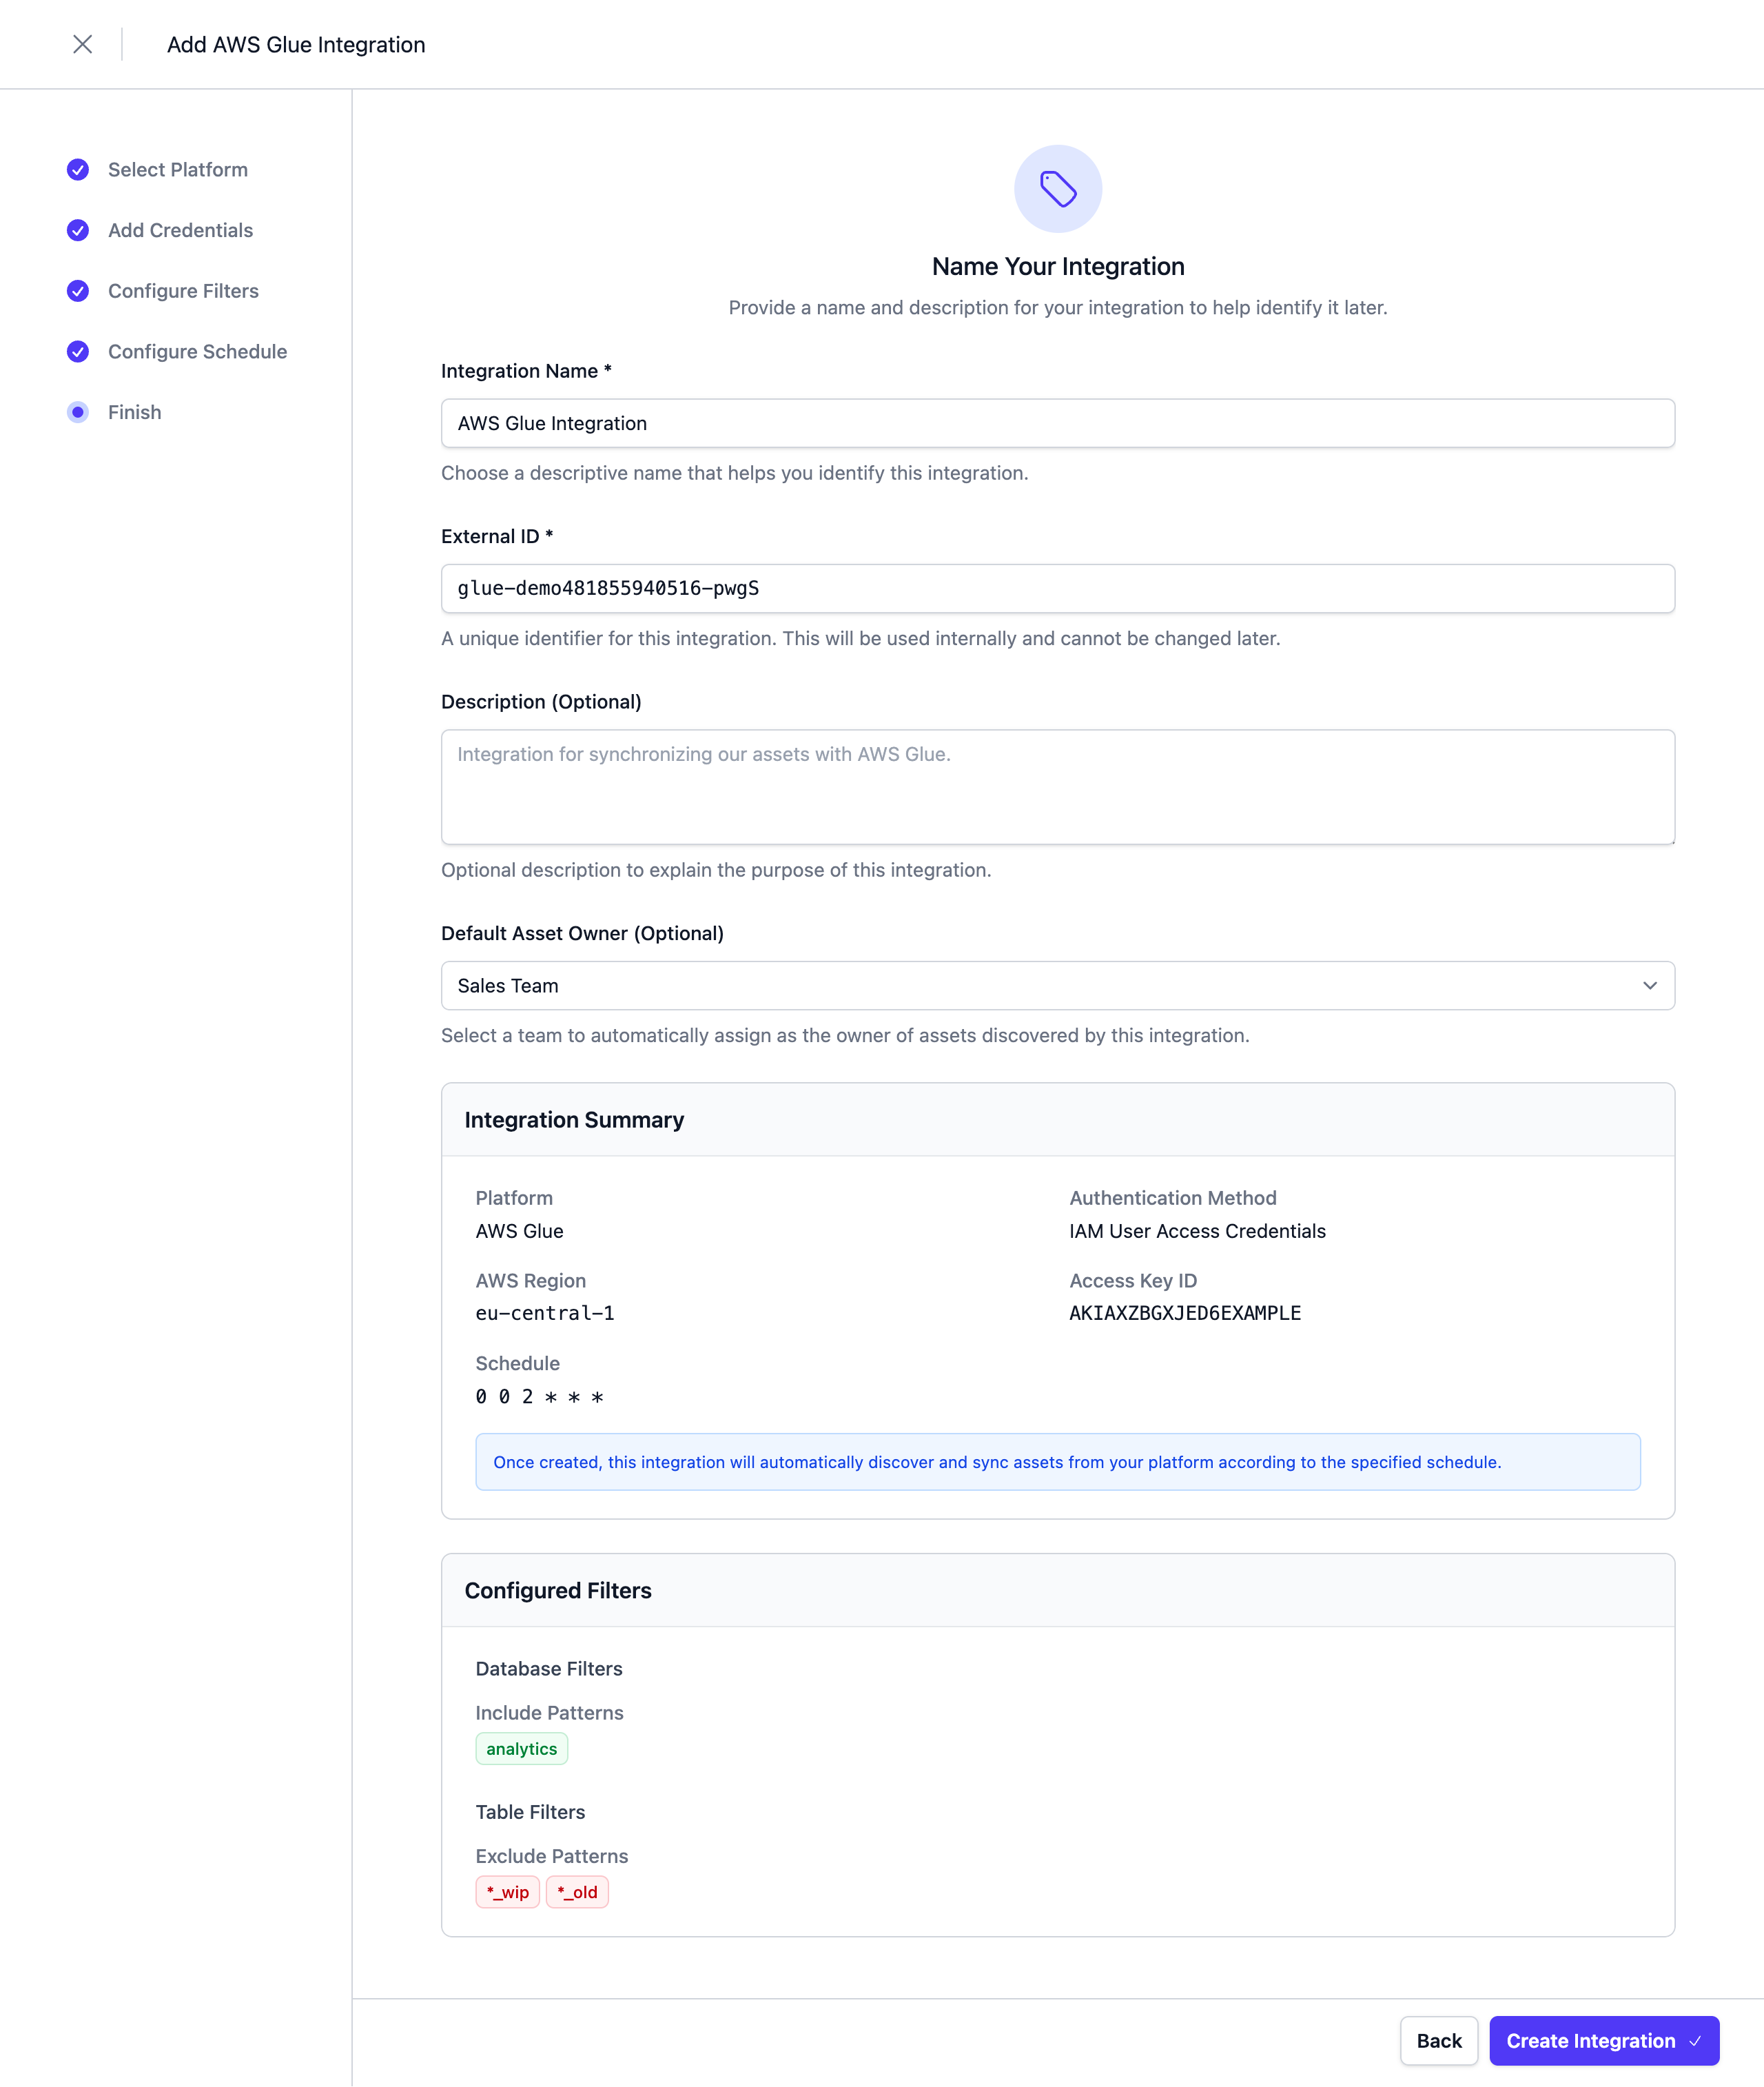
Next Steps
The integration is now configured and will run according to the schedule. To check the integration status, navigate to Settings > Integrations. Here you'll find the current status and the last 10 integration runs.
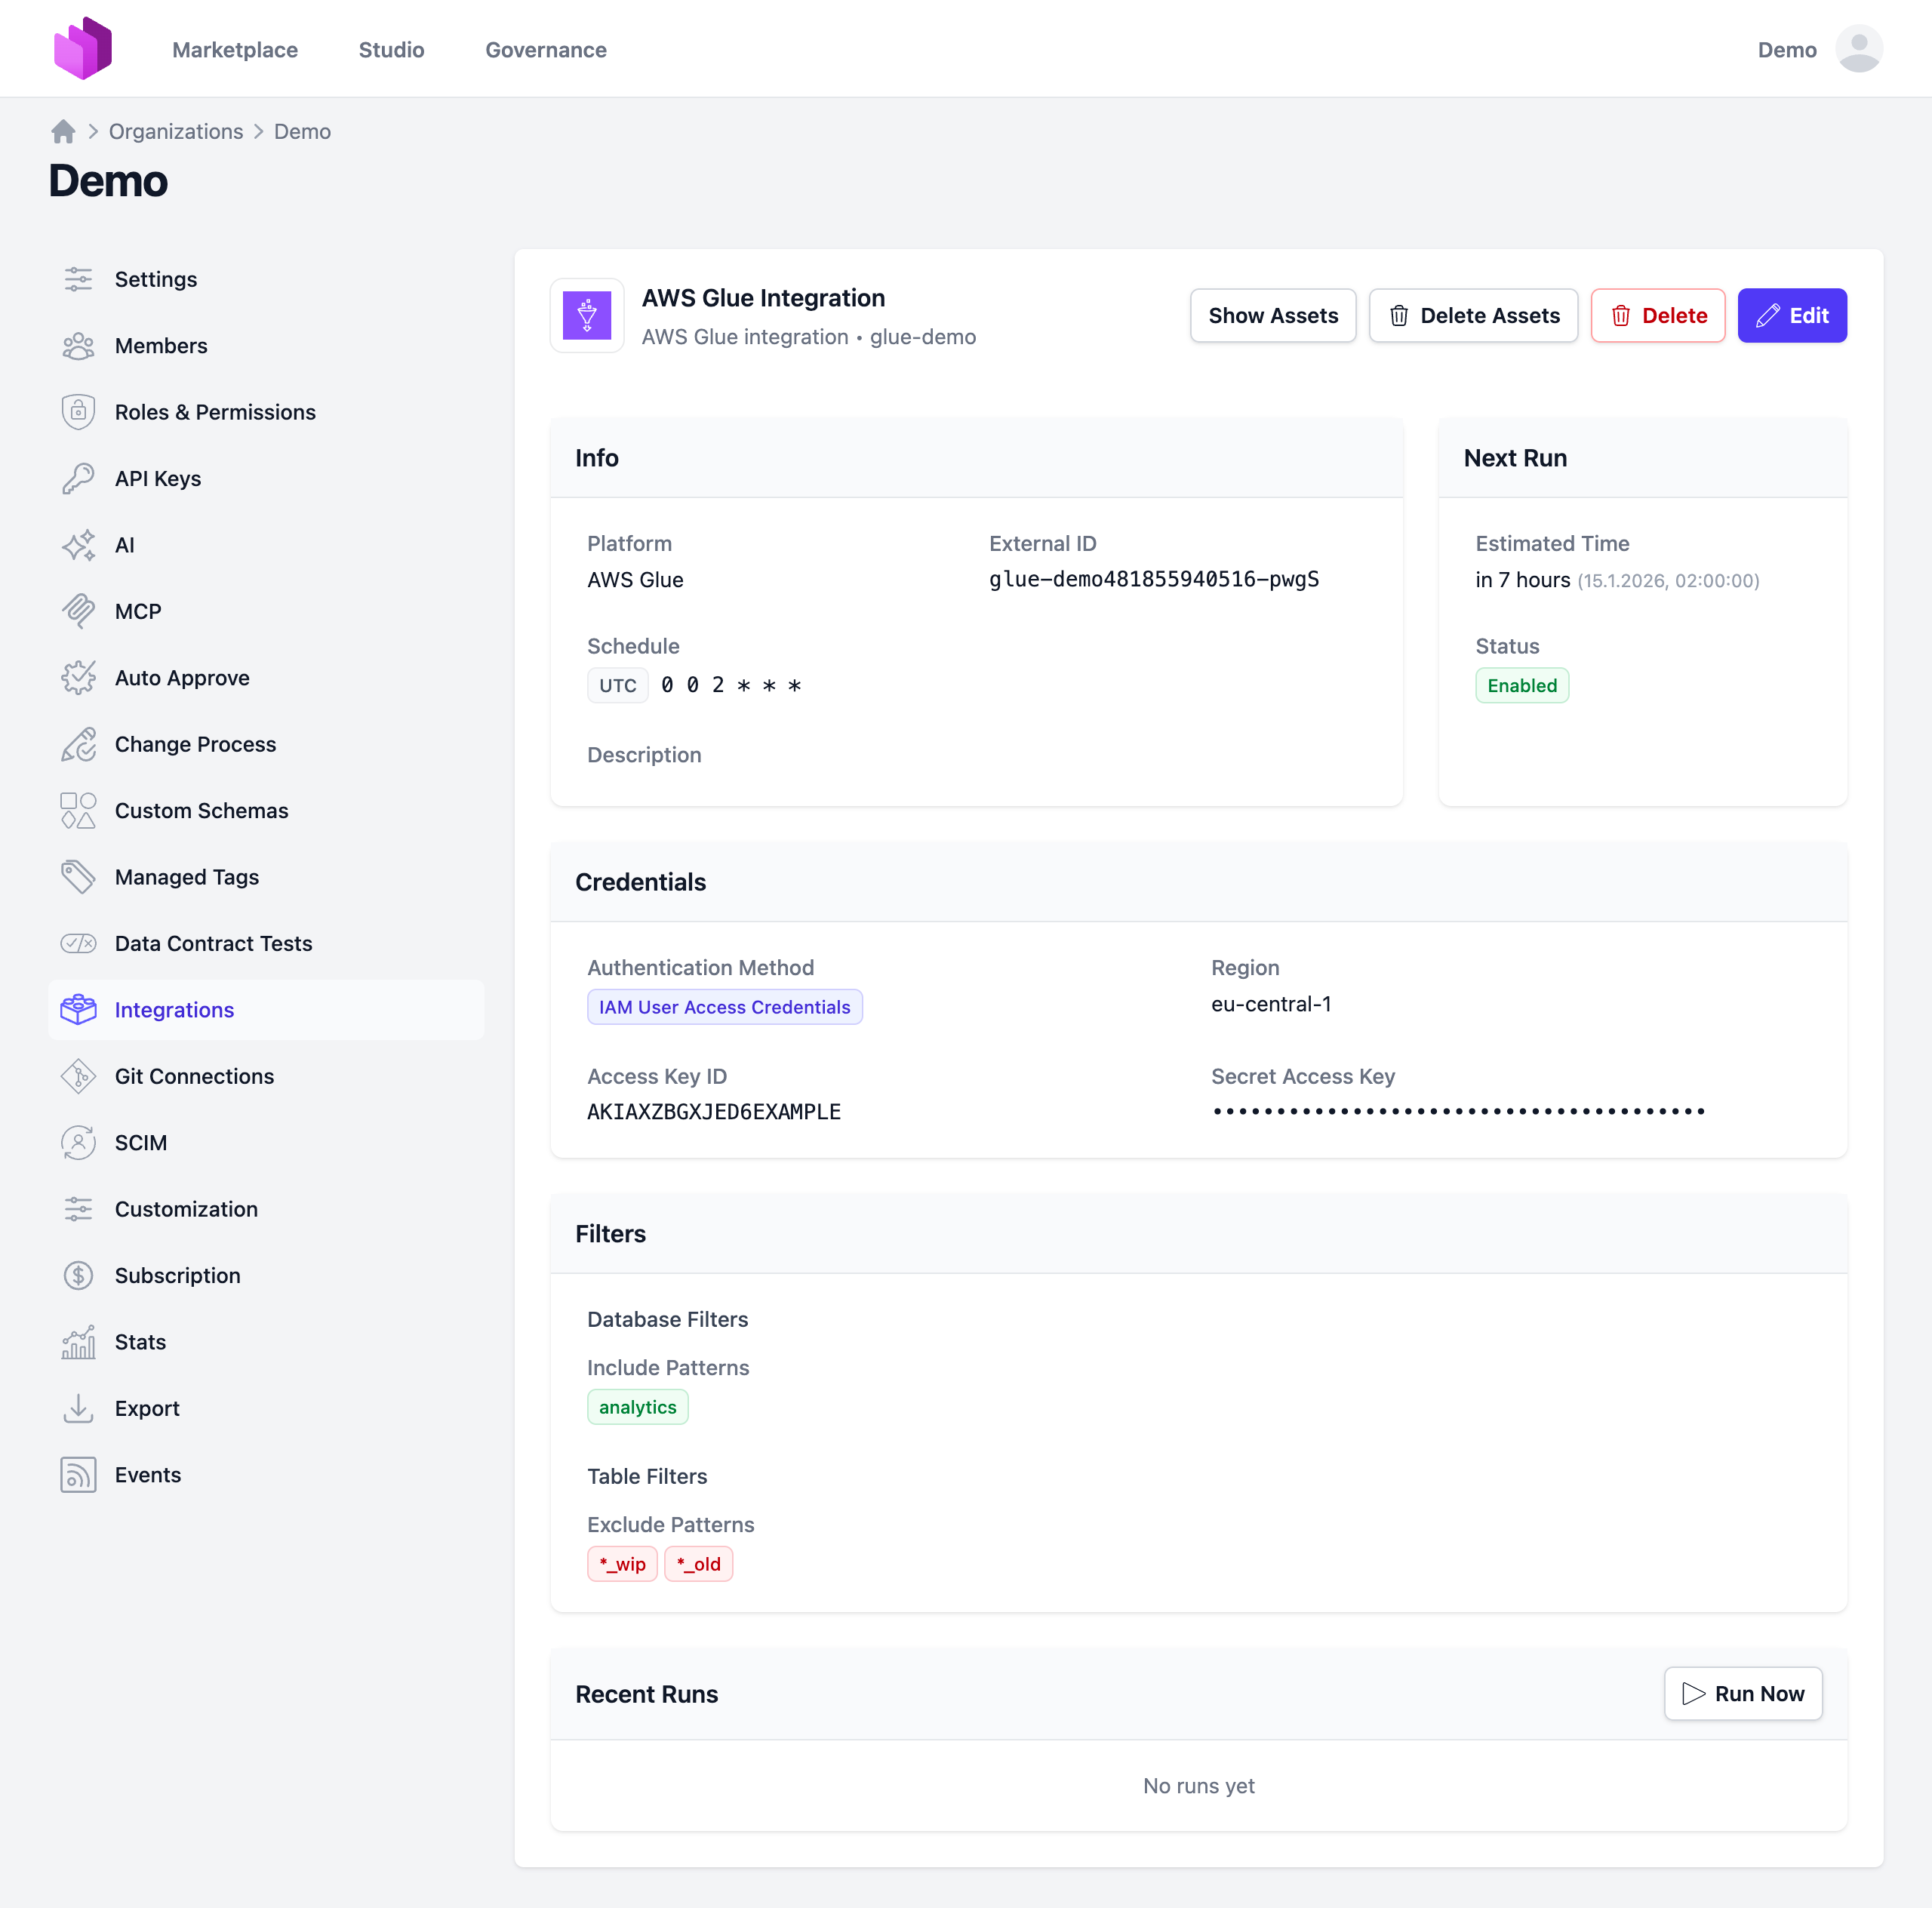
You can adjust the integration configuration and credentials at any time. The configuration is saved in YAML format with syntax validation support in the editor.
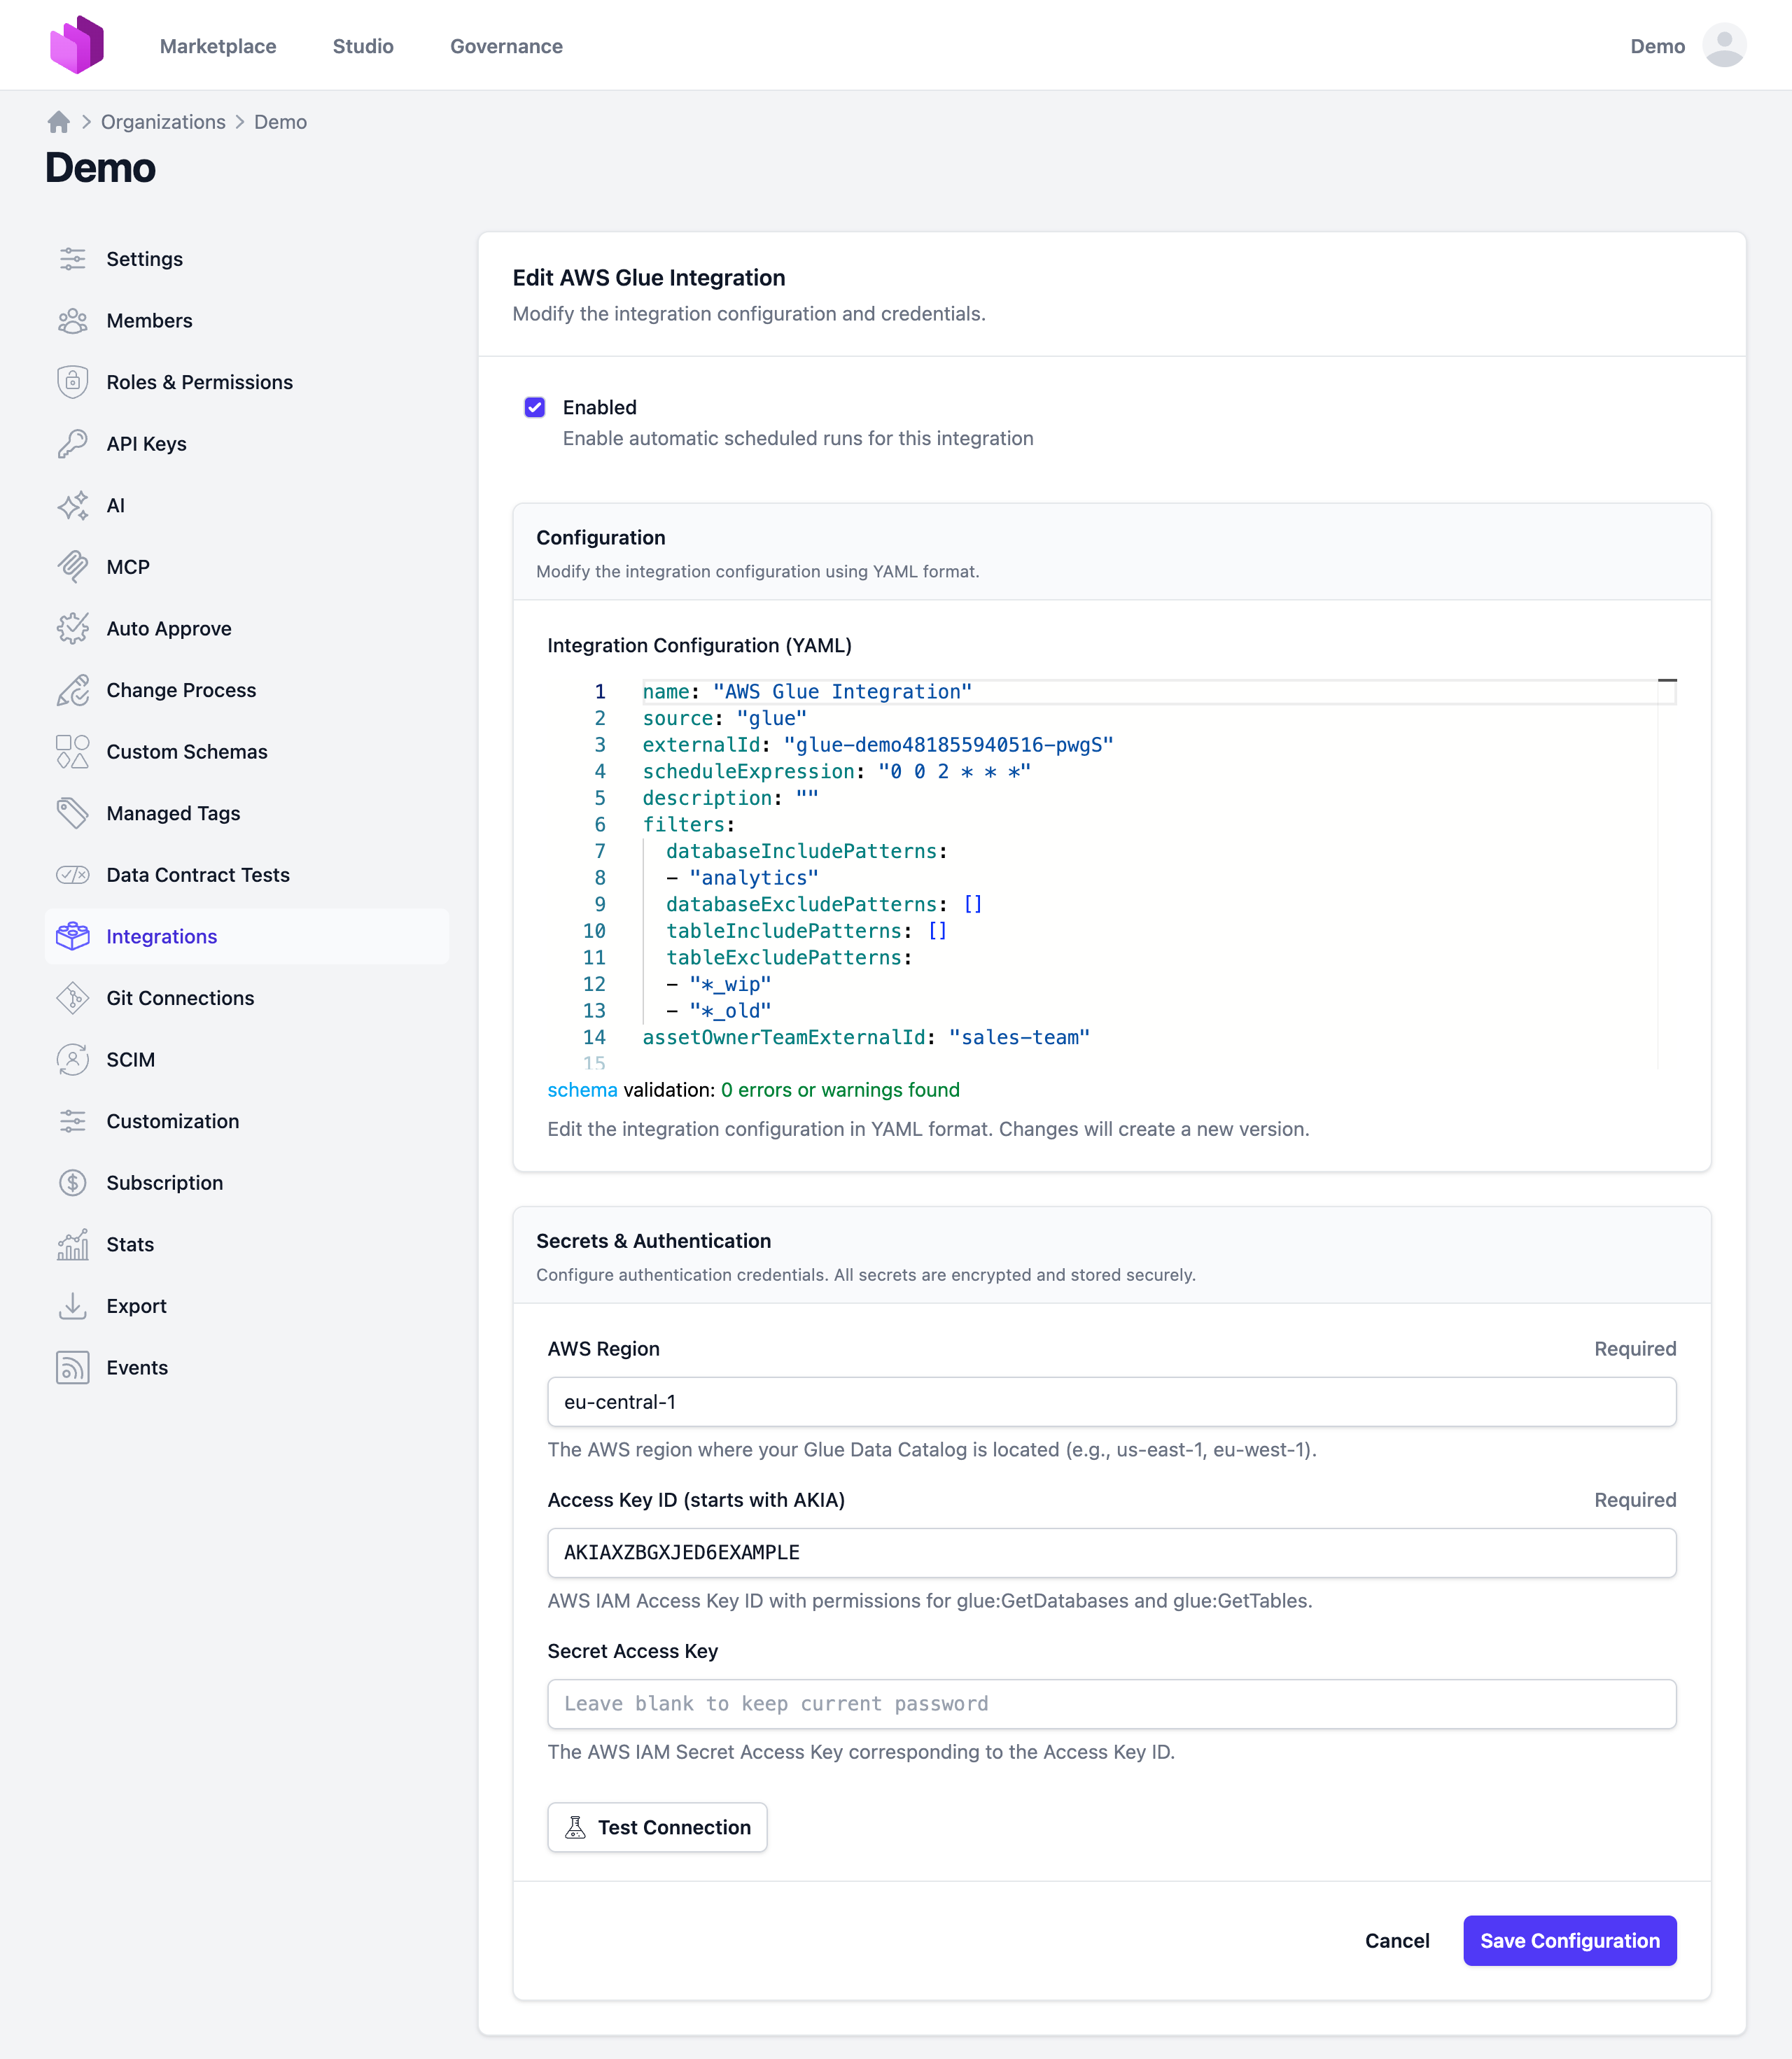
Note: The previously stored secret access key is not displayed in the edit view for security reasons.
Deselecting the Enabled checkbox disables the automatic schedule. Manual integration runs are still possible.